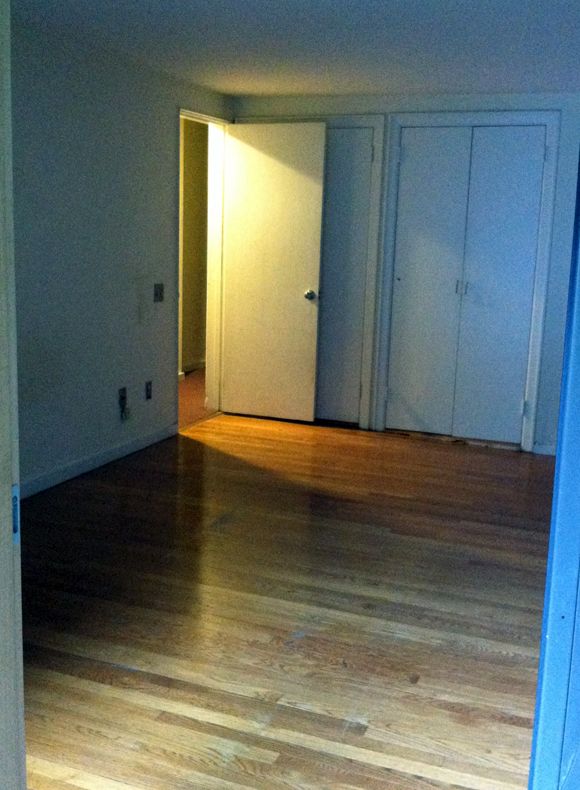
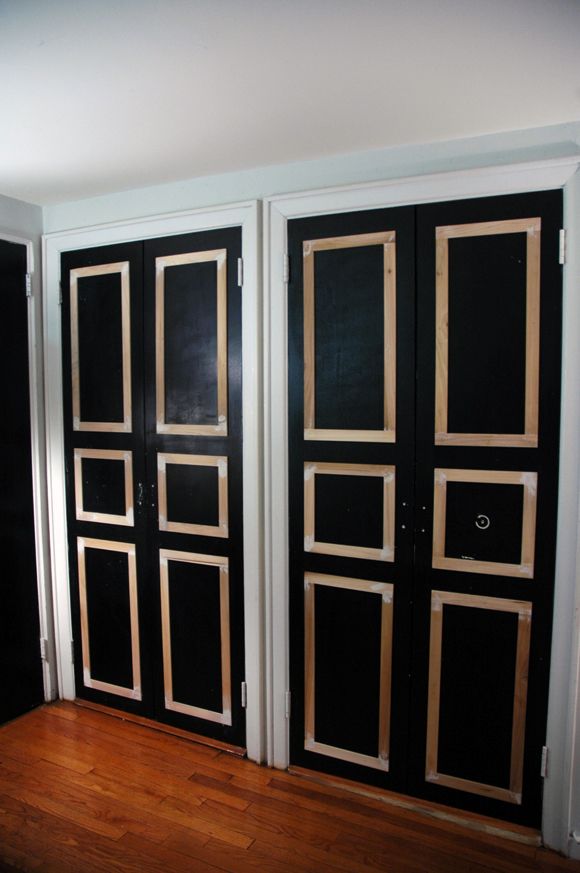
There are two closets in my office that hold a lot of good stuff - fabric and trim and wallpaper samples. Since I use these closets often, I decided to make them prettier and I gave the doors a little facelift recently. Here's what the boring hollow core doors looked like on move-in day.
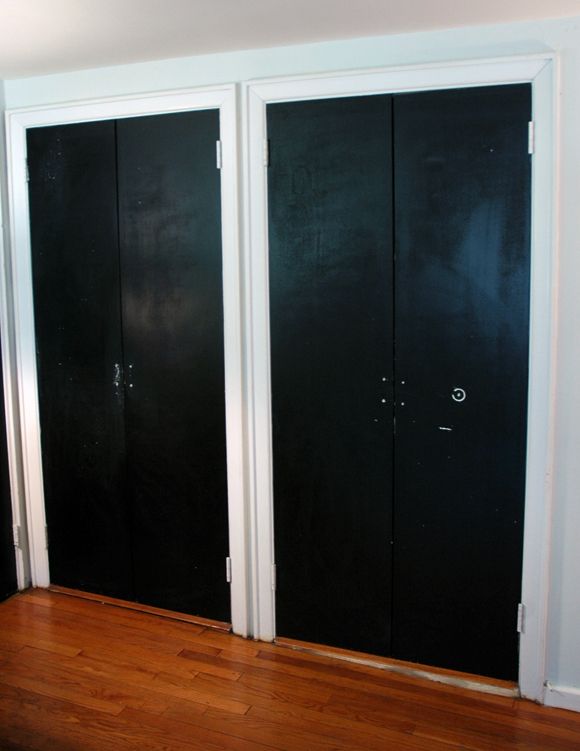
The painters our landlord insisted on using didn't prime any of the doors before painting them black (with latex paint??), so I've been going back one by one and re-coating with primer and oil-based paint. Here's what the doors looked like after removing the old hardware and giving them a light sanding. This was also after I took down the blue wallpaper. (We had a little photoshoot in the space a couple months ago and the wallpaper needed to be removed. It's a long story, but I was fine with it.)
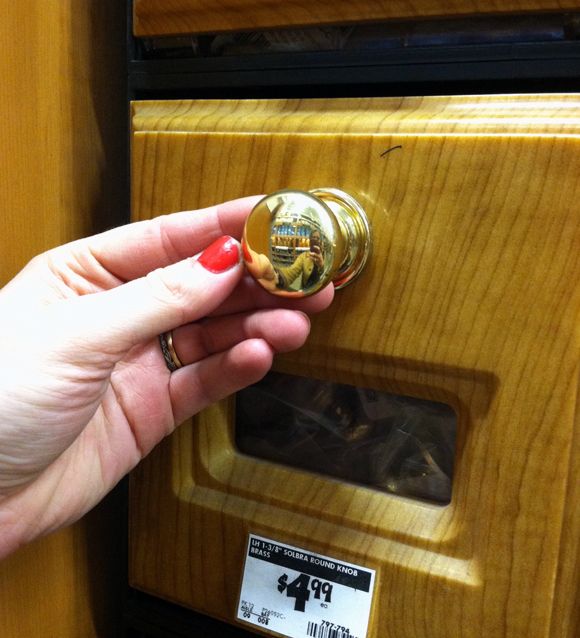
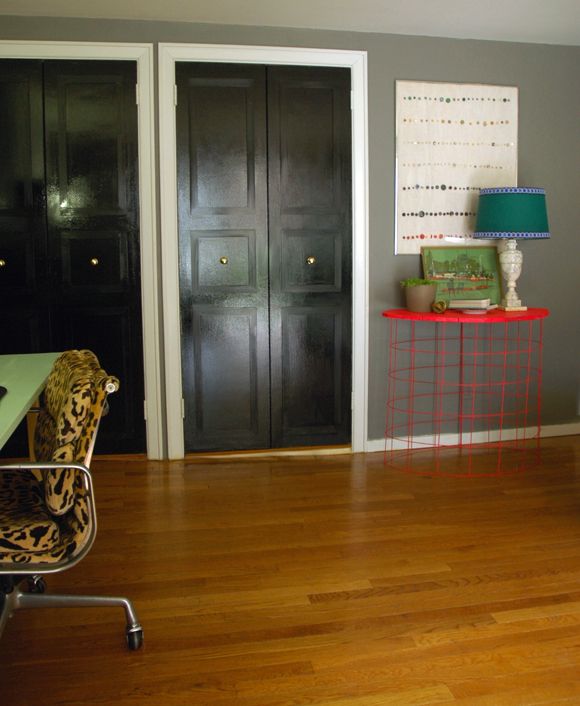
At one point I had installed a big brass knob on the far right door, thinking I had four knobs, but I actually only had three (you can see one of them in this post). Bummer. The knobs were a little big for the closet doors anyway, so I started looking around for a good, but mostly inexpensive alternative. I found these solid brass knobs at Home Depot for $5 each and they fit the bill just fine. A little on the small side compared to the others, but probably a more appropriate size for closet doors.
I sanded the doors down by hand, which was a mistake. I should have pulled out my palm sander or even stripped the doors with my beloved Citristrip. There was definitely a texture left that I hoped wouldn't showed through the new paint, but it did a bit. It's not all that horrible in person, but learn from my mistakes and don't take the shortcuts here like I did. :) Hopefully your doors are smoother than mine were and the whole problem can be avoided.
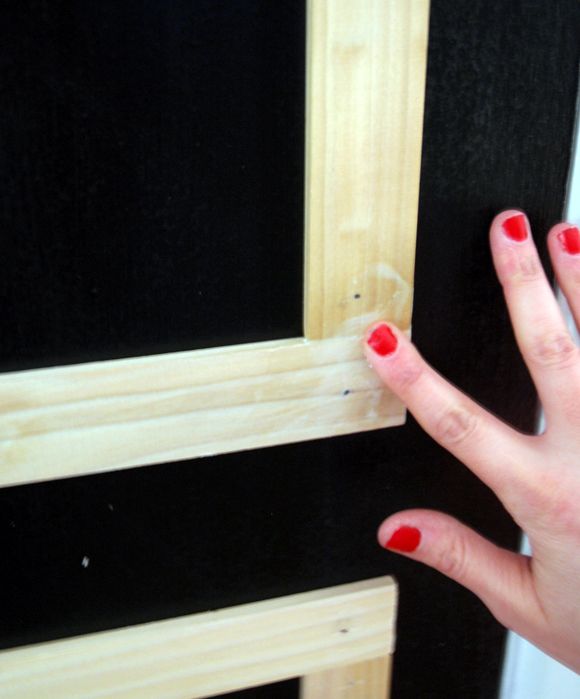
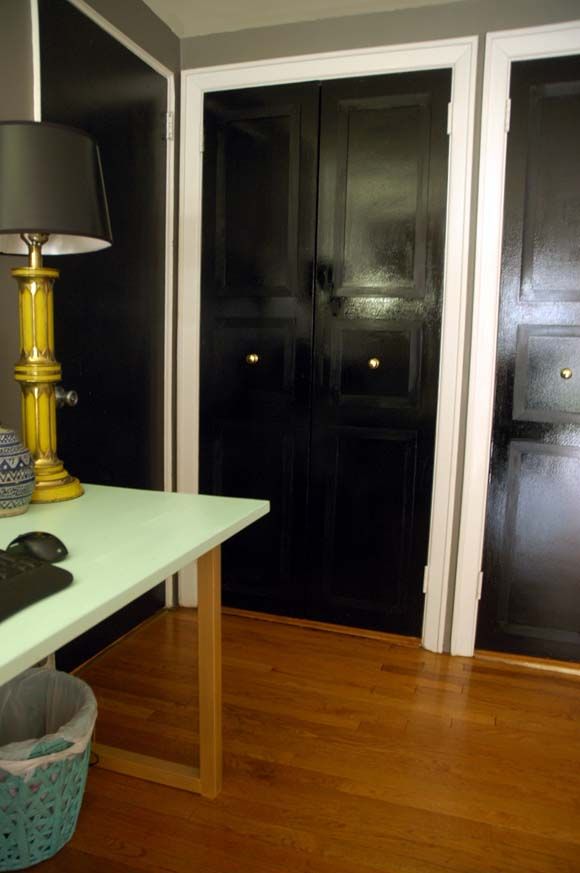
I had a bunch of pre-cut trim from a few old projects that I decided to use on the closet doors. Since all of it was pre-cut, all my long pieces were ready to be installed on the door with my brad gun and this project was a cinch. I only had to cut the short pieces and the pieces for the small boxes in the center of each door.
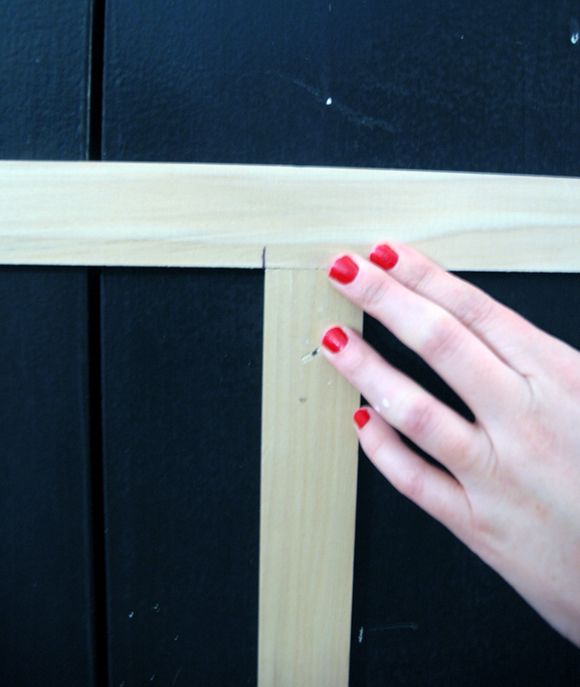
I made things really easy on myself and made it so every border was 3" wide. This way I could just eyeball the placement of the trim, hold it up, verify with a ruler that the trim edge was 3" away from the door edge (or the next piece of trim) and then put in a nail with my brad gun. No marking out, no levels. Fast and easy.
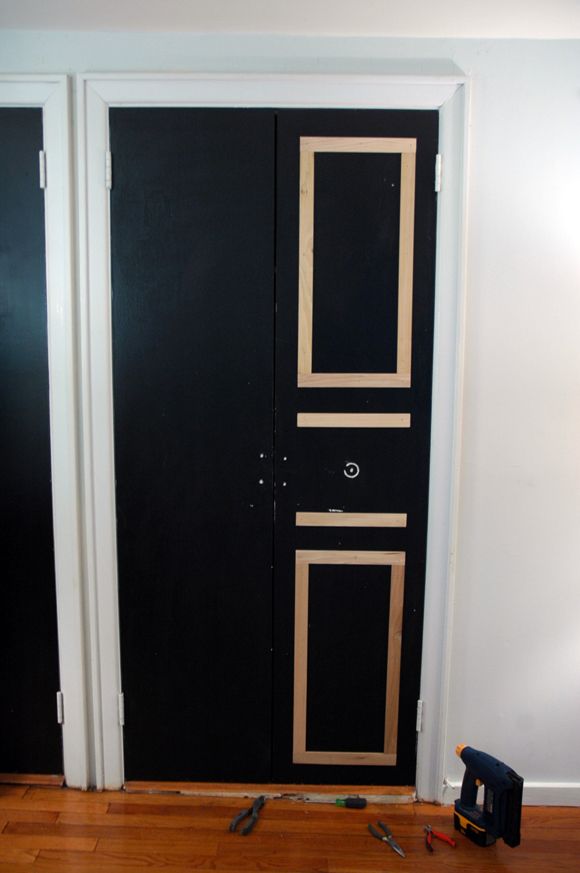
Once all the molding was nailed up, I sealed all the seams with paintable caulking and gave that a light sanding when it had dried.
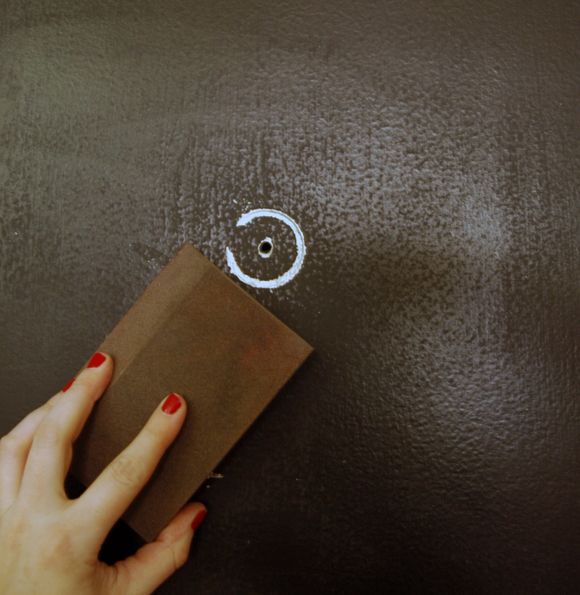
The old hardware holes were patched too and then the doors were ready to be painted.
The only dark-tint primer I had on hand was a cheap brand that I'm not a big fan of, but I used it anyway to prime the new trim. Not surprisingly, it didn't do a great job of sealing the raw wood. So the trim took the oil-based paint differently than the old door did. C'est la vie, I guess. (Note to self: Only buy Zinsser!)
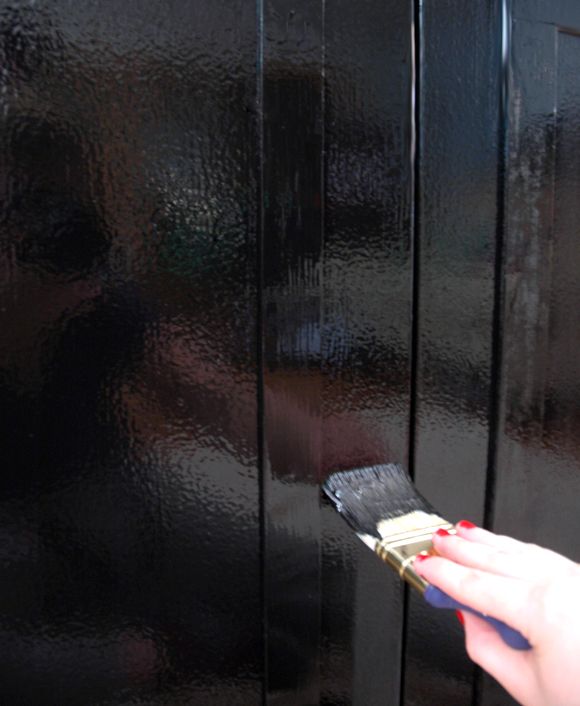
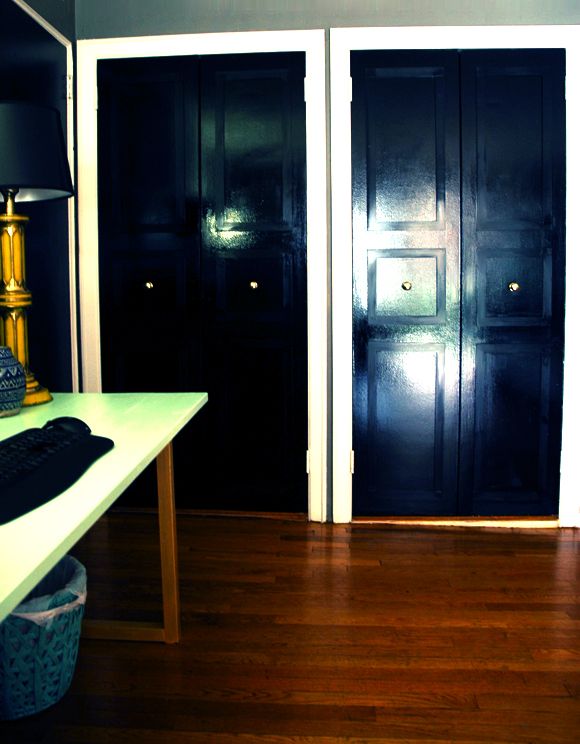
It's hard to photograph super glossy walls and doors, so you'll just have to trust me that it looks prettier in person. :) But I'm happy with how the project turned out.
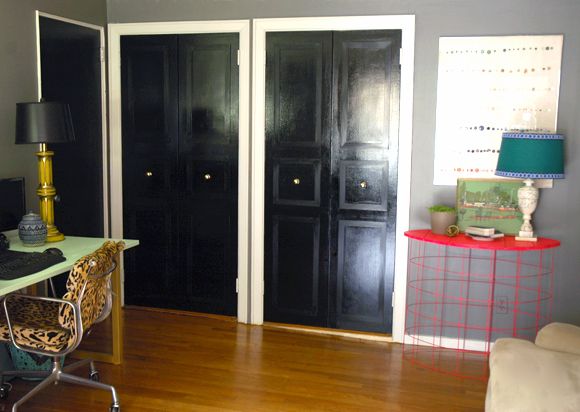
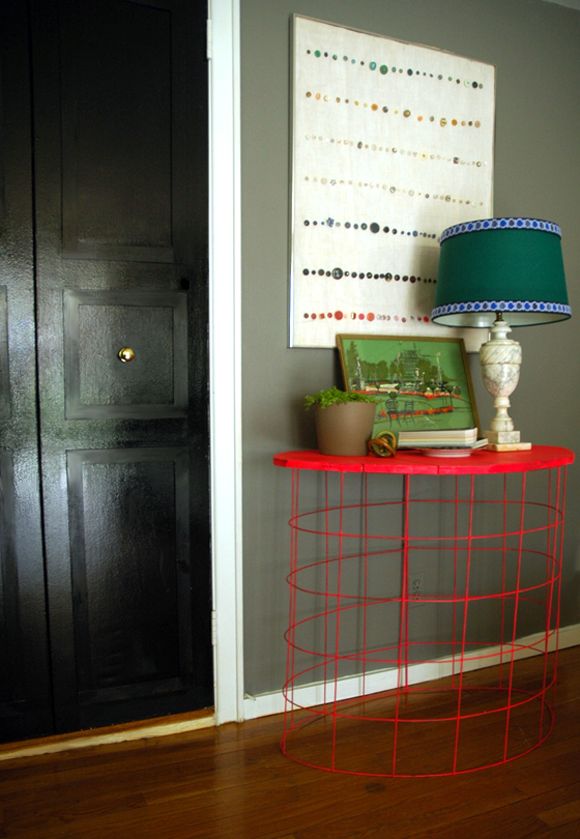
I love the shine and the bit of dimension that the new trim adds. And I love the new wall color (BM Chelsea Gray) with the black doors too. The masculine neutrals help tone down some of the brighter colors I have in the space (like the neon tetanus console). :)
One step closer to finishing this room that still needs a lot of work!
PS Here's the door in our old loft to my girls room that I trimmed out (without any power tools!) and painted a bright yellow. And another, better shot in this post.
Have you trimmed out any of your interior doors? I love how it can really elevate those hollow core doors so many of us are cursed with! :)