Tampilkan postingan dengan label Accessories. Tampilkan semua postingan

DIY Autumnal Garland

The year after I moved away for college, my parents moved about 2.5 hours north of Phoenix. The small town that they moved to was the place we had visited every summer and Thanksgiving for most of my childhood. It was where my dad grew up and where my grandparents had always lived. It's a special little place in the high desert, and the drive up there from the Valley takes you through all sorts of beautiful Arizona scenery.

 photo IMG_9399.jpg

Michael had to work over Veteran's Day weekend (boo) so I decided to take the girls up to visit my parents. The weather was perfect and the sky was that perfect color of winter blue. I've always loved the desert, but I think I can appreciate its unique beauty even more after living on the east coast for a decade.
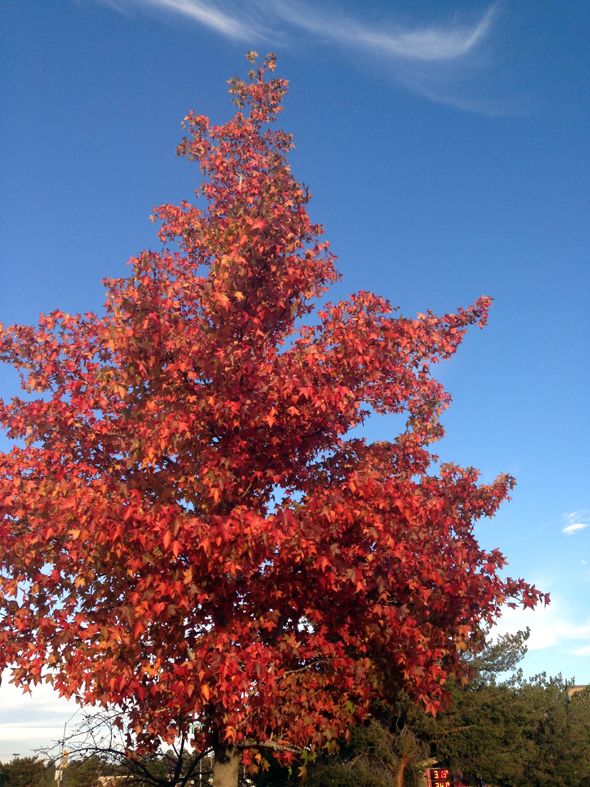
 photo IMG_9423.jpg

On the way back home, the girls and I decided to collect samples of some of the plants and foliage along the road back down to Phoenix. We found everything from sage to juniper (with pretty little blue berries!) to gorgeous maple leaves in every shade from red to yellow.
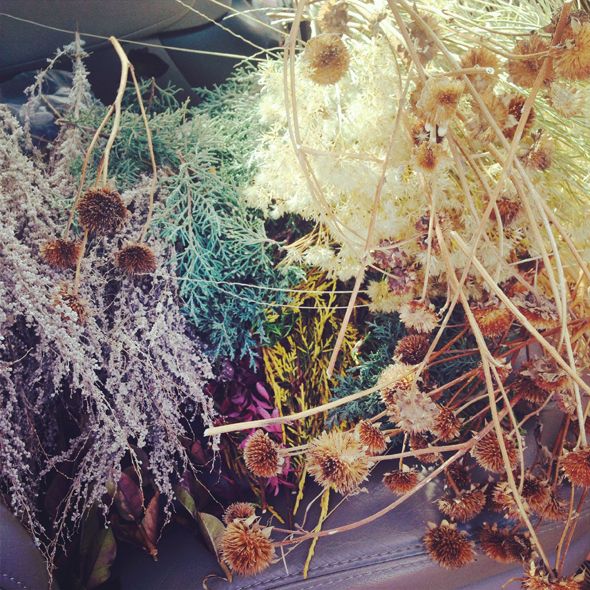
 photo IMG_9410.jpg

I was surprised that we were able to collect something from every color in the rainbow in less than two hours of driving. How could I resist making an ombre garland with all those pretty colors?
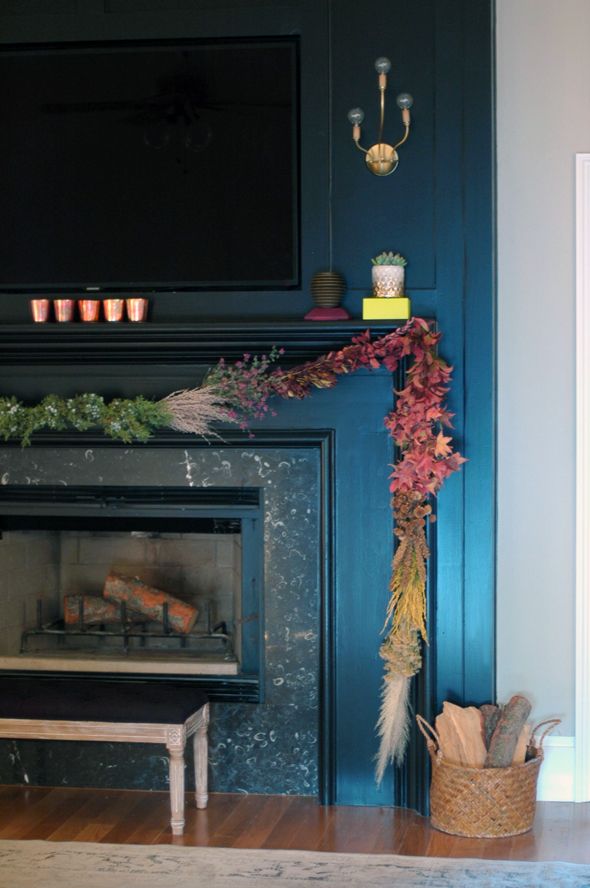
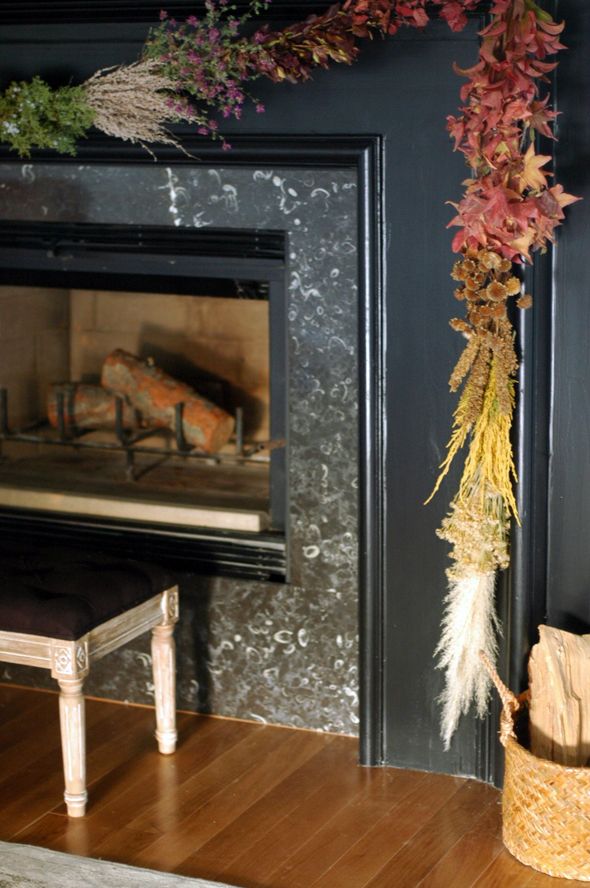
 photo DSC_0878.jpg

 photo wDSC_1044.jpg

Here's the easy how-to:

I've made a few wreaths with evergreen boughs before and the concept is very similar for a garland. It couldn't be simpler or much less expensive (it was actually free for me since I had the floral supplies on hand already).

To make a similar garland, you'll need a good collection of leaves and plants. Try to find plants that are either already pretty dry or that will dry out well (flowers usually do not dry that well). It can get a little messy, so try organizing everything on a canvas drop cloth to make clean up easy.
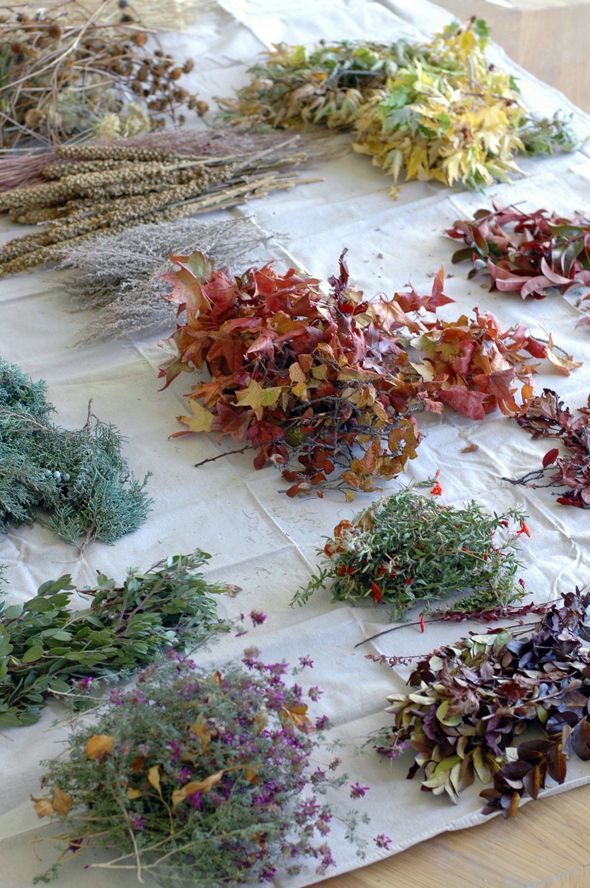
 photo nDSC_0745.jpg

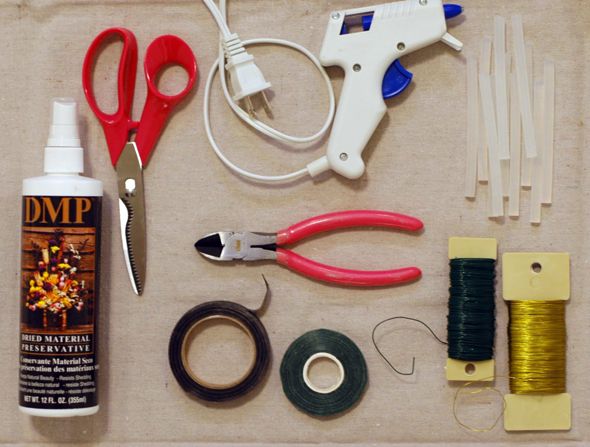
Here are a few things I used:

 photo DSC_0775.jpg

You'll for sure want two thicknesses of floral wire, wire clippers and floral shears. The Dried Material Preservative (available at craft stores) is optional, but is actually pretty helpful for keeping the brittle, dry plants more soft and pliable. And actually I've been giving my garland a light misting with this stuff every few days, just to give it a little more life.
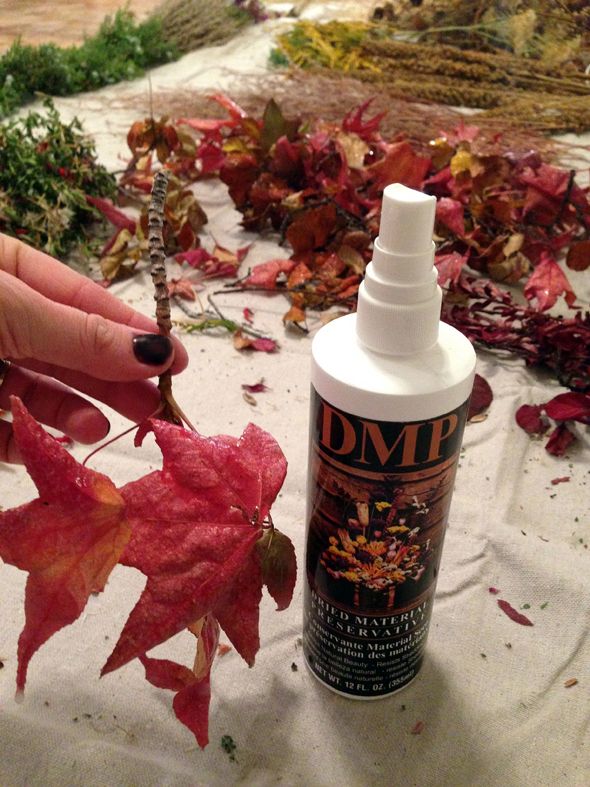
 photo IMG_9519.jpg

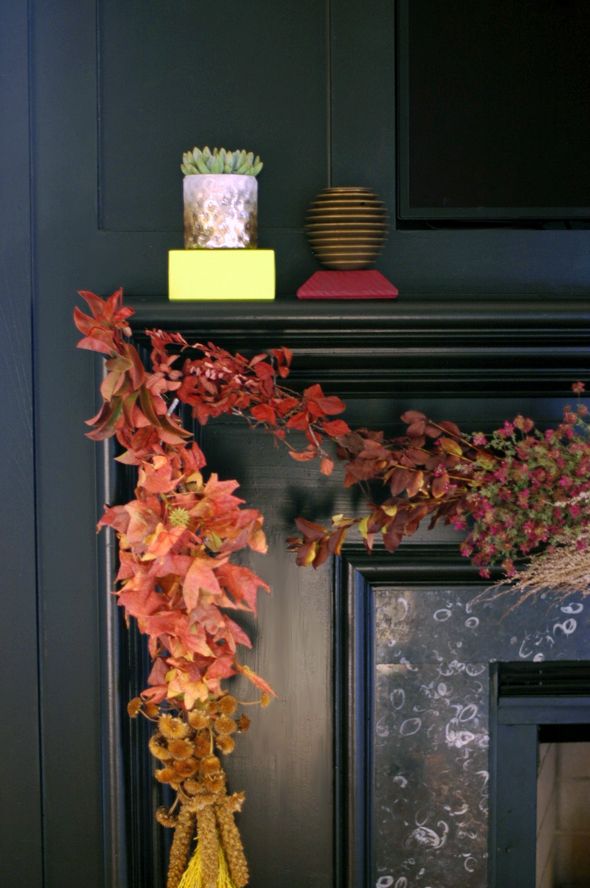
So, I would say the trickiest part here is figuring out the flow of the garland. I wanted mine to have a gradient or ombre look, so it took a little planning to get the right plants with the right color in the right area of the swag so there was a good balance to the thing. I knew I wanted the juniper berries in the middle though, and the red leaves in the corners and the white grass at the ends, so then it was just a matter of filling in the rest.
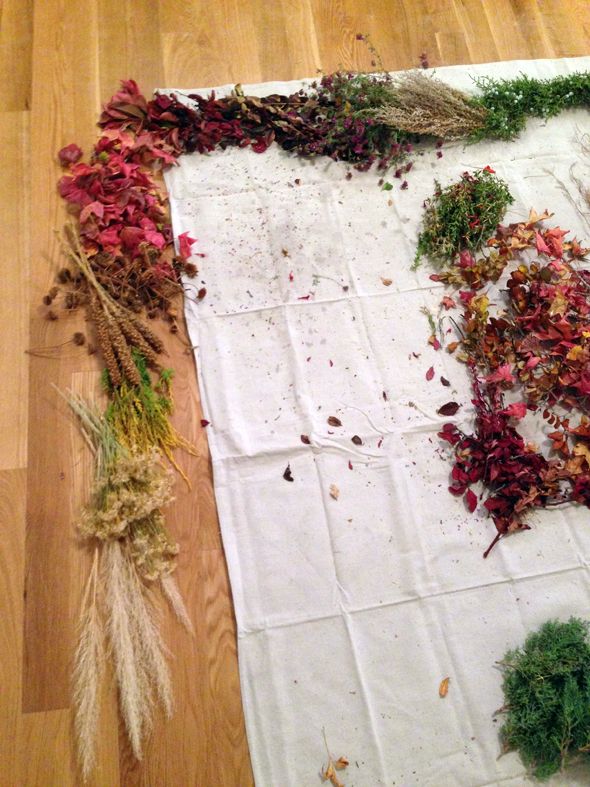
 photo IMG_9523.jpg

Once all your foliage is ready to go, and you have a good sense of how long your finished garland will be (mine is about 15 ft long), measure out three equal lengths of thick floral wire and then braid the wire. It doesn't have to be perfect at all - and don't stress if the wires get a little tangled. The idea is you want a thicker but still pliable surface to tie the flowers to.
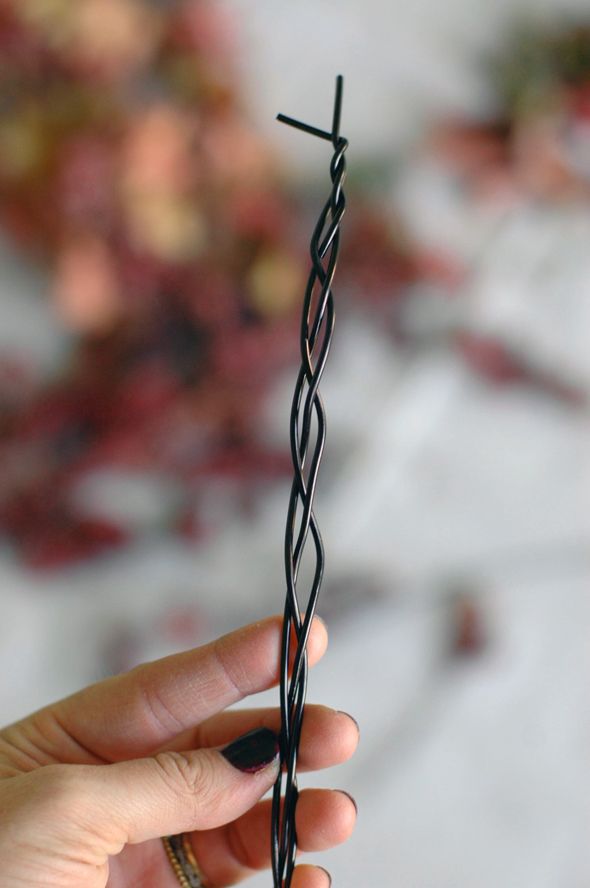
 photo mDSC_0771.jpg

I used two of those stick-on hooks (in black, to match my fireplace) in the corners of the mantle. I looped the braided wire around the hook and sort of pinched it to help the wire stay put. If you want the finished garland to swoop down a little in the center, let the wire sag just a bit here, but not too much. The weight of the foliage will pull it down several more inches.
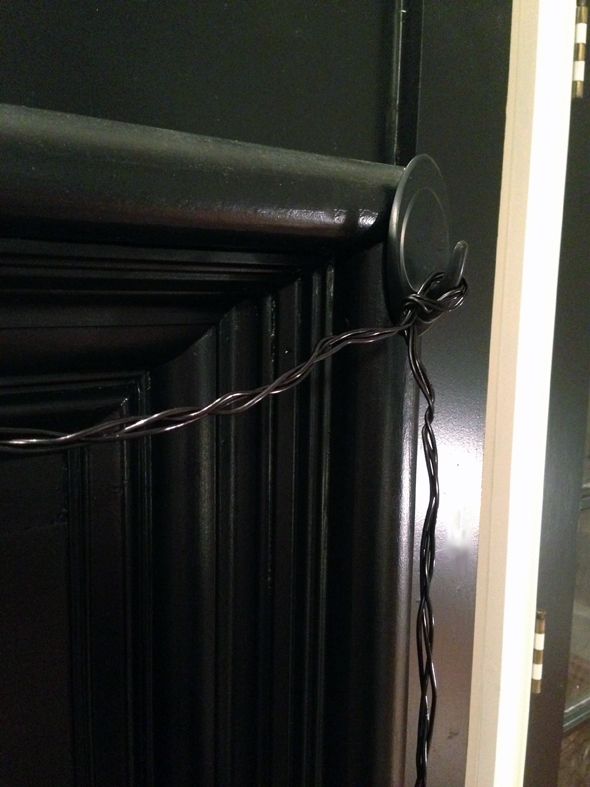
 photo IMG_9538.jpg

Then it's time to start layering on the foliage. The most important part is to start at the bottom and layer on top of each little bundle and work your way to the center.
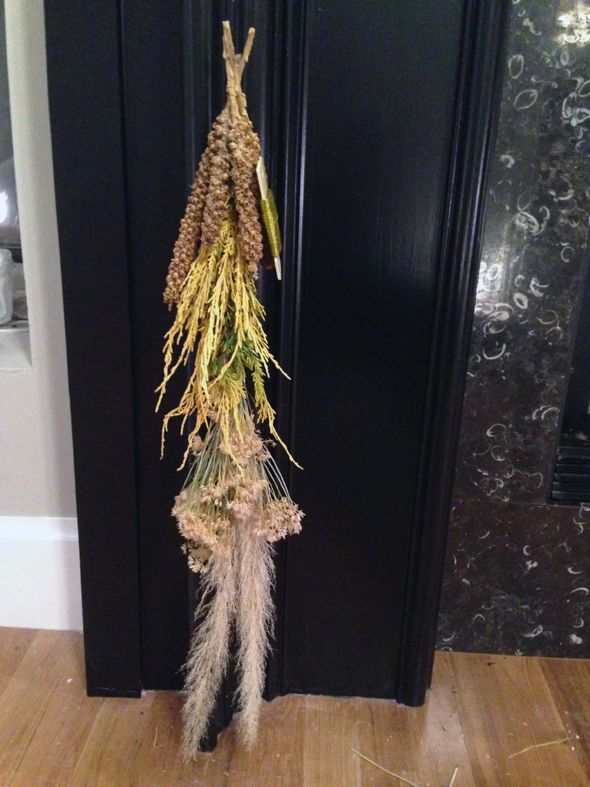
 photo IMG_9528.jpg

To make each bundle, you just layer the foliage in your hand in a pretty way so that there are no gaps or blunt lines. And then you hold the bundle up against the braided wire and wrap it three or four times with the smaller gauge floral wire, just around the base of the bundle, mostly. For the lighter foliage, I used gold wire and for the greenery I pulled out my dark green wire.
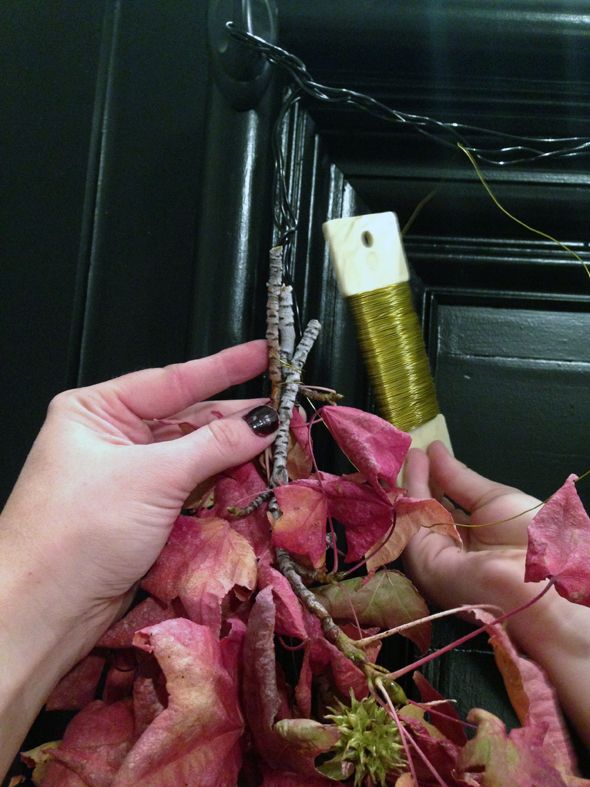
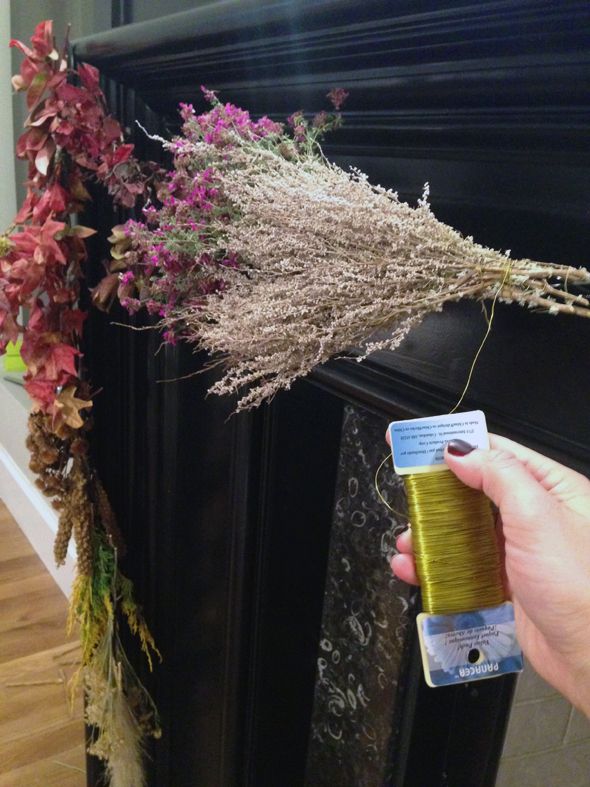
 photo IMG_9531.jpg

 photo IMG_9544.jpg

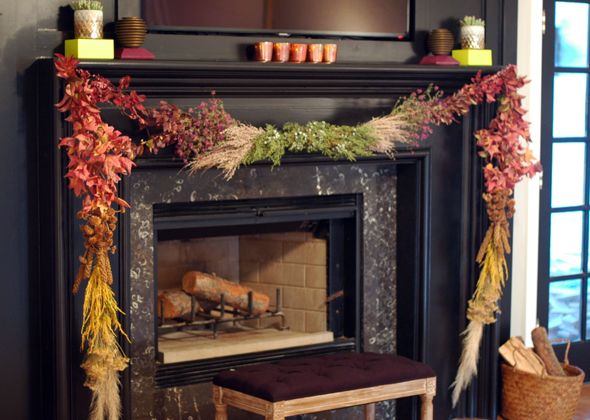
Once I finished layering on one half of the garland, I started at the bottom of the other side, trying to copy the layout exactly. When both halves are finished, you should be left with two mirror-image symmetrical swags. I think it would look a little funny if you don't have a center piece that is sort of bunched up and less layered looking. So I made a little end cap for the very center out of more juniper bush. I used floral tape to sort of bunch and fan out some shorter pieces, and then attached it with wire just like with the other bundles.
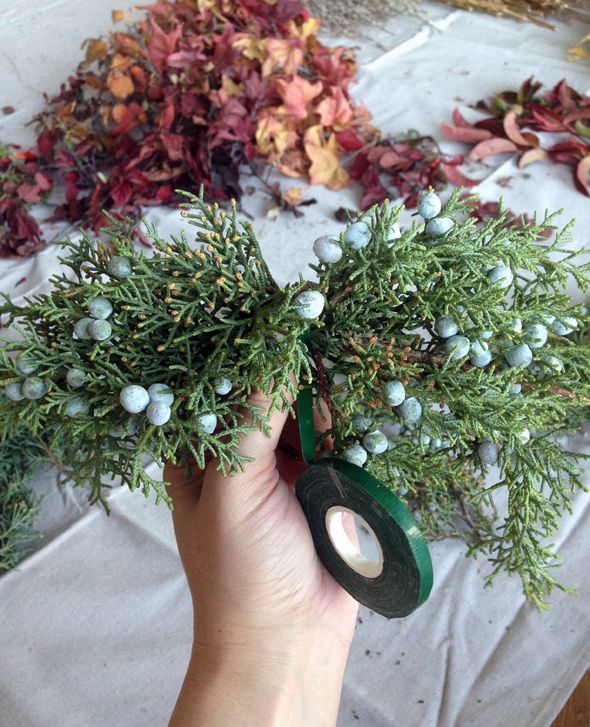
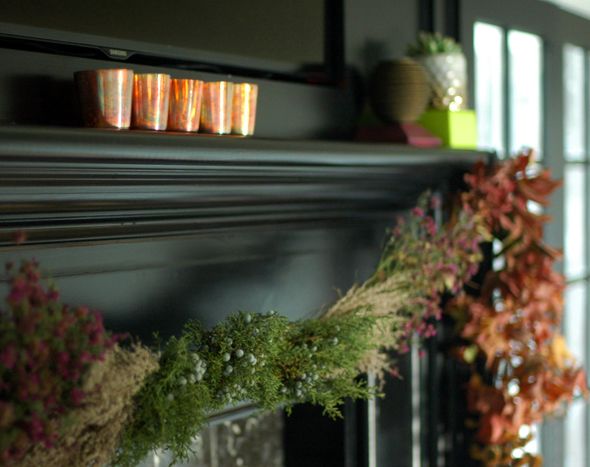
 photo IMG_9503.jpg

 photo DSC_1013.jpg

Also, and I didn't end up needing to do so here, but if you've lost a lot of leaves in the process, you can strategically hot glue a few leaves back on to help fill things out a bit.
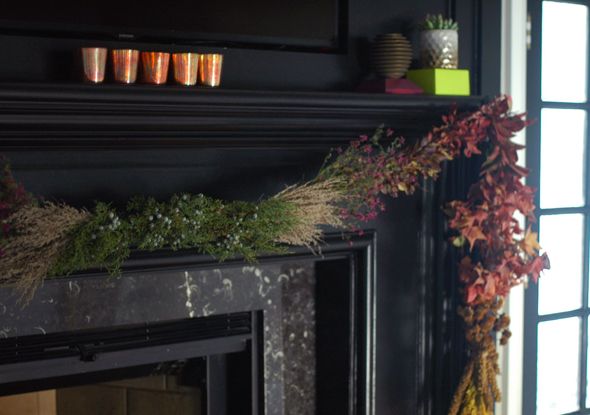
 photo DSC_0997.jpg

Finally, you can sort of bend and tug at the wire to get it to look right and you're done! It's easy and fun and only takes an hour or two. My garland has been up for about a week and a half and I think it'll still look great for Thanksgiving next week! The only plant that's shed at all is the soft gray sagebrush in the middle, and it's not been bad at all.
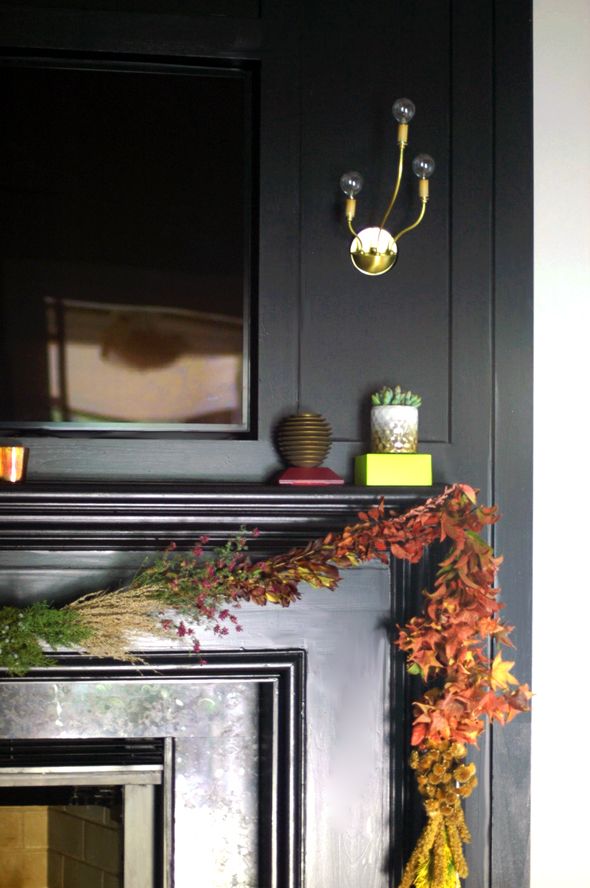
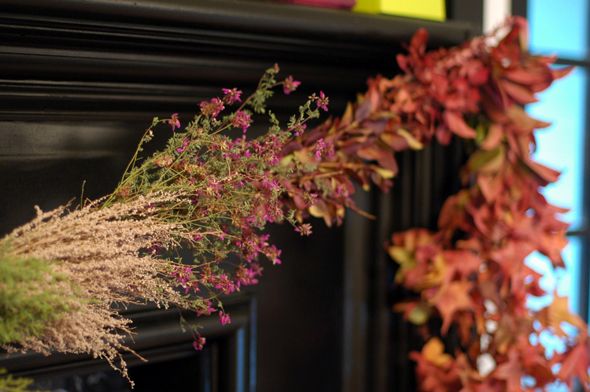
 photo DSC_0984.jpg

 photo DSC_0854.jpg

I'm already dreaming of ideas for a winter palette of all blues and greens and grays for my next garland. Maybe a double swag!
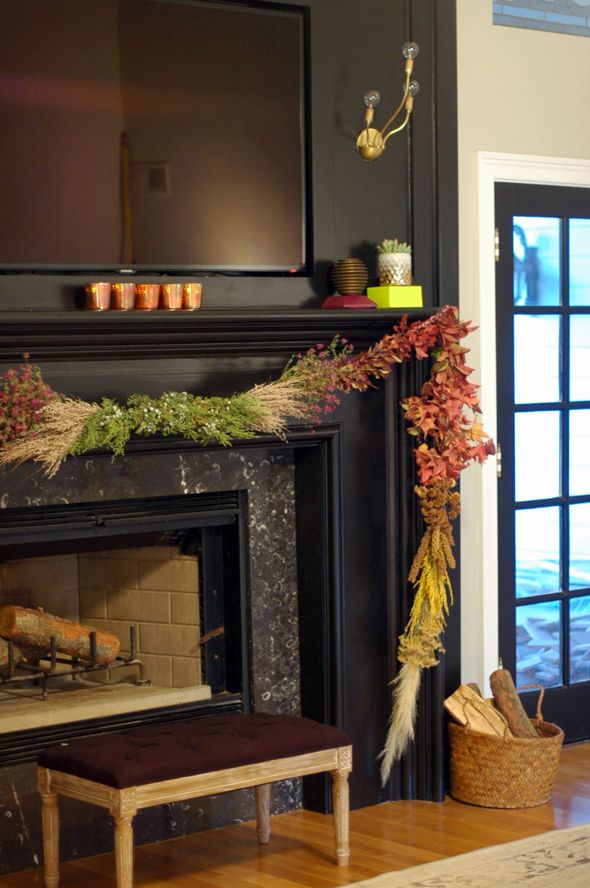
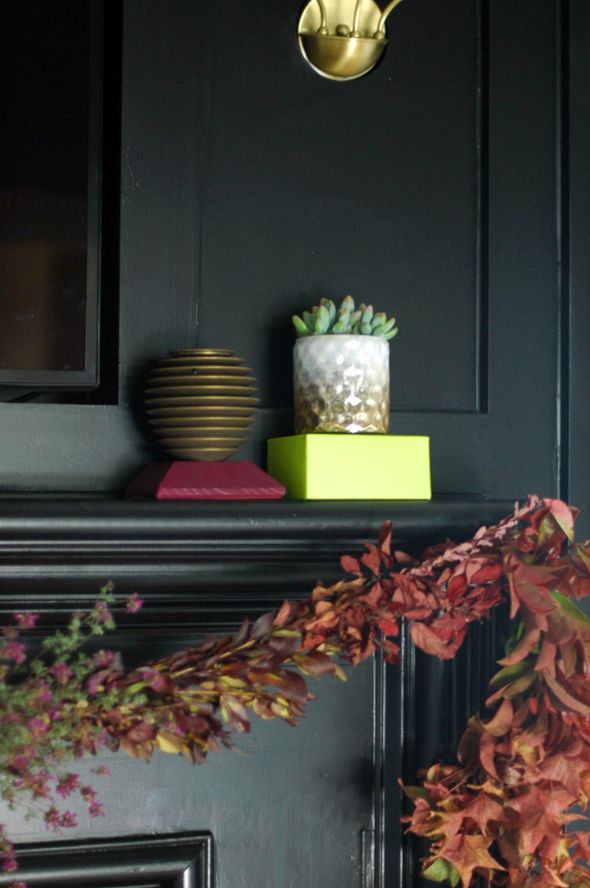
 photo DSC_0844.jpg

My Fall Mantel (and a Give Away!)

I am SO excited to partner again with Glade® to bring you this post on how I'm bringing fall decor into my home this year with decor and scent! There is such an emotional connection to scent (all it takes me is half a whiff of Dior J'adore perfume to be transported to high school!). Where could it be more important to be making these emotional scent connections than in our homes? Introducing seasonal scents at this time of the year is such a key (and simple!) part of getting your home holiday-ready.

 photo DSC_0984.jpg

About five minutes after we finished our new fireplace surround, I was itching to style it with all sorts of pretty seasonal accessories. But in the end I kept it pretty restrained on the mantel so that the autumnal garland could be the star (DIY tutorial coming tomorrow!). Though the votives, the small succulent plants and the Glade® Sense and Spray® Automatic Freshener play important supporting characters. There is a little color here, but mostly I wanted the mantel to be about texture.

 photo DSC_1028copy.jpg

I put two fresheners on the mantel for symmetry. I have the Cashmere Woods scent in both fresheners and they are making our large, high-ceilinged living room smell heavenly! Now it looks and smells like fall in here (a far cry from where we were just a few short weeks ago!).

 photo xDSC_0851.jpg

Here's a breakdown of how I styled our new mantel for fall, including a huge give away from Glade® to help your make over your own home for the holidays!

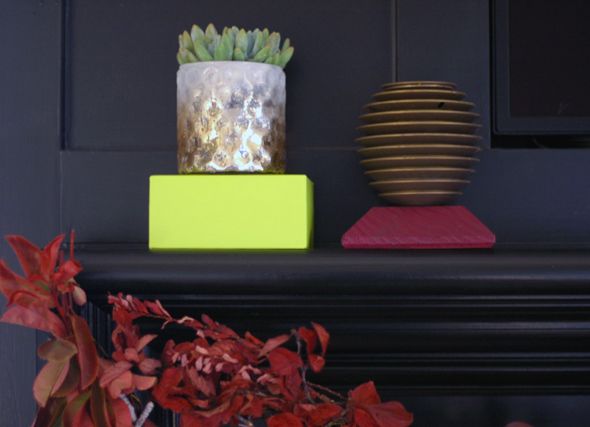
I think one of the best styling tips I could ever give is to elevate items you want to stand out or to make look more special. On a little pedestal, even an air freshener looks beautiful and sculptural! (well, it helps if your air freshener is as beautiful as Glade's Sense and Spray!)

 photo GladeandLGN.jpg

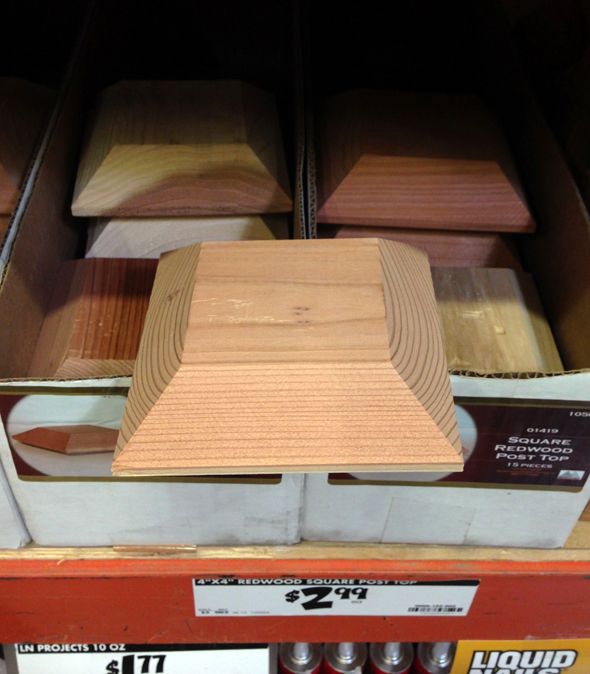
To make these pedestals for my fresheners, I stopped into the hardware store and found these little wooden post caps for a few dollars each.

 photo IMG_9472.jpg

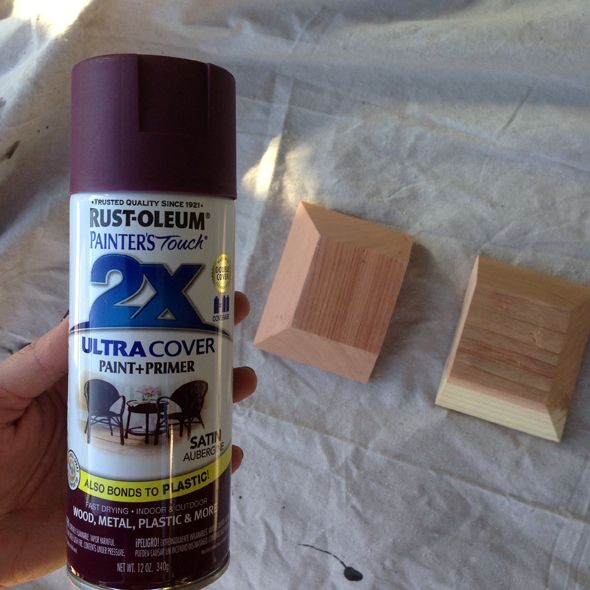
I quickly spray painted them with this Aubergine color from Rustoleum - the perfect unexpected fall color.

 photo IMG_9493.jpg

I could have sanded the wood down a little more, but I liked the wood grain pattern and thought it would be pretty peeking through the paint. I think it looks cool and I'm glad I kept it!

 photo DSC_0920.jpg

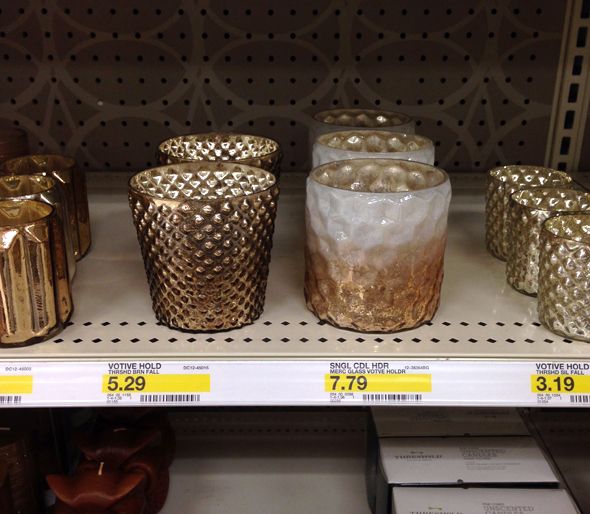
The citron boxes the succulent planters are sitting on are just stationary packaging I picked up at Target (the boxes are actually really nice though - no noticeable seams on the corners)! Use what you got, right? :) The mercury glass planters are larger votive holders, also from Target.

 photo IMG_9480.jpg

The orangey mercury glass votives I lined up in the center of the mantel were clearance finds at Michaels from a few weeks ago. The color on these votives is seriously phenomenal - I'm loving them and wish I could had bought more to keep on hand for parties.

 photo DSC_0997.jpg

The herringbone basket we're using for spare firewood is also a recent Target purchase (from the bath section). The little black tufted stool in front of the firebox is from Homegoods and the rug I'm trying in here for now is the same rug we had in our brownstone living room. I like how the neutral elements in the space (the rug, the floors, the fireplace and walls) all help the colorful accessories pop. This room was made for holiday decorating! :)
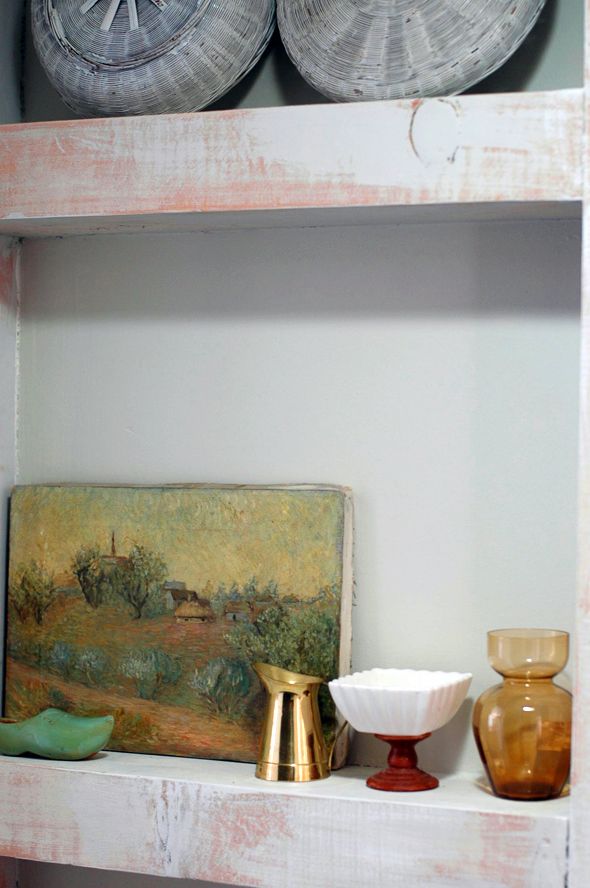
 photo DSC_0878.jpg

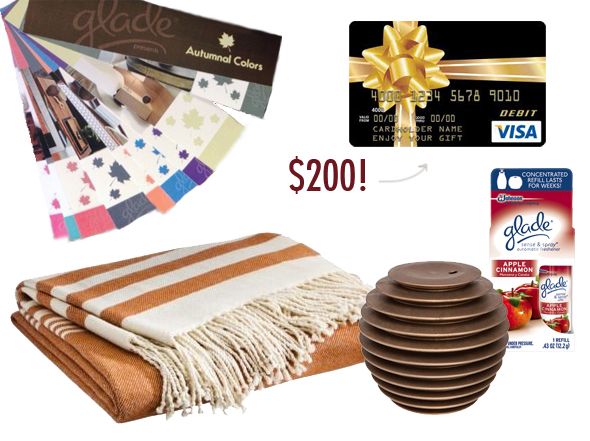
Now, for the fun part! Glade is kindly offering a beautiful give away package to a lucky LGN reader to help them bring a little seasonal flair into their home. Simply leave a comment on this post to enter to win a beautiful gray basket filled with a gorgeous striped throw, a deck of inspiration images and color palettes, a Glade® Sense and Spray® Automatic Freshener, an Apple Cinnamon scent refill, and a $200 Visa gift card!
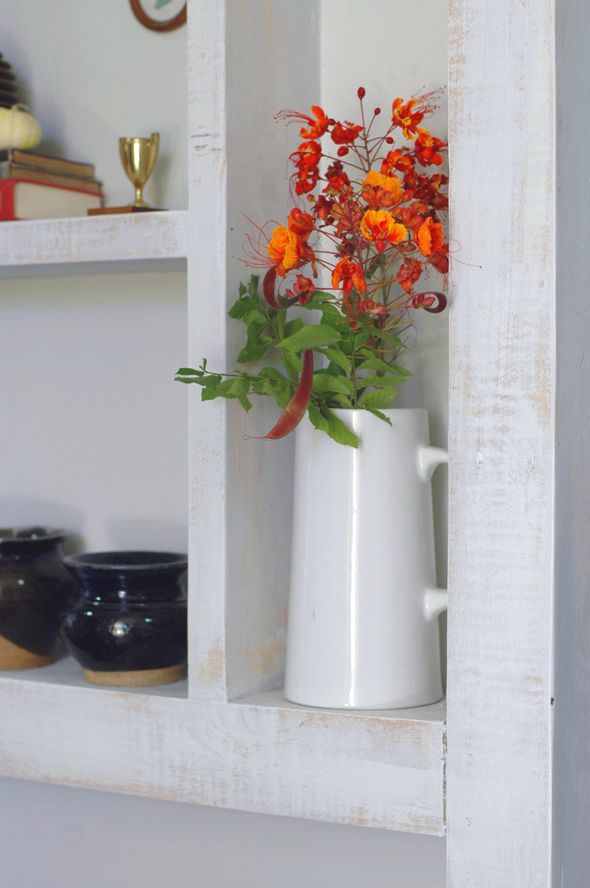

 photo GLADEGIVEAWAY-2.jpg

Contest ends on Tuesday, November 26 at midnight PST. Winner will be chosen at random and contacted via email. Best of luck!

Ultra-PRO Round Up

~
Happy Tuesday MTG peeps,

Today we wanted to provide a cross post from MTG Realm on Tumblr in order to catch up with some very lovely Ultra•PRO productsPersonally, we have a variety of sleeves and boxes and have yet to be disappointed.  Anywhoos - Let's check 'em out! -
~
Magic: the Gathering - Accessories
Yer fav PWs - the Lorwyn 5!  - MTG Ultra•PRO ‘Mana Series 4’ Planeswalker play mats.
Expected to be released in December 2013.
Depending upon which store you go to, this may retail anywhere from $20 to $25.

~

Magic: the Gathering - Accessories
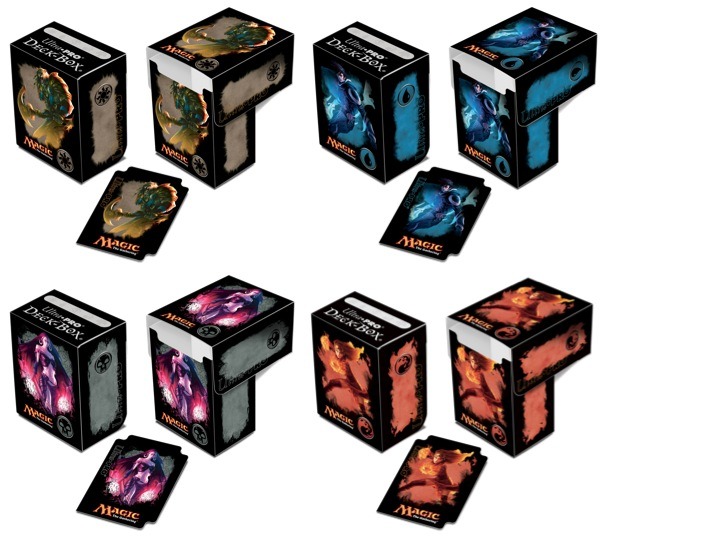
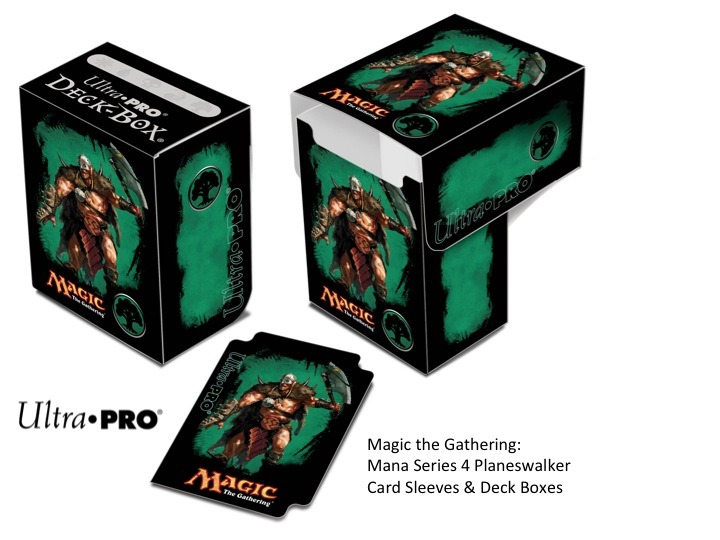
MTG Ultra•PRO ‘Mana Series 4’ Planeswalker card sleeves and deck boxes.  Expected to be released December 2013.

~
 
Accessories - Ultra•pro
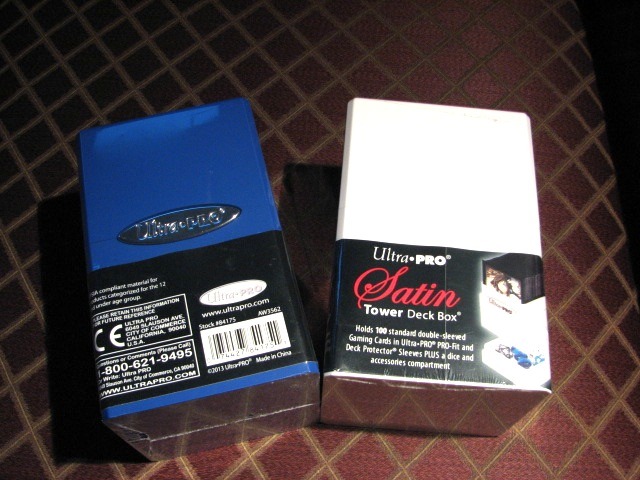
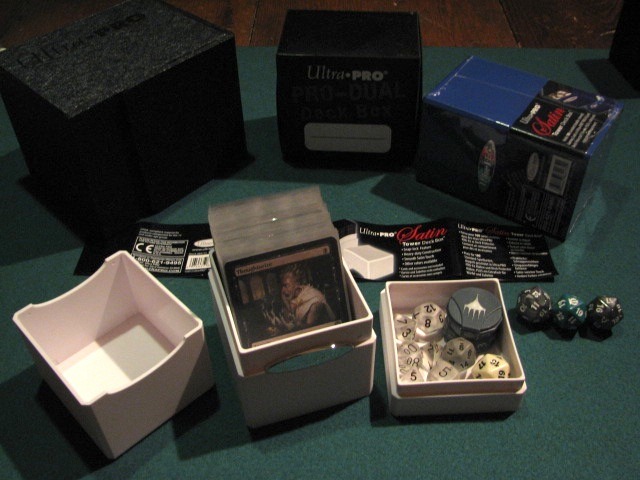
Check out this sweet Ultra•PRO Satin Tower Deck Box to get your stack of awesome to your game. 

• It’s heavy-duty construction uses ballistics proof (maybe) rigid plastic.

• This can hold up to a 100+ standard sized sleeved cards.

• Secures your precious cargo with a unique snap lock system.

• Has an accessory compartment for your dice / tokens / opponent’s broken dreams.

This is like an epic three-stage rocket you can blow up your game table with.

Pro Tip - confuzzle your opponent by using a white UPR Satin Tower deck box to carry your mono-black control deck.

~

Decorating for Fall

The holidays are practically here and I've been in denial. Suddenly the weather is starting to cool down and all the stores have pumpkins out front. 

 photo ssDSC_0515.jpg

 photo hDSC_0512.jpg

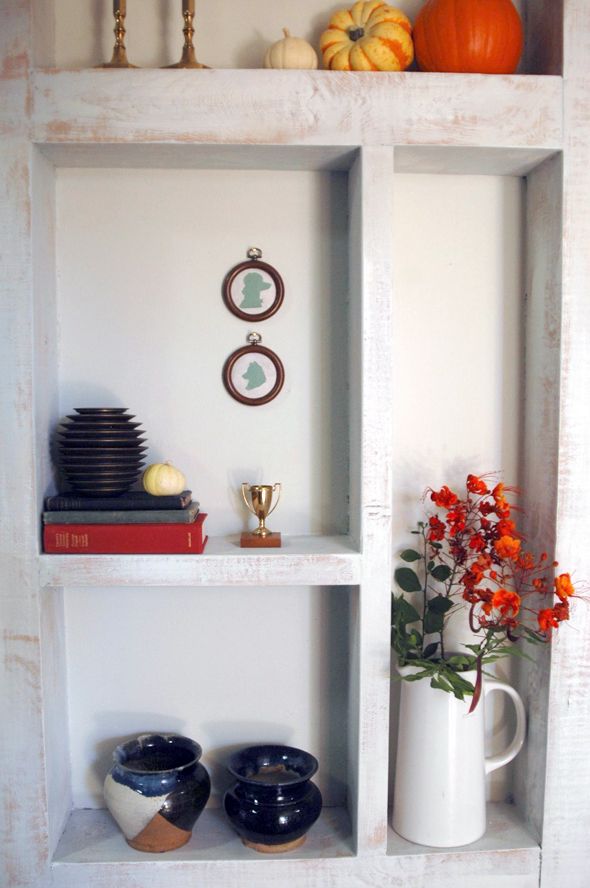
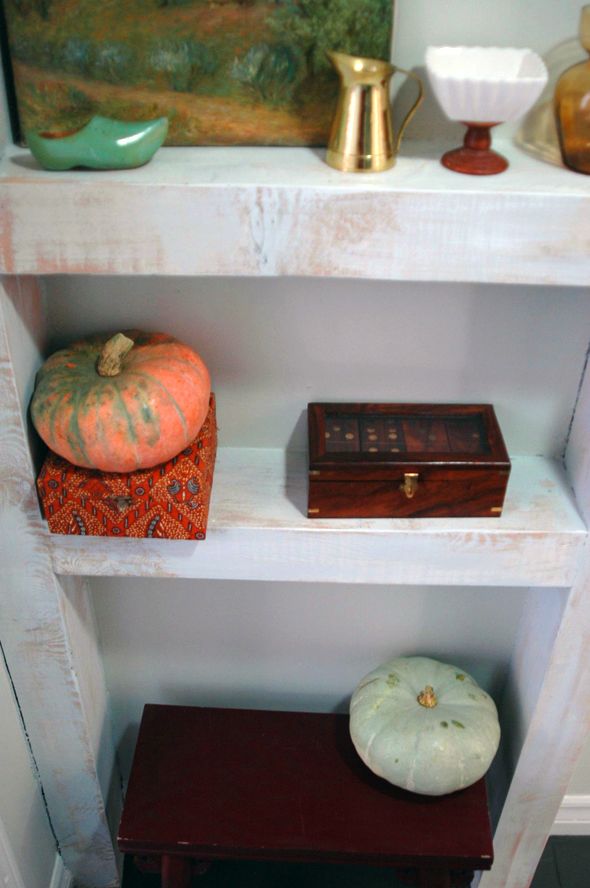
It's almost impossible for me and my kids to pass these by and we've amassed quite a collection of mini (and not-so-mini) pumpkins over the past week or two. So I was thrilled when Glade® invited me to share a few of my fall decorating tips with you (hoarding justified!). It actually worked out perfectly because I had recently been thinking that that little stretch of hallway by the mudroom is a great place to display holiday decor. I was able to transform the space with a few small projects (like stripping the shelves!) and styling with inexpensive finds (including the newly designed Glade® Sense and Spray® Automatic Freshener). Now my home looks and smells like it's ready for autumn. Here's how I did it:

 photo fall1.jpg

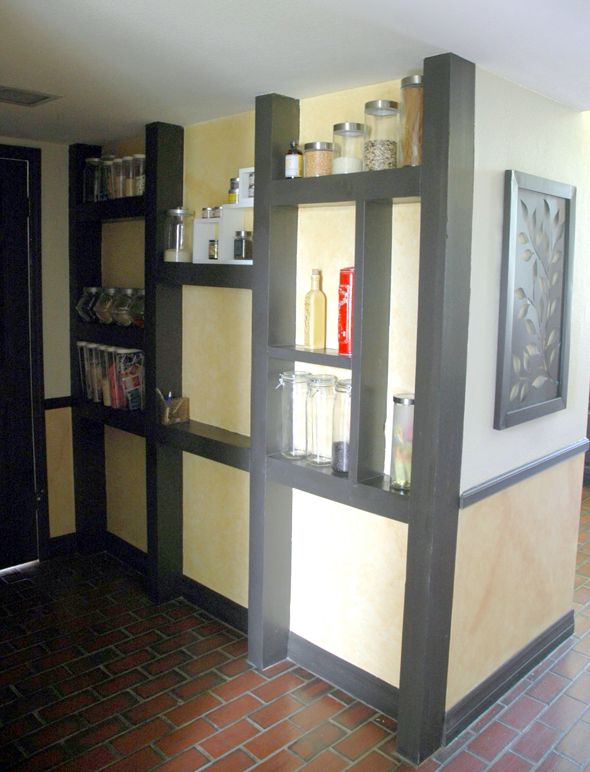
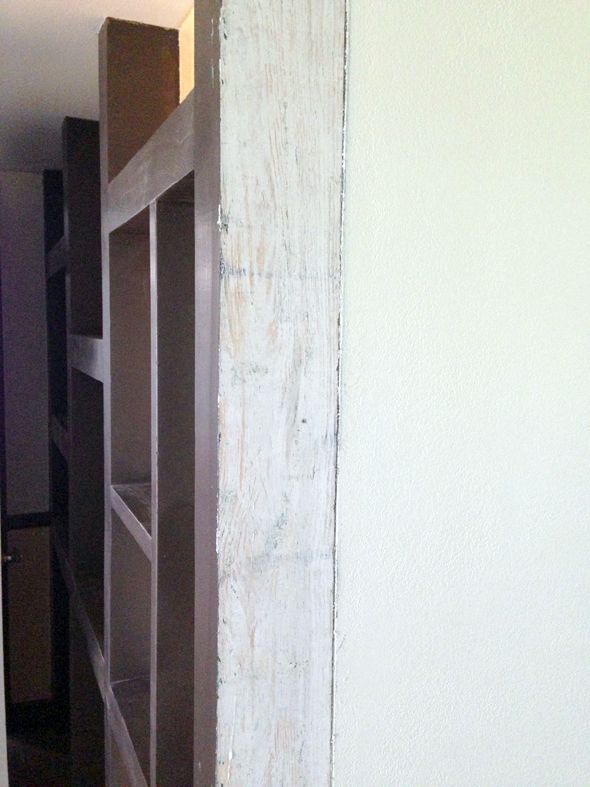
The shelves used to be painted a really dark brown and the walls were a mid-tone gold color and it felt just a little too dark. 

 photo fDSC_0573.jpg

I used stripper gel to remove the two or three layers of paint, which came off pretty easily and left  behind a primed pine beam. 

 photo IMG_7699.jpg

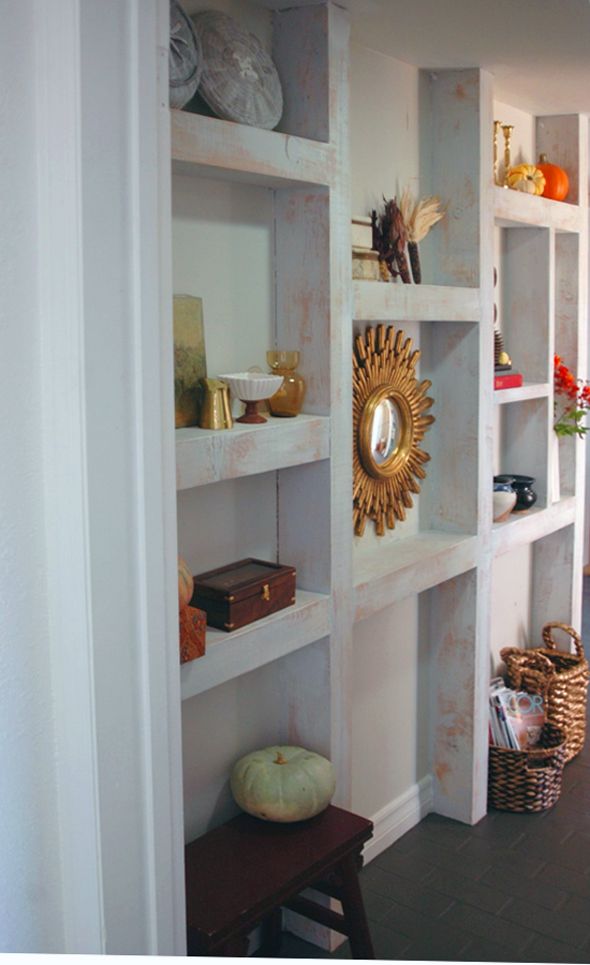
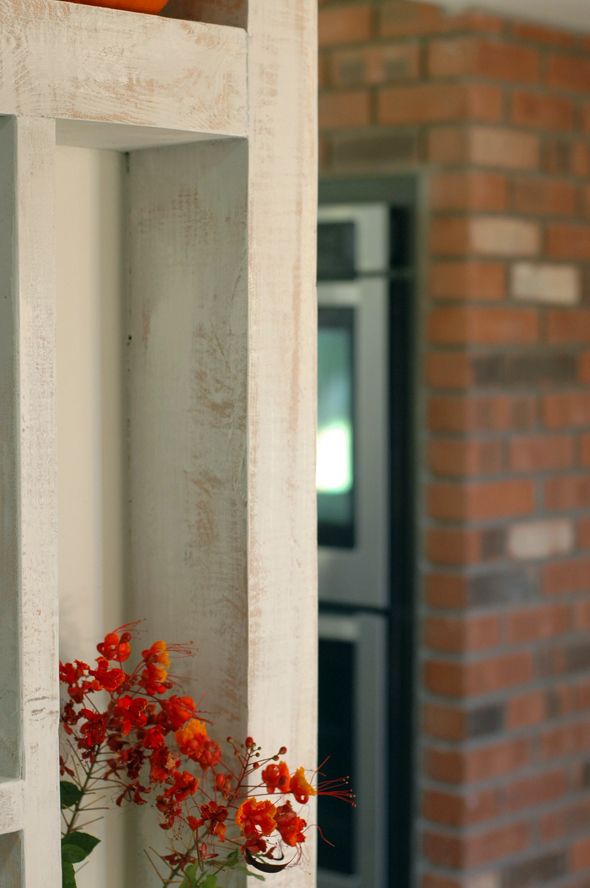
So far I haven't done much with the wood after taking off the paint. I like how the light wood feels brighter and more airy, but I'm not sure I love the distressed look. 

 photo IMG_7702.jpg

It's fine for now though (kind of works with the fall theme, right?). And either way I won't do too much to the shelves because they'll likely be removed in the big kitchen remodel down the road. A darker gray wash would be easy and pretty though.

 photo DSC_0548h.jpg

 photo Untitled-1.jpg

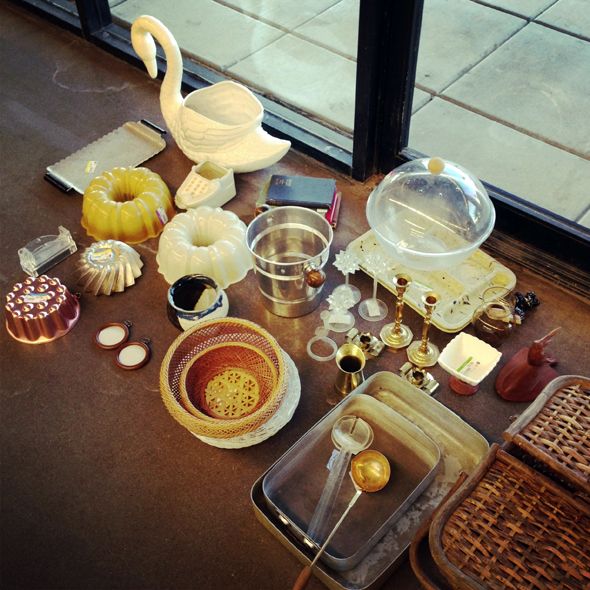
So, as for the decorating, I decided to go to Goodwill to see what they had in the way of vintage wares in golden, warm tones. It was a total jackpot thrifting day. I think most of these were from the same home - they all had a similar look. (you can see more of my finds from that day here).

 photo IMG_7735.jpg

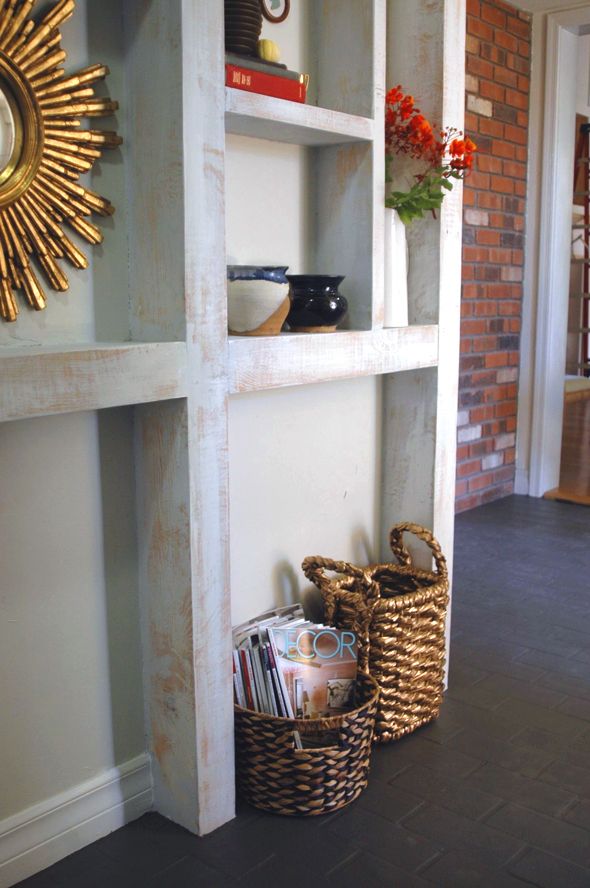
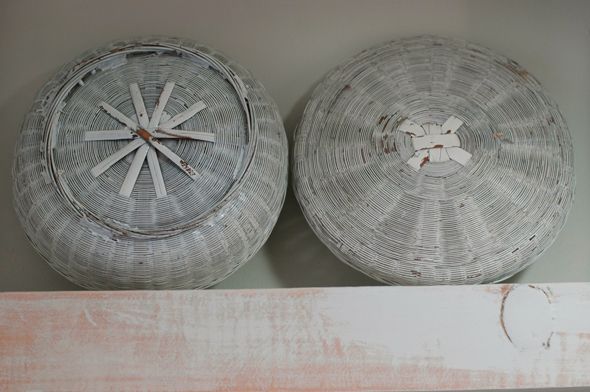
I also stopped into Homegoods to grab a few baskets for the floor. Homegoods is the best place to buy storage baskets.

 photo eDSC_0506.jpg

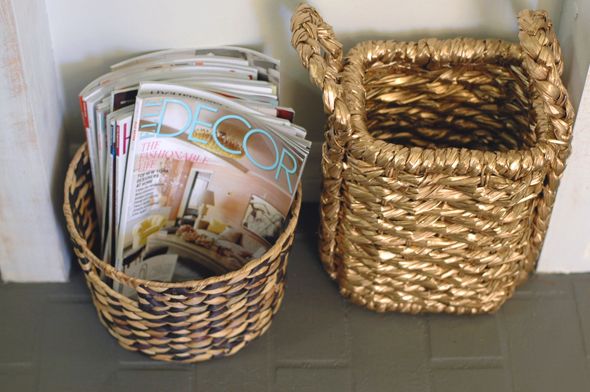
The cute herringbone pattern one is the perfect size for about a month's worth of magazines - anything bigger would just allow for an unwieldy reading pile, and who needs that?

 photo IMG_7794.jpg

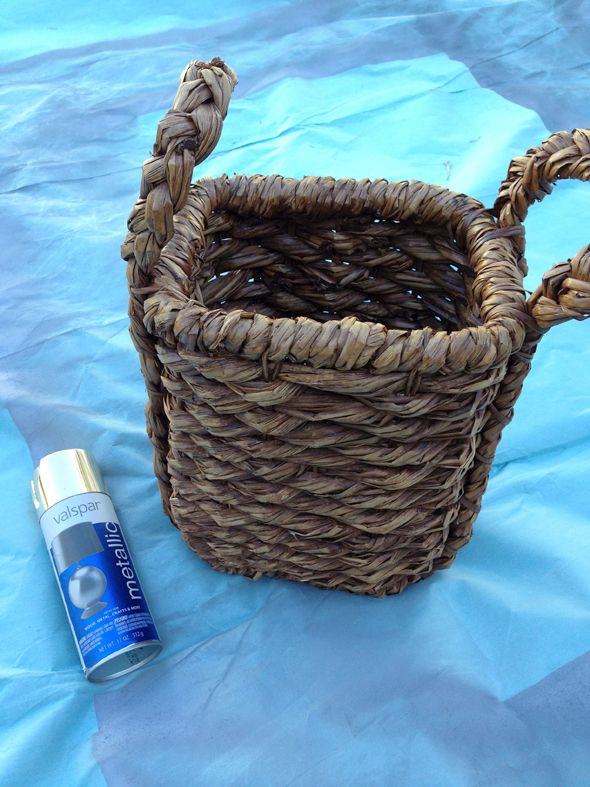
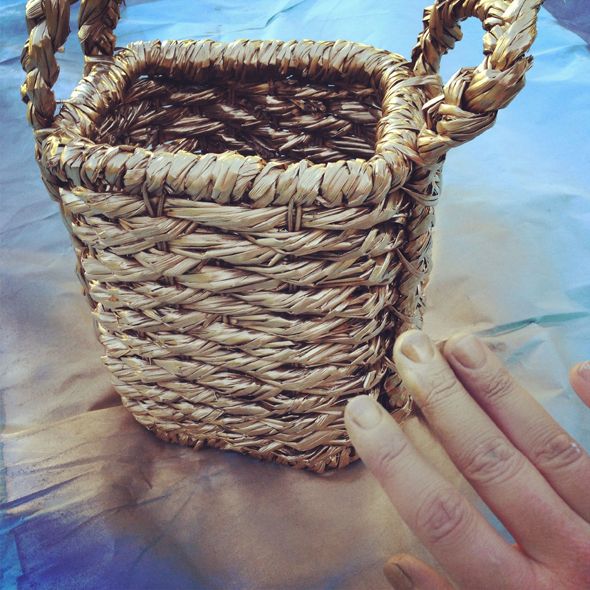
The taller basket will be used for umbrellas maybe, once we actually find the box with the umbrellas (!). I spray painted the basket gold, because everything is better gold. (with the exception of fingers).

 photo IMG_7821.jpg

 photo aaDSC_0494.jpg

 photo aDSC_0543.jpg

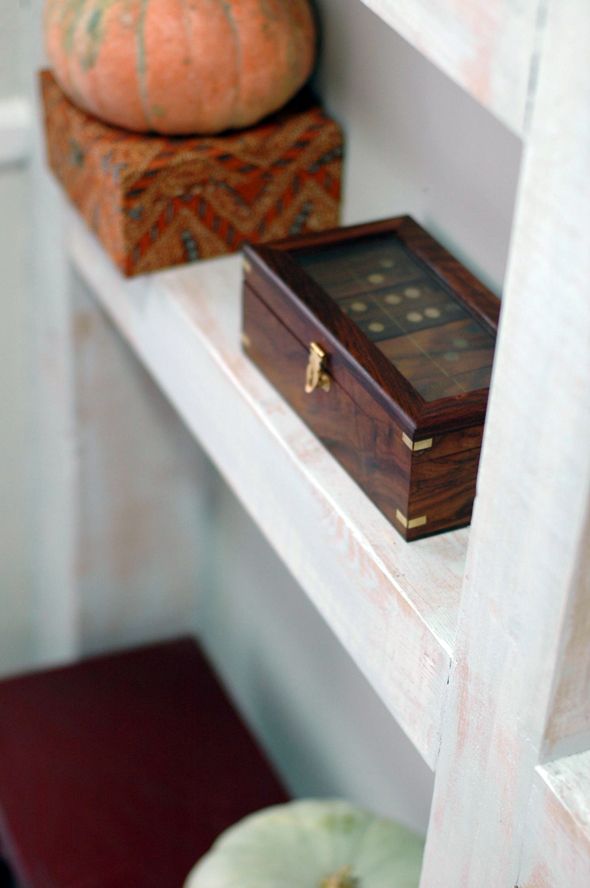
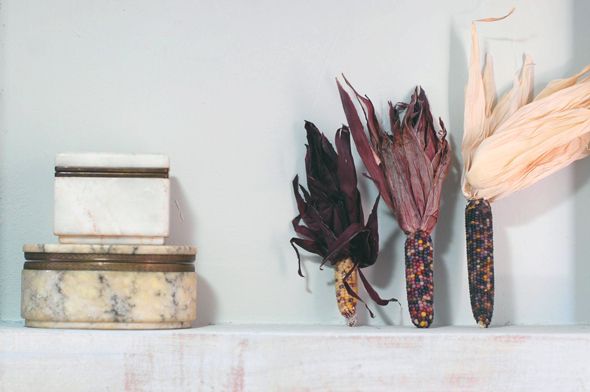
And speaking of gold/brass, Homegoods is selling a lot of brass things right now - really cool trays and accessories like this brass-inlay dominos box set.

 photo aDSC_0552.jpg

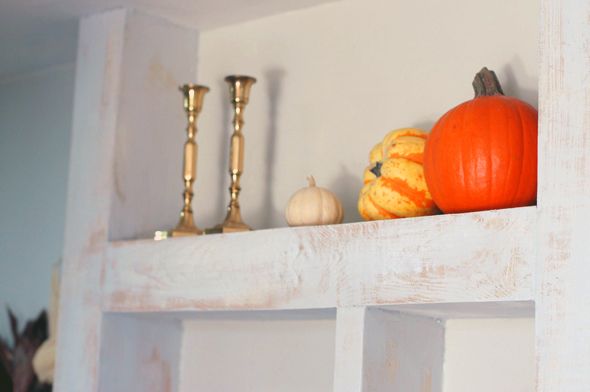
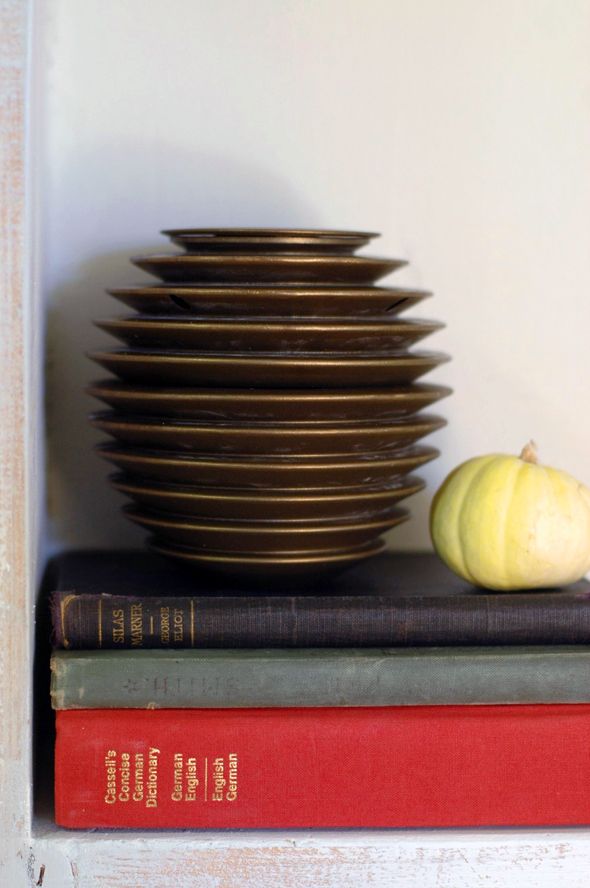
I mixed my new and old finds together on the shelves and put lots of pumpkins out and some books too. I think it's a good idea to not fill every square inch of shelf space or else it can start to feel like a store display.

 photo hDSC_0481.jpg

 photo DSC_0537.jpg

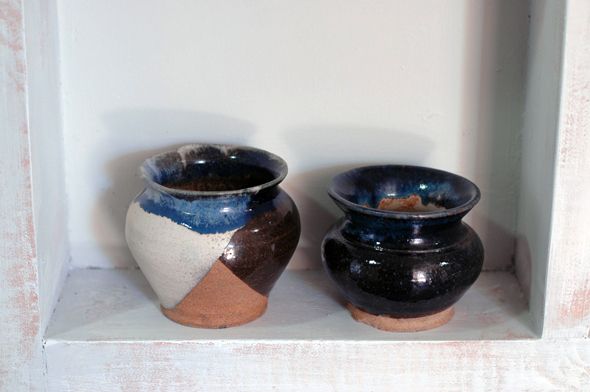
I love that piece of pottery here on the left.

 photo qDSC_0540.jpg

I also think it's a good idea to go pretty neutral with the colors on a display shelf. And if something is more colorful, try to group it with items in a similar color family.

 photo aDSC_0529.jpg

 photo aDSC_0511.jpg

 photo aDSC_0526.jpg

 photo aaDSC_0490.jpg

Can you spot the freshener below? I love how it just blends in with the decor.

 photo wDSC_0501.jpg

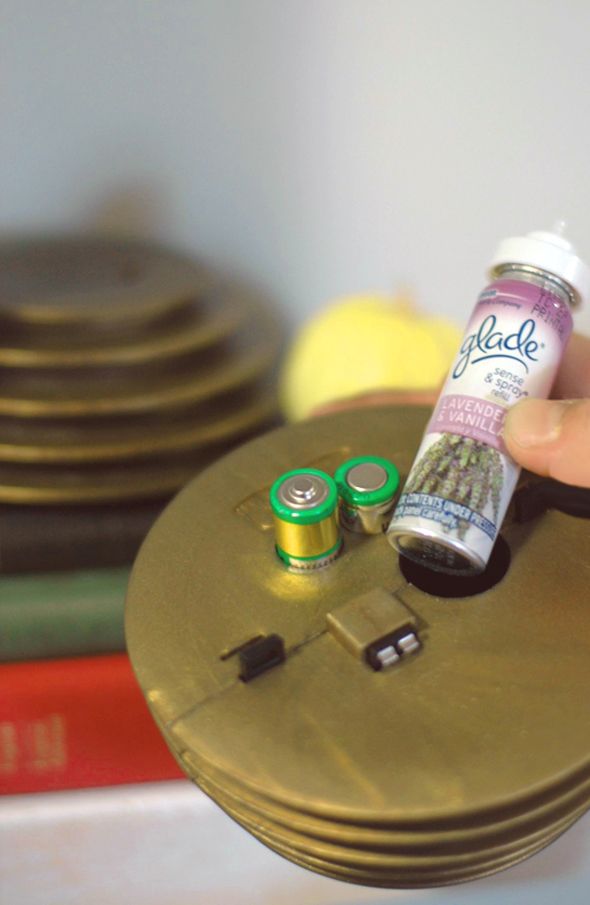
It's the newly designed Sense and Spray® Automatic Freshener by Glade® that sprays every time you walk by.  You set it to spray no more than every 15, 20 or 30 minutes, so it works perfectly in high-traffic areas just like in this hallway by our mudroom. The scent travels all around this side of the house.

 photo aaDSC_0522.jpg

You can choose different scents (and in fact, there's a whole line of great, new fragrances), but my hands-down favorite is their Lavender and Vanilla. It smells really good and it's a more complex scent than you normally find with air fresheners. This is a bit of a side note, but isn't it weird how houses/families have a smell? I'm always wondering if our house has a smell that I'm just used to - the idea stresses me out a little bit to be honest. I think scent is a big part of the experiencing of a home and it is a huge relief for me when visitors comment that our house smells nice. And just like putting out the pumpkins, choosing a warm, inviting scent is the perfect, simple way to welcome guests and to celebrate the season. I just popped in the Cashmere Woods scent yesterday to get the warm, woodsy smell happening, and now it really feels like October! :)

 photo jDSC_0480.jpg

And it was downright genius of the makers of Glade® to design such a pretty diffuser. How far we have come from the days of those scent cone eye sores!

 photo ssDSC_0515.jpg

So, tell me, have you started decorating for the holidays yet? Too soon? :) Our old neighbor had a rule where as soon as she saw Halloween stuff in stores she felt she could start listening to CHRISTMAS MUSIC. That is a level of holiday commitment unknown to me! 

 photo Untitled-1.jpg

This post was brought to you in collaboration with Glade®  Check out their variety of new fragrances here. Thank you for supporting LGN sponsors.