Tampilkan postingan dengan label Give Aways. Tampilkan semua postingan

My Fall Mantel (and a Give Away!)

I am SO excited to partner again with Glade® to bring you this post on how I'm bringing fall decor into my home this year with decor and scent! There is such an emotional connection to scent (all it takes me is half a whiff of Dior J'adore perfume to be transported to high school!). Where could it be more important to be making these emotional scent connections than in our homes? Introducing seasonal scents at this time of the year is such a key (and simple!) part of getting your home holiday-ready.

 photo DSC_0984.jpg

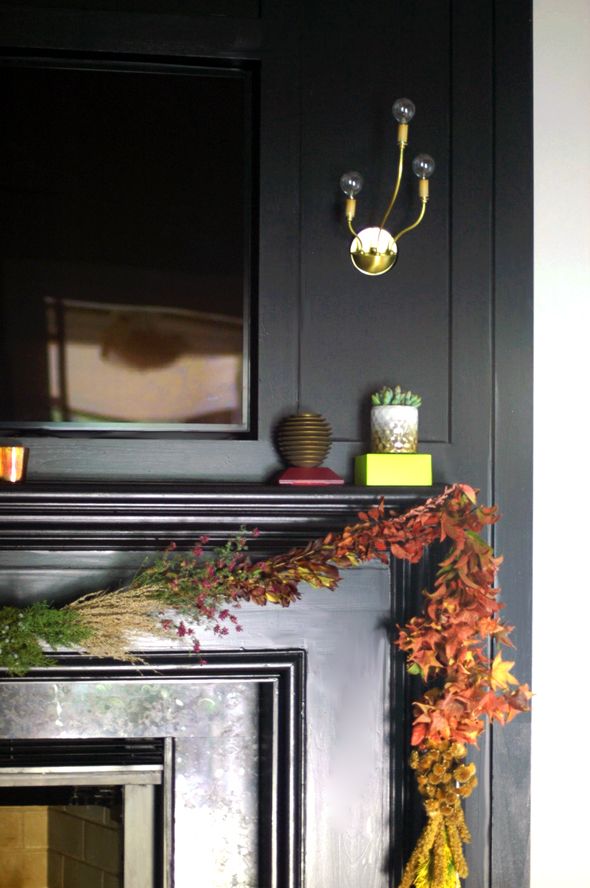
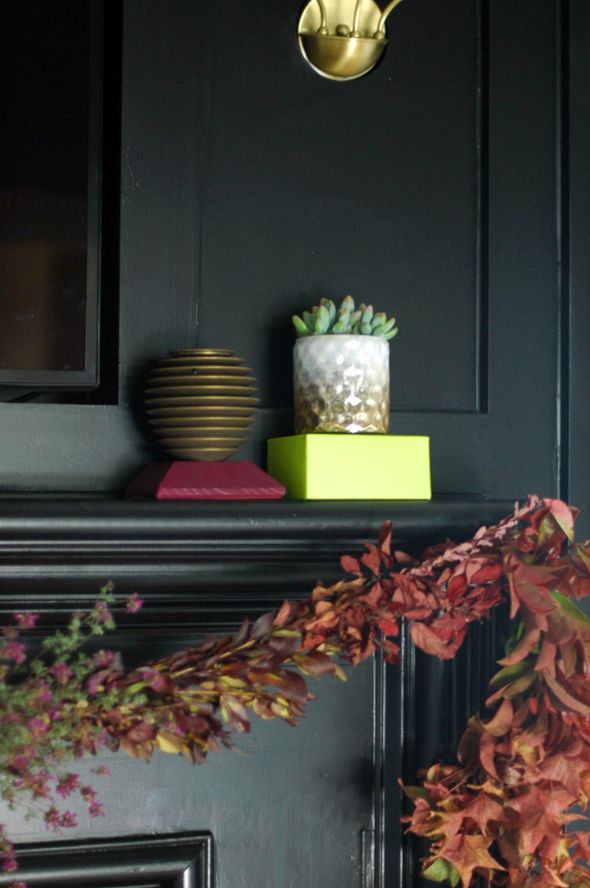
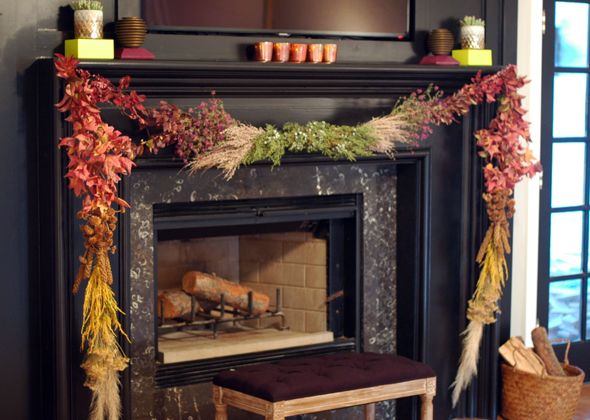
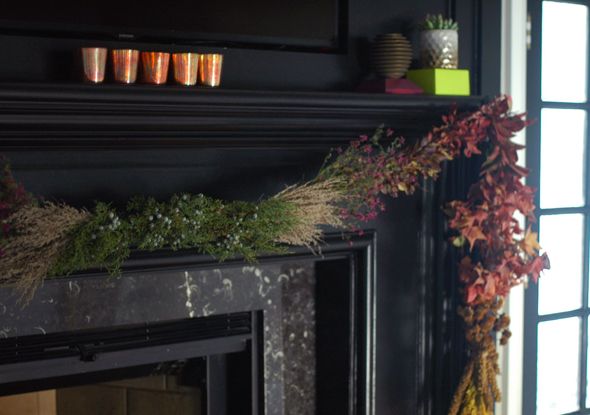
About five minutes after we finished our new fireplace surround, I was itching to style it with all sorts of pretty seasonal accessories. But in the end I kept it pretty restrained on the mantel so that the autumnal garland could be the star (DIY tutorial coming tomorrow!). Though the votives, the small succulent plants and the Glade® Sense and Spray® Automatic Freshener play important supporting characters. There is a little color here, but mostly I wanted the mantel to be about texture.

 photo DSC_1028copy.jpg

I put two fresheners on the mantel for symmetry. I have the Cashmere Woods scent in both fresheners and they are making our large, high-ceilinged living room smell heavenly! Now it looks and smells like fall in here (a far cry from where we were just a few short weeks ago!).

 photo xDSC_0851.jpg

Here's a breakdown of how I styled our new mantel for fall, including a huge give away from Glade® to help your make over your own home for the holidays!

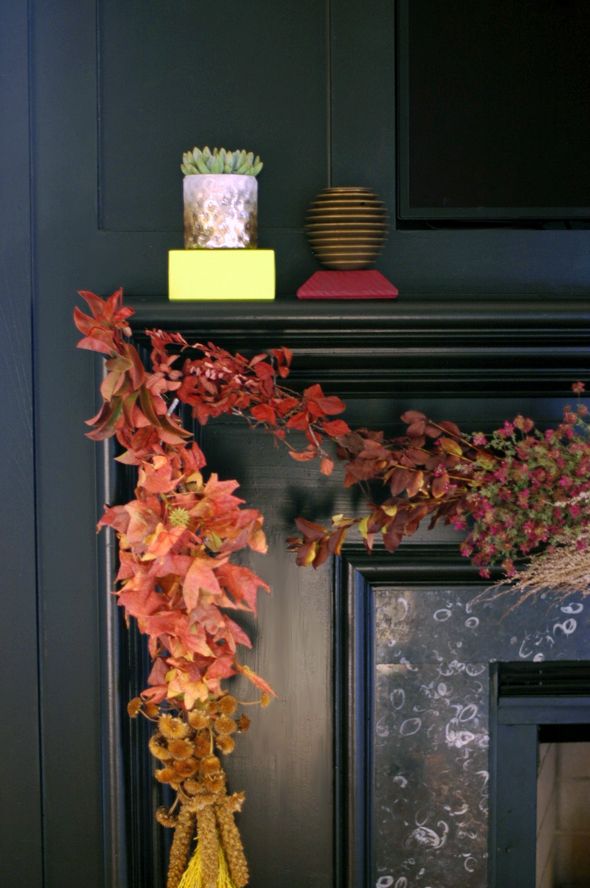
I think one of the best styling tips I could ever give is to elevate items you want to stand out or to make look more special. On a little pedestal, even an air freshener looks beautiful and sculptural! (well, it helps if your air freshener is as beautiful as Glade's Sense and Spray!)

 photo GladeandLGN.jpg

To make these pedestals for my fresheners, I stopped into the hardware store and found these little wooden post caps for a few dollars each.

 photo IMG_9472.jpg

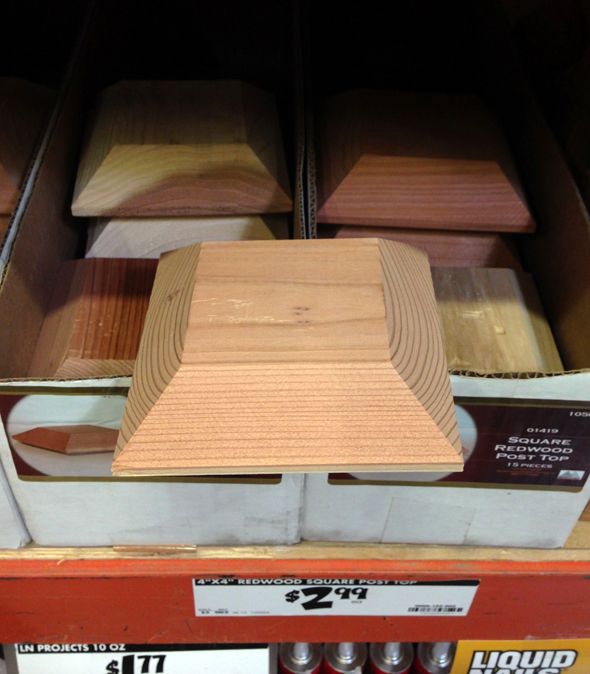
I quickly spray painted them with this Aubergine color from Rustoleum - the perfect unexpected fall color.

 photo IMG_9493.jpg

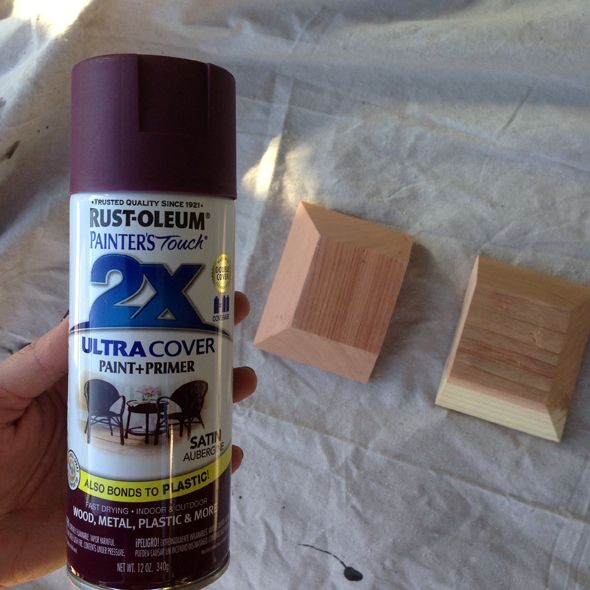
I could have sanded the wood down a little more, but I liked the wood grain pattern and thought it would be pretty peeking through the paint. I think it looks cool and I'm glad I kept it!

 photo DSC_0920.jpg

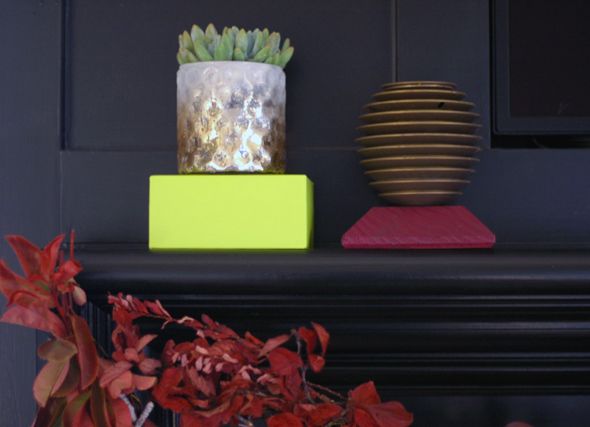
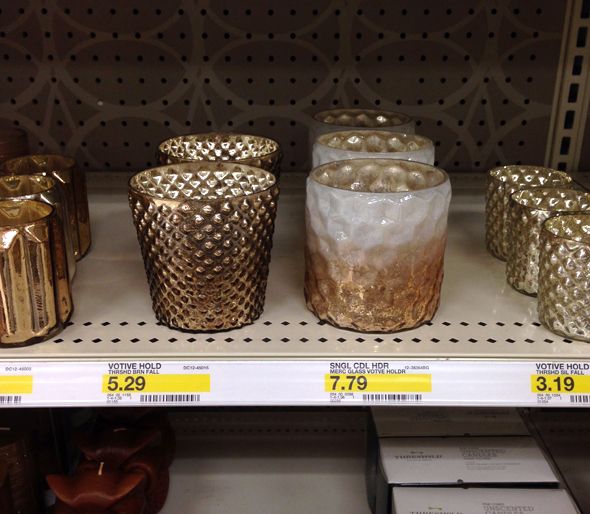
The citron boxes the succulent planters are sitting on are just stationary packaging I picked up at Target (the boxes are actually really nice though - no noticeable seams on the corners)! Use what you got, right? :) The mercury glass planters are larger votive holders, also from Target.

 photo IMG_9480.jpg

The orangey mercury glass votives I lined up in the center of the mantel were clearance finds at Michaels from a few weeks ago. The color on these votives is seriously phenomenal - I'm loving them and wish I could had bought more to keep on hand for parties.

 photo DSC_0997.jpg

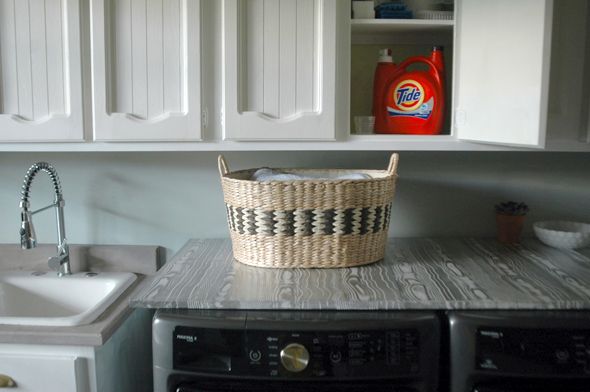
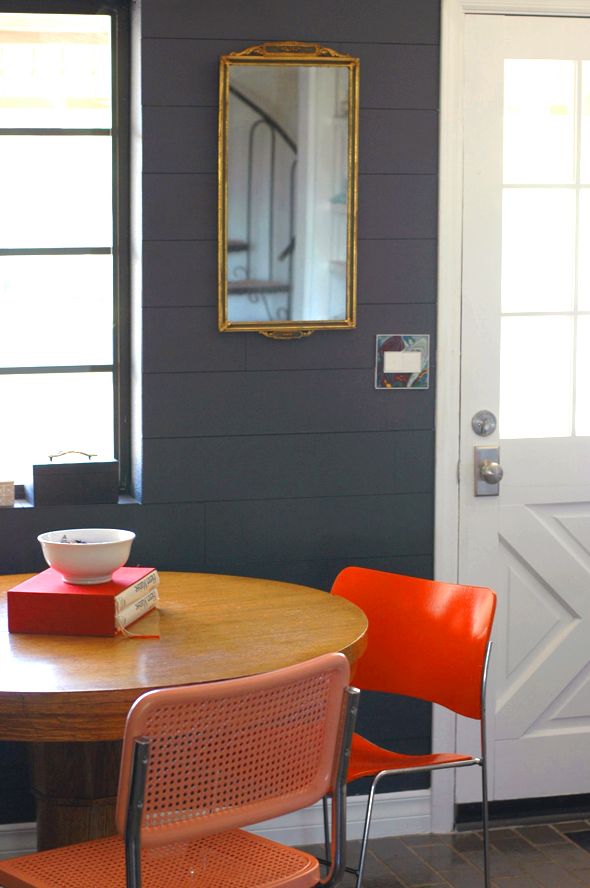
The herringbone basket we're using for spare firewood is also a recent Target purchase (from the bath section). The little black tufted stool in front of the firebox is from Homegoods and the rug I'm trying in here for now is the same rug we had in our brownstone living room. I like how the neutral elements in the space (the rug, the floors, the fireplace and walls) all help the colorful accessories pop. This room was made for holiday decorating! :)

 photo DSC_0878.jpg

Now, for the fun part! Glade is kindly offering a beautiful give away package to a lucky LGN reader to help them bring a little seasonal flair into their home. Simply leave a comment on this post to enter to win a beautiful gray basket filled with a gorgeous striped throw, a deck of inspiration images and color palettes, a Glade® Sense and Spray® Automatic Freshener, an Apple Cinnamon scent refill, and a $200 Visa gift card!


 photo GLADEGIVEAWAY-2.jpg

Contest ends on Tuesday, November 26 at midnight PST. Winner will be chosen at random and contacted via email. Best of luck!

Amazing Finds on Chairish (and a $500 Give Away!!)

So, I've been doing quite a bit of furniture shopping lately for the new house. I don't want to spend an arm and a leg, but I also don't want cheap junk either. I'm mostly looking for really special, unique stuff - the treasures. Craigslist can occasionally be a gold mine, but even in New York, I had to sift through so many cheesy listings to find something maybe worth looking at.

Chairish is a new site that is bridging the gap between Craigslist and 1st dibs. It is a person-to-person marketplace where design lovers buy and sell exceptional pre-owned furnishings and decor. The inventory is curated by the stylish staff at Chairish, so you know you won't be sifting through junk, but the prices aren't astronomical like on other sites. You'll see a lot of familiar names pop up on Chairish. From Milo Baughman to Drexel, Eames to Barabara Barry. There are also lots of great vintage pieces with unknown origin and some fabulous newer pieces. 

Here are a few of my favorites currently available. If you're lucky enough to snag any of these, color me jealous.


 photo ChairishLGN6.jpg
 photo ChairishLGN5.jpg
 photo ChairishLGN4.jpg
 photo ChairishLGN3.jpg
 photo ChairishLGN2.jpg
 photo ChairishLGN1.jpg

Chairish is also a great place to sell your gently used furnishings! There's never a listing fee and they offer a few different options for selling services. Like, if you don't want to deal with it at all they will take care of the whole shebang from pick up and storage, to photography and listing. Chairish always handles (and verifies) payments and orchestrates delivery. They've thought of everything, officially enabling chronic decorators nationwide! :)

Here's the extra exciting part: Chairish is offering up a whopping $500 gift certificate today! To enter to win, click here. Contest ends on Friday, September 13 at midnight. The winner will be announced here and contacted. Good luck!!

This post is sponsored by Chairish. To see the entire Chairish collection, visit here.

New Sponsor Highlight (and a Give Away!): HauteLook

One of my newest sponsors is HauteLook, which is a Nordstrom company. For as long as I can remember, I've loved Nordstrom and everything about it. It's great that you can find clothes, shoes, jewelry, beauty products and even home goods in one place and at all different price points. HauteLook, which is a free, member's only sale event site, has inventory that is well-rounded in just the same way, with the added excitement of new sales and new collections introduced daily, at awesome discounted prices - we're talking, like 75% off. Great deals to be had.

 photo ssDSC_0417.jpg

 photo vDSC_0432.jpg

Once of my favorite HauteLook finds was this silk Cynthia Rowley dress I bought a few months ago. I love the Klimpt-esque print and colors. The pieces that look like gold foil catch the sun in a really pretty way.

 photo dDSC_0435.jpg

 photo sDSC_0427.jpg

And about a month ago I found this mint hotel bedding set on HauteLook for a steal. Less than $90 for a high quality king-sized duvet with a pair of shams.

 photo sDSC_0442.jpg

I'm so excited to use this in our room when we move into the space next week. I'm thinking of hanging my chinoiserie panels behind the bed - won't that be a pretty pairing?

 photo fDSC_0436.jpg

HauteLook always has a great selection of beautiful items, but I usually like to just shop their home page, which highlights the day's most popular items. Here are my "best-of-the-best" choices, all available right now:

 photo LGNHAUTELOOK1.jpg
1  //  2  //  3  //  4  //  5  //  6  //  7


 photo LGNHAUTELOOK2.jpg

8  //  9  //  10  //  11  //  12  //  13

HauteLook is offering up three $50 gift cards today. To enter to win, register for free here, take a peek around and leave a comment here with you favorite picks. Contest, which is open to US, Canada and Australia residents, ends next Thursday at midnight. Winners will be emailed. Good luck!

This post was brought to you by HauteLook. Thank you for your support!

Give Away: $500 to The Home Depot!

Today is the very last day to enter to win a laundry room e-design from yours truly which comes with a $5000 Mastercard gift card and a year's supply of Tide. I hope you've entered already (and here's the link in case you haven't!).

In celebration of the laundry room makeover contest, The Home Depot is giving you a second chance to win something special today - a $500 gift card!

 photo cDSC_0522copy.jpg

To enter to win the $500 gift card to The Home Depot (which will arrive with a great box of samples from Tide), just leave a comment on this post. I'd love to hear what projects you'd fund with the gift card. I actually picked up some supplies there this weekend and did a little faux bois treatment to my laundry folding station. I'm working on the tutorial photos now, so look for that post tomorrow probably.

 photo xDSC_0539.jpg

Contest ends Monday, August 26 at midnight. Winner will be contacted via email. Good luck! (And don't forget to enter the EXTRA BIG give away here!)

Thanks to The Home Depot and P&G for sponsoring this post series. And thank you for supporting the companies that collaborate with me on LGN posts. :)

Give Away: $200 in adorne Light Switches and Plates (and a Marbling DIY!)

This weekend's give away is a great one. Legrand is expanding its North American presence and has a wonderful line called adorne, featuring truly beautiful and well-designed light switches and wall plates. It amazing how doing something as simple as swapping out a light switch and plate for something special can really elevate a room. Design is in the details!

 photo aDSC_0454.jpg

For our mudroom, I chose to replace our old school double toggle switch with a double sofTap switch. You can choose other switches that operate with motion sensors (walking by or waving your hand in front of the switch), whisper switches, dimmers, remotely-controlled smart switches - they've thought of everything. I liked the extra clean look of the sofTap and I love that there's a tiny little light that very softly illuminates the switches when they're off, which is shockingly helpful for supporting my midnight snack habit.

 photo wallplates.jpg

They've also covered the gamut of wall plate possibilities (above). You can go glossy modern (like the white I have in this post), mirrored, metallic, leather, all sorts of colors, or the customizable option I used here in the mudroom. That option comes with a paper mat template that you can use for wallpaper or any art project you want to create. (The tutorial for the marbled paper is after the jump.)

 photo DSC_0499.jpg

 photo aaDSC_0584.jpg

To enter to win a $200 shopping spree with adorne, visit the site and choose your favorite switch and wall plate combos. (PS This video really helps the switched come to life - worth a watch!) Leave a comment on this post with your choices and where you'll use your new switches. Contest ends Friday August 16 at midnight. Winner will be emailed. Good luck!!

 photo aDSC_0431.jpg

And don't forget to click through for the marbling tutorial...
I've been dying to try a marbled paper DIY for a really long time. I LOVE marbleized anything so this felt like a natural choice for my customized wall plate.

You'll need: a variety of nail polish colors (try the dollar store or CVS is having a 2 for $3 sale right now on some brands), water, a disposable container that's bigger than the paper or item that you're marbling, a toothpick or anything long and pointy (I used a long screw because our toothpicks are still packed away :)), paper or whatever you want to marble and a place to dry the items (I used a drop cloth). Also, you might want gloves, as my messy hands below will demonstrate.

 photo aDSC_0491.jpg

By the way, I think most anything can be marbled with nail polish - the possibilities are pretty endless. Flower pots and vases, finger nails (obvs), picture frames,  jewelry boxes, chair legs. There are lots of tutorials floating around the web that show all sort of cool ideas. I loved this one on Design Mom.

So, to start, fill your container with a bit of water. If you're marbling paper, you'll only need about an inch of water.

Take off all the lids to your nail polish to make the process go faster. You'll need to work pretty fast so that the polish doesn't start drying.

 photo aDSC_0510.jpg

Pour your colors in rings, one on top of the other. There's no right or wrong way to do this. Just pick colors and pour. If you pour slowly, the nail polish shouldn't sink.

 photo DSC_0503.jpg

 photo aDSC_0512.jpg

After pouring your rings, use a toothpick (or a screw) to pull the color. You're not mixing it - you're just going to move the colors around gingerly. Don't over-swirl and don't take too much time to do it.

 photo aDSC_0517.jpg

Then drop your paper onto the pattern, press softly to make sure the surfaces fully connect, and then pull off the paper and flip it around quickly but carefully to make sure the paint doesn't run. And then put it down to dry on your drop cloth.

 photo aaDSC_0518.jpg

It will be a little wet at first, but it dries quickly.

 photo aDSC_0522-1.jpg

Now, don't swirl again - the new pattern will be soft and completely lovely, so just get your next paper ready and dip it. I got at least three dips from each round of pouring. And I usually ended up liking the second or third papers the very best. The paint will be thinner and more dreamy-looking.

 photo aaDSC_0521.jpg

 photo aDSC_0531.jpg

I ended up doing three or four rounds of paint pouring (I'm swimming in marbled paper if anyone wants any:) ), but these were the ones I like the best for the switch/wall plate application. I had to pick ones that had more interesting perimeters since the middle was going to get cut out for the switches.

 photo aDSC_0535.jpg

 photo DSC_0543-1.jpg

 photo aaDSC_0548.jpg

 photo aDSC_0551-1.jpg

I ended up going with a darker pattern because I liked how it looked with the wall color.

The customizable wall plate comes with a paper template that I used to trace out the hole for the switch.

 photo aDSC_0569.jpg

You just remove the sticker on the plate to expose the adhesive and then place your art paper.

 photo aDSC_0579.jpg

And then I used a razor blade to make the edges fit perfectly. 

 photo aaDSC_0584.jpg

I really love how the wall plate turned out. It looks so pretty with the orange chairs. :)

 photo aDSC_0573.jpg

The finish on the papered plate is actually pretty solid because nail polish is an enamel (and this was a first-dip paper - so there's lots of polish on there), but I might paint on a clear coat later if I feel like it needs it.

 photo aDSC_0431.jpg

Now, go enter the give away and make your own marbled wall plates! :)