Tampilkan postingan dengan label Cleaning. Tampilkan semua postingan

A Surprise in the Vestibule

The other day I had our shop-vac out (P.S. shop-vacs are life-changing) and was cleaning up the common area in the main front door of the brownstone, which we share with our upstairs neighbors. There's this really nasty, unfortunate commercial grade carpet everywhere in there and it's dark blue-gray so it shows every spec of dust, every sliver of newspaper. I pretty much hate it.

 photo IMG_2440.jpg

Since my shopvac is so shockingly powerful, I kept accidentally sucking and pulling up the carpet piece on the vestibule floor. Suddenly I saw a flash of black and white tile under the carpet. 

 photo IMG_2442.jpg

I felt like Charlie when he saw the little twinkle of the golden ticket so he ripped away the chocolate bar wrapper as fast as possible. That old carpet was up quicker than you can say "carrara marble with soapstone."

 photo IMG_2448.jpg

 photo IMG_2453.jpg

After vacuuming and wiping up decades of dirt, I couldn't have been happier about my surprise discovery. It's definitely not perfect, condition-wise, but I love this 106 year-old original floor. Such character!

 photo IMG_2468.jpg

And isn't this simple pattern a great design? Gracie says "It looks like chocolate chip ice cream or a Queen's fur coat." Love that girl and the way she sees the world.

 photo IMG_2477.jpg

Cleaning Up My Recycling Closet

In the past, I've always tried to recycle, but that usually meant just sorting the obvious things - plastic bottles and cardboard boxes. We were never all that diligent about sorting... until we moved to Brooklyn Heights. People really care about recycling here (including and maybe especially the people that live next to us).  :) There might have been a situation where they tattled on us for not sorting good enough (whoopsies).

I have to say though, I'm actually sort of grateful we got busted. We were pushed to figure out a solution where we carved out some space to quickly and easily sort out our plastics, glass and paper. And now, recycling is a breeze, truly, and I feel less guilt-ridden. Like we are doing our part.

Here's how we did it:


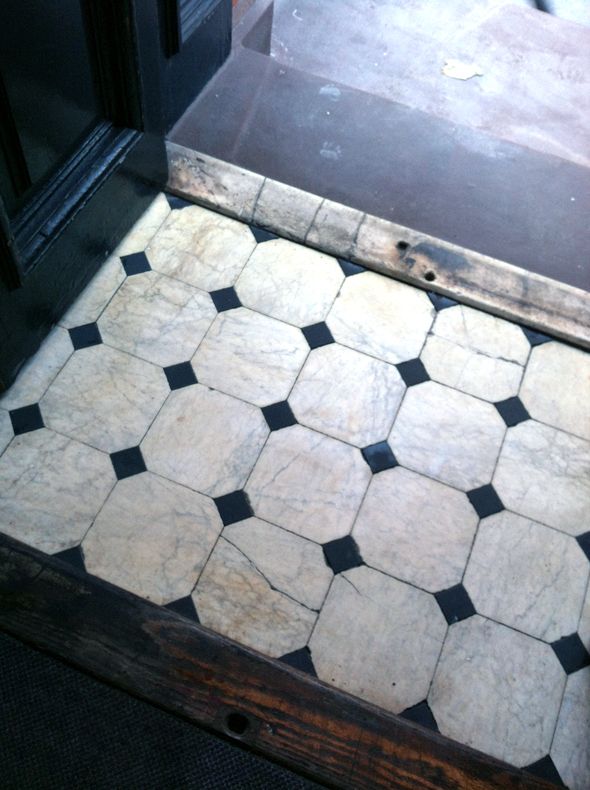
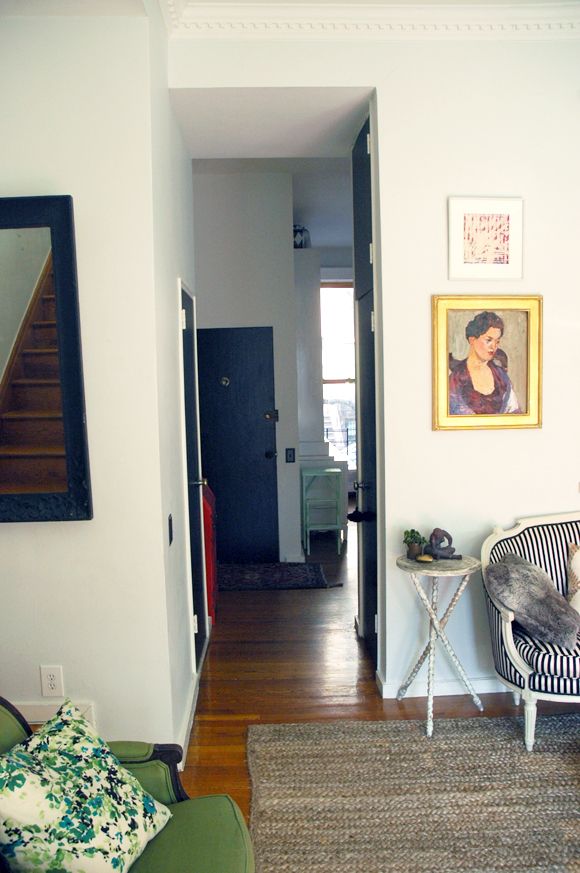
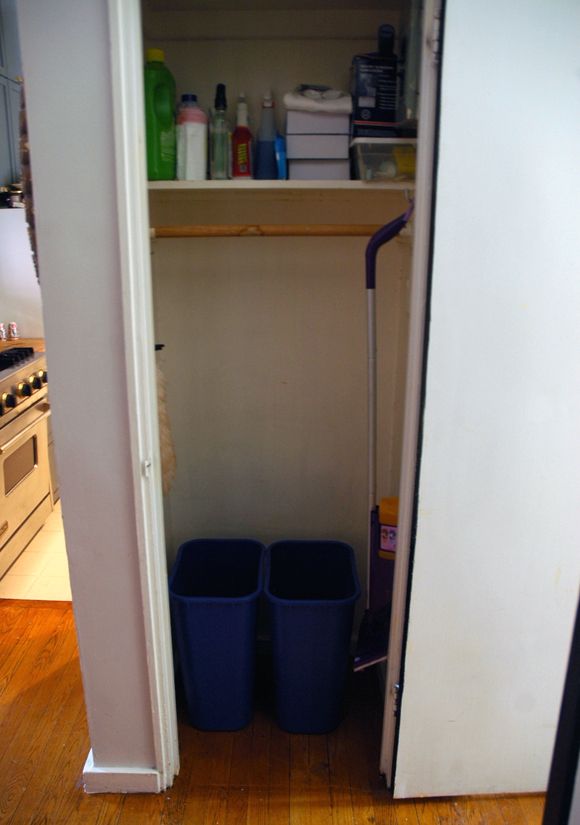
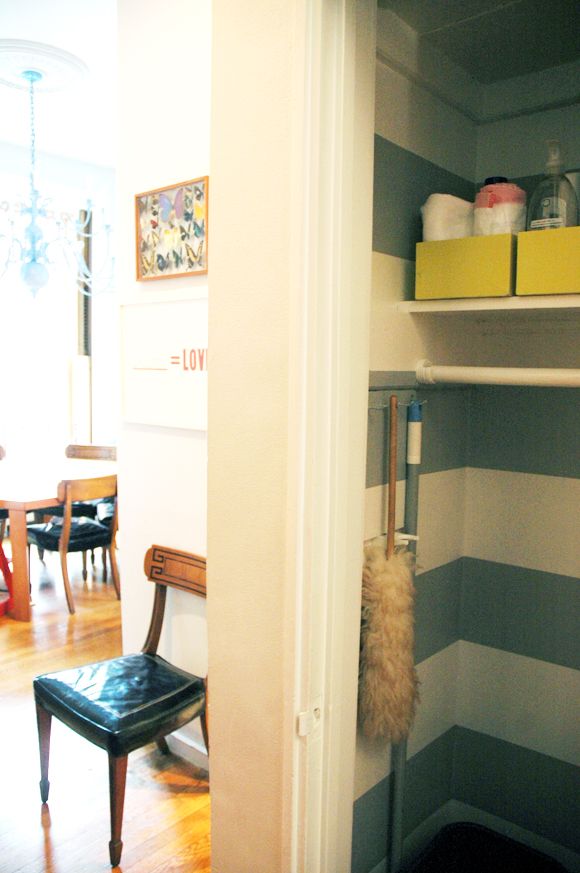
We have a little closet right by the front door on the parlor level. It's across from the powder bath and around the corner from the kitchen. I think it was meant to be a coat closet or maybe even a pantry at one time. Mostly it was just disgusting. (seriously)


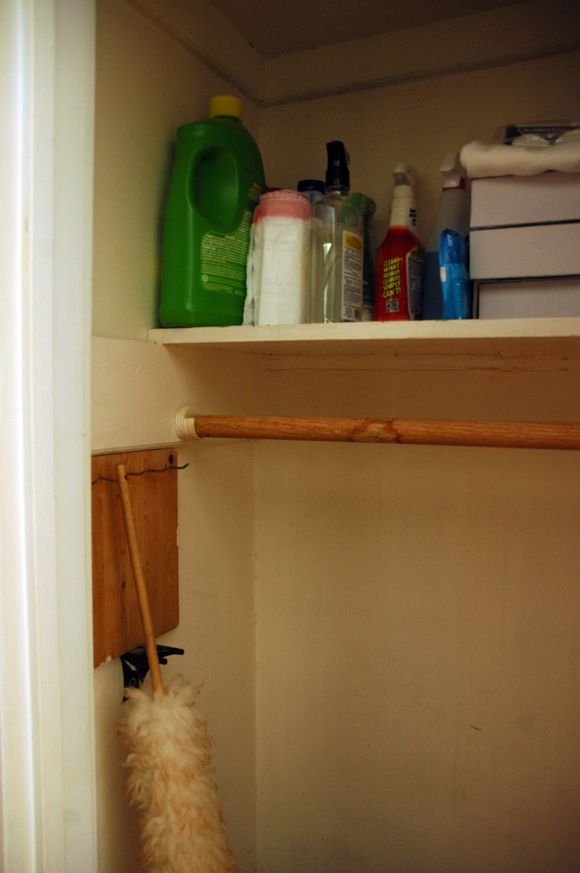
The painters the landlord hired to paint the brownstone before we moved in did a pretty shoddy job. They didn't paint the insides of 
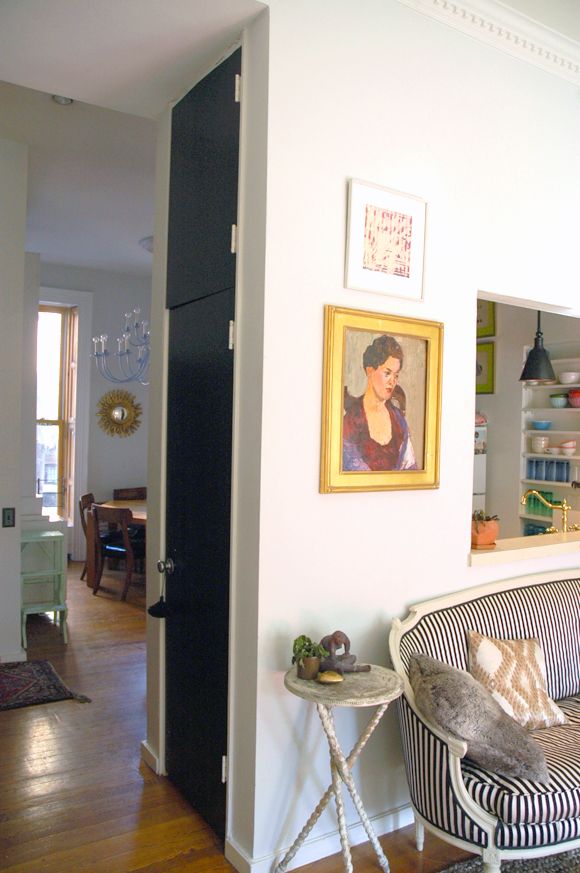
any of the closets. I mean, what? Weird. So slowly I've been tackling one closet at a time to fix the situation, but I hadn't had a chance to do the recycling closet until recently. See that gross cream color? That was the color of the entire house before we moved in and it just looked dirty. (doesn't the Cabbage White look much more fresh?)


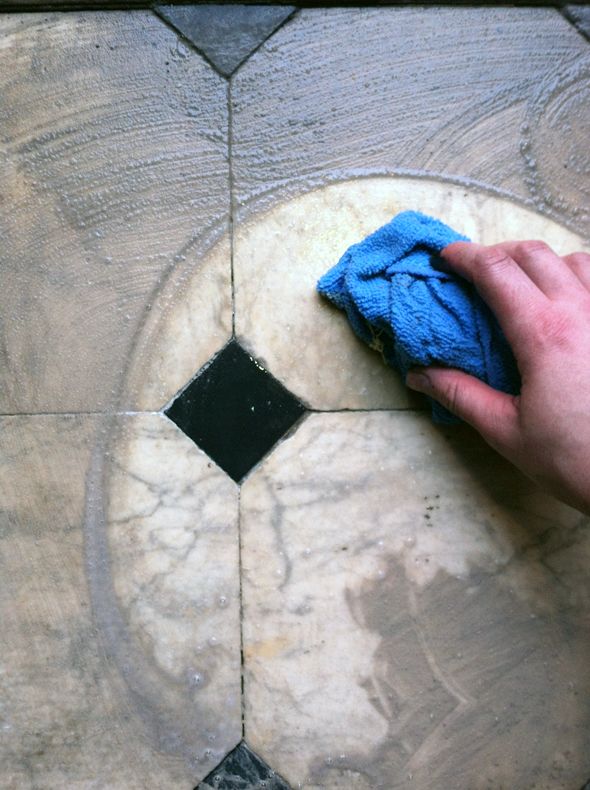
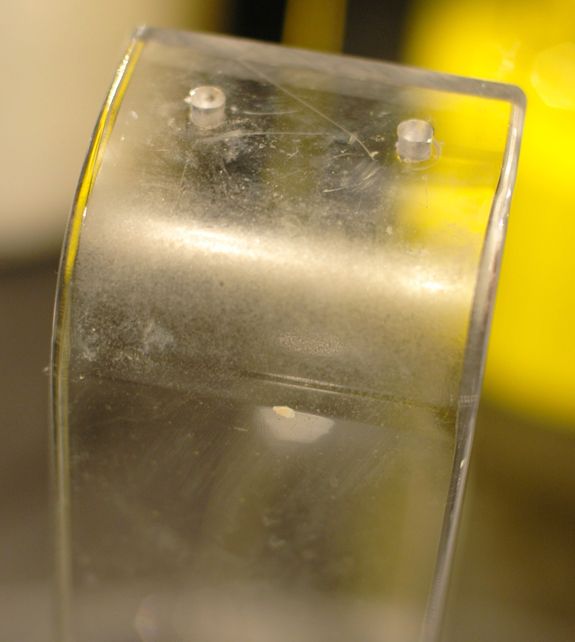
Gross. I'm am totally disgusted by the state of this closet and I live here. Apologies. No wonder I was no good at recycling! Who would want to open the door for this view:


30+ years of cream paint in a garbage closet is bound to look bad, even after a few scrubbings! So a new coat of paint in the closet was added to the to-do list. But probably the biggest issue we've had with the recycling situation is the girls had trouble figuring out how to sort items in the identical bins we had in the closet.


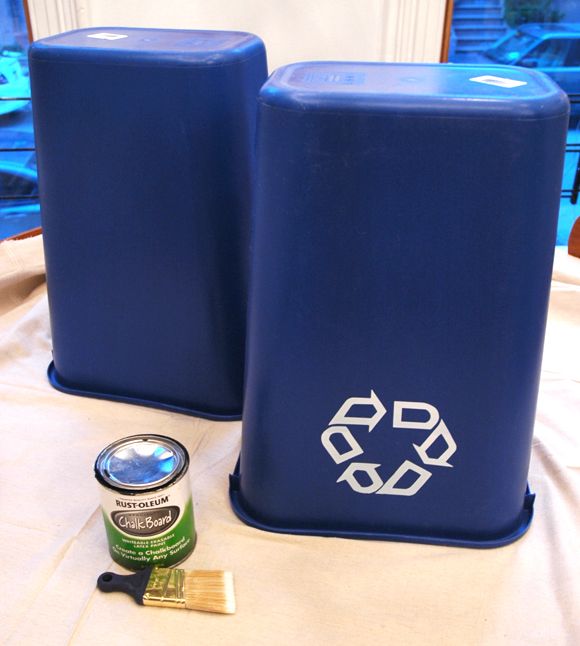
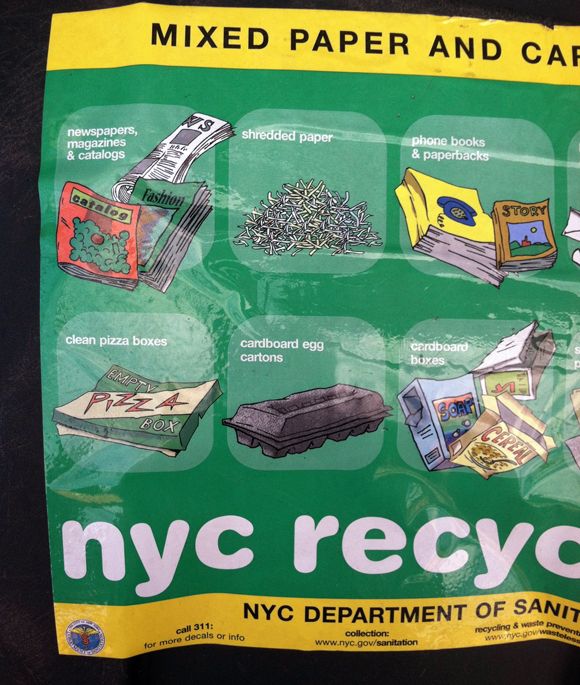
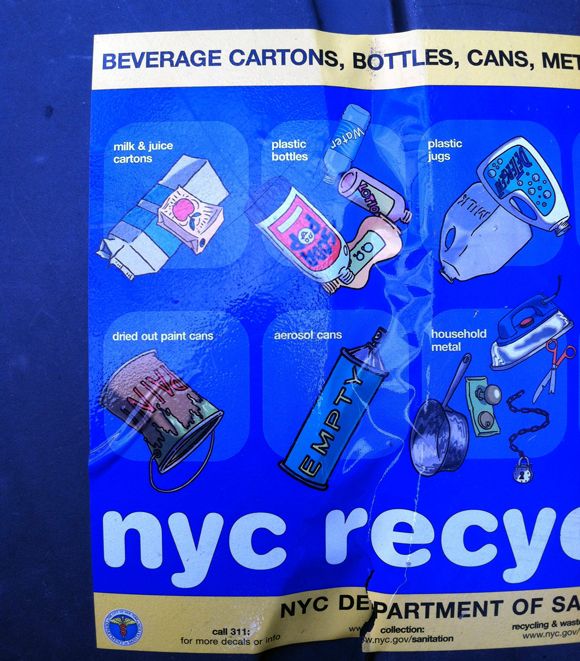
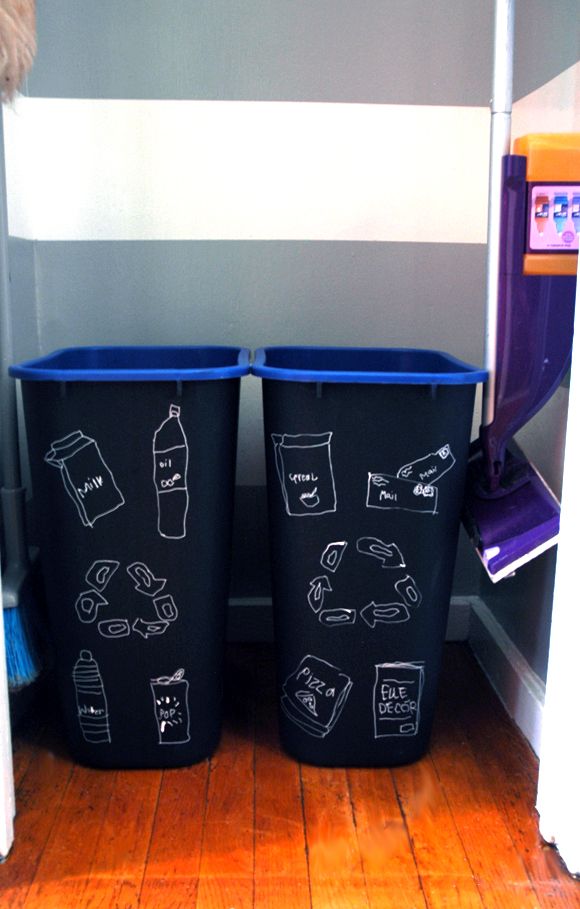
So on the fly I primed and painted just the outsides of the bins with chalkboard paint. Then I went outside to the recycling bins in front of our house and snapped photos of the two sorting guides.


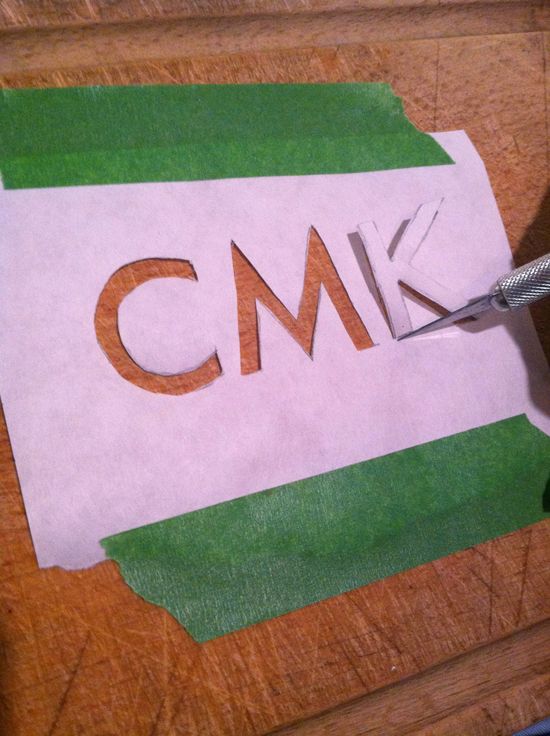
I'd been dying to put my chalkboard pen to use again (they are so cool - totally recommend picking one up at an art supply store or you can 
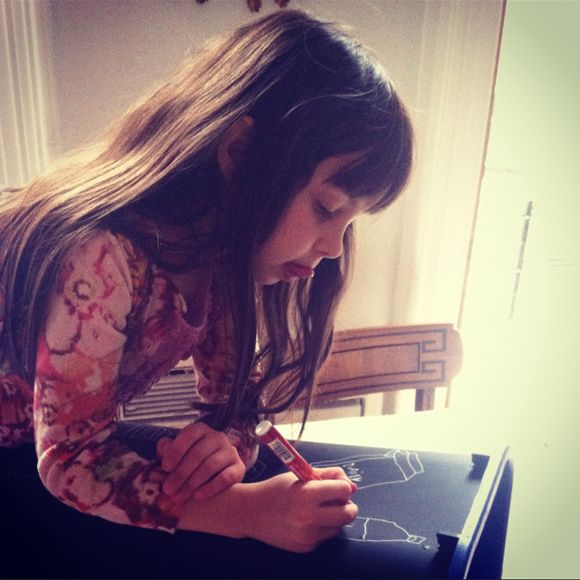
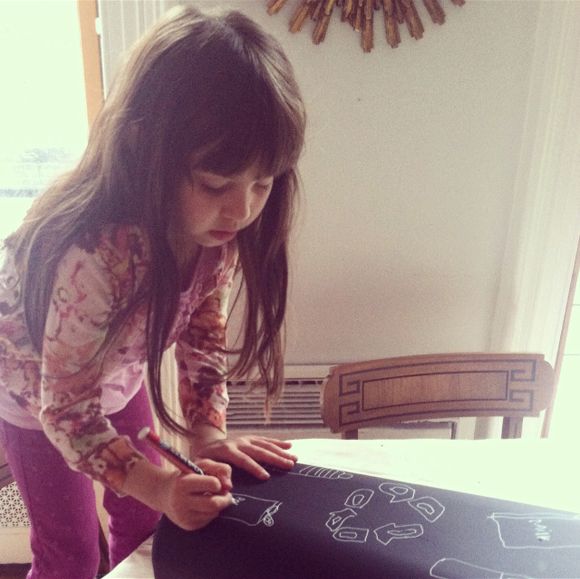
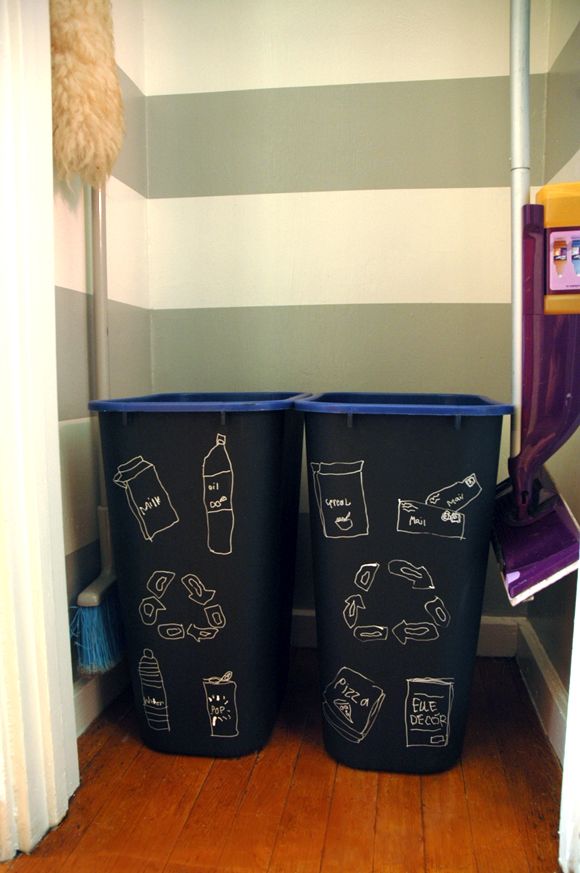
buy one here). Gracie and I chose a couple of items to display on each of the bins and talked about layout and then she got to work with the chalkboard pen.


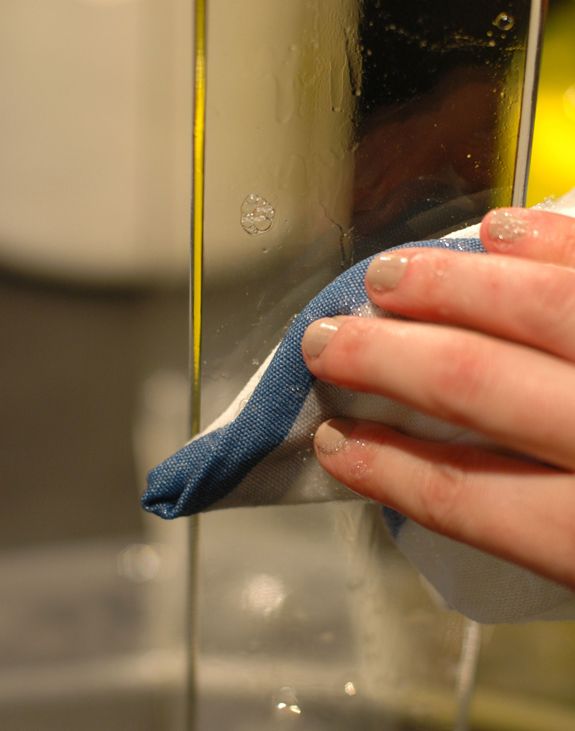
Claire was a little bummed she missed out on the illustrating action this time, but that's the good news about chalkboard (pen) recycling bins - the pen wipes off with a wet rag, so she can have a turn as often as she likes. Whatever helps them to learn their sorting, right? :)


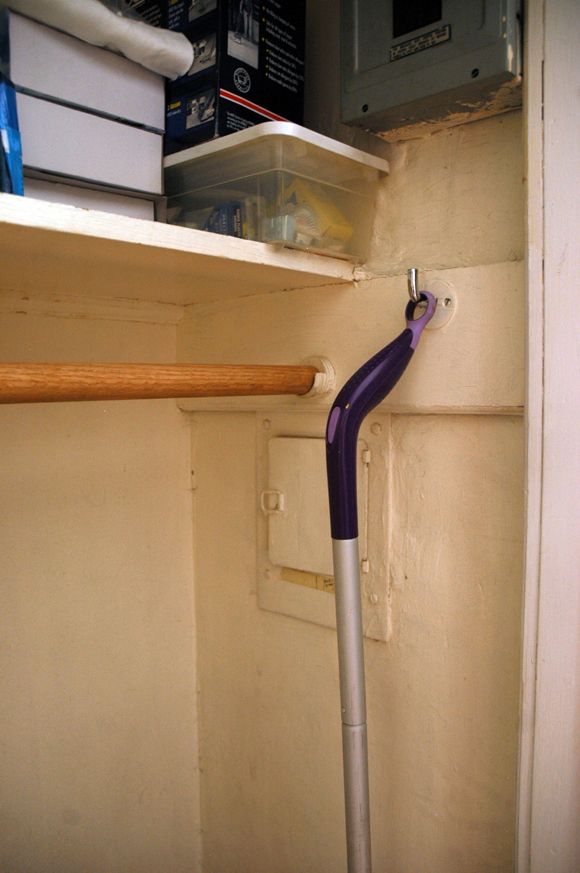
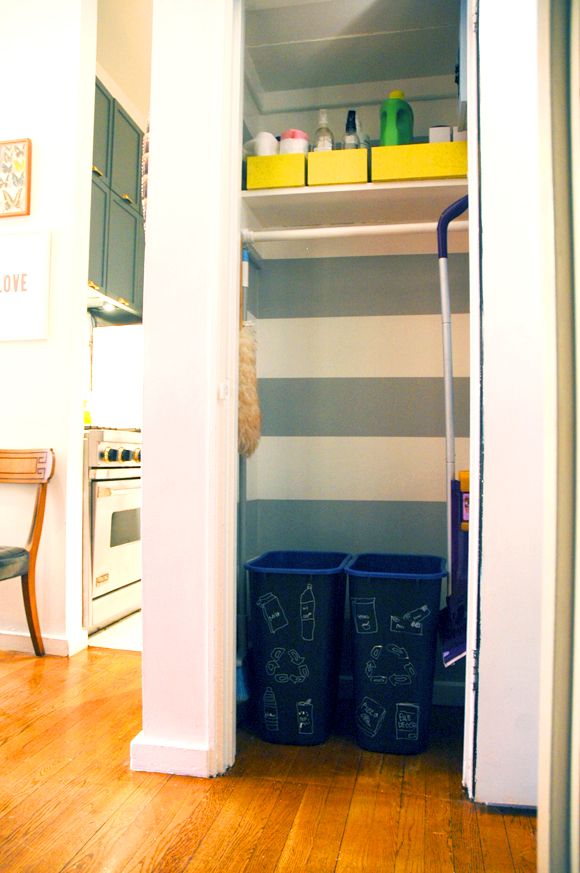
Also, don't the walls look about a million times better? They got a fresh coat of white paint, which  was a huge improvement on its own, but horizontal stripes make every space more fun. Especially in tiny little secret spaces, where the stripes surprise you every time you need the broom or go to throw away an empty olive oil bottle.


And I'm happy to report that the mini-makeover and the new recycling bins have totally improved our recycling habits, and by a lot. The girls are just about pro-level recyclers now and it's so cool to see them excitedly taking ownership over what used to be a chore for us all.


I'd love to hear what you guys do to make recycling (or anything to live a more green lifestyle) an easy habit for you and your family. I'm working on adding more eco-friendly cleaning products into my housekeeping routine. My sister in law is a budgeting super-star and an all-around phenomenal housekeeper. When I mentioned this post to her, she says she uses and completely loves Green Works, and I'm excited to take her word for it and try it myself.


This post is sponsored by Green Works. You don't have to compromise to be clean when you use hard working, plant-based cleaners by The Clorox Company.

Check out this quick video to learn more. :)

How to Clean Lucite

I picked up this vintage lucite stool at the flea market a week or two ago and this weekend I had a minute to reupholster the seat and clean up the base.


I was so excited to use this laminated fabric I bought at Purl Soho a while back. You can find lots of laminated fabrics online. They're great to use on dining chairs and play room chairs, or seating in the bathroom.


I took off the old, dingy fabric and used the old fabric as a pattern to cut out the laminated fabric. This way it was easy to choose where I wanted to center the fabric on the pattern.


Laminated fabric, like vinyl, is a little tricky to work with around corners and round edges because it is so thick. Don't be afraid to pull tightly and try hard to keep the folds on the underside of the seat, rather than along the edge.


Before I put the new seat on, I cleaned the acrylic frame. There's definitnely a right and a wrong way to clean lucite. NEVER use Windex!! It deteriorates the acrylic slightly over time and makes it look cloudy instead of bright and clear.


The best way to clean lucite is simply warm soapy water and a soft cloth.


Then just wipe it down with a dry cloth and you're all done. I've seen acrylic polish solutions out there but I've never used them before.


So happy to have a new little waterproof stool in our bathroom for sitting on while I bathe the girls!


PS Here's the post were I painted the little blue vanity. And remember Emily's laminated fabric bench in her dining room? Have you found a great use or source for laminated fabric?

The Bean Jar Method (and a freezer paper DIY!)


This post is sponsored by Pine-Sol®. Clean & Disinfect with Pine-Sol: The Powerful Scent of Clean.

I've been on a bit of a cleaning post kick lately, so I thought we could talk about kids and chores. Did you get an allowance growing up? I've learned that kids need incentives in their lives (well, don't we all?). We've been using beans as an incentive/accountability tool for a couple months now and I love it.

We keep dried pinto beans in this old jar on the counter and every night the girls pull out their bean baggies and we square away our accounts.


The general idea is every bean is worth a penny. Every chore the girls do each day is worth a bean, and we also give and take away beans for their actions. Like fighting/yelling/not sharing results in the loss of a bean or two. Sometimes I'm feeling generous and will offer them 10 beans each to make the trip to the grocery store easy! It works every time. :)

The girls count their beans all the time (another bonus! Math practice!) and when they have earned a few dollars, we go to the toy store (i.e. heaven on earth). It's so fun to see that the new toys they earned and budgeted for mean more to them. I feel like they have a better understanding of and appreciation for money now.

We've been keeping their beans just in little baggies, but I'm committed to the program now, so we upgraded to these cheapie little coin purses from H&M that I personalized with their monograms.


It's a super easy DIY. I just typed their initials into Word (Futura font at 165 pxls) and lightly taped a small piece of freezer paper on to my computer screen. I also bumped up the brightness on my screen so there was lots of contrast.


I softly traced the edges of the letters and then cut the letters out on a cutting board with an Xacto knife. Here's a little tip for cutting anything out with an Xacto knife - pull, don't push the blade. You'll have much more control of your line if you're pulling down all the time, so move your project around so that you're always pulling the blade down.


Next, you just layer a dish towel on top of the freezer paper (wax side down on the purse) and iron until the freezer paper is secured on the purse.


I used a regular paint brush and some gold latex paint to dab on the letters. I did about three coats of paint with a bit of drying time between each coat. Try hard to keep the paint smooth and even, but don't push the paint down too hard. It will get in under the edges of the paper if you're too agressive.


While the third paint layer was still wet I peeled off the freezer paper.


Ta-da! Personalized bean purse! I also switched out the old zipper pull for a mini gold/black leather tassle I whipped up while the last coat of paint was drying.


The girls love our Bean Jar method - it's sort of incredible actually how well they have responded to it! - and they were extra excited when we worked on these purses together. It makes the whole idea more special to them. Claire sleeps with her bean purse under her pillow. And I think they're so cute I might actually make one for myself. Lipstick holder maybe?

Do you have a method for getting your children to happily help around the house?

My Cleaning Process and a $500 Give Away!

This post is sponsored by the makers of Clorox® Disinfecting Wipes, the quick and easy way to clean and disinfect your home!


I get a lot of emails asking about my cleaning schedule after I wrote about my typical day on Joanna's blog. I truly do not love cleaning, but I know that I'm so much happier with life when my house is clean. Don't you feel the same way?

A couple years ago, right after I had Claire and when Gracie was old enough to really start doing some damage, I was feeling like I would never have a clean house again. (I also thought there was a good chance I would never get to sleep through the night again. :) good times) I was picking up the house all week long it felt like, and then I would do all my laundry and deep cleaning on the weekends. That meant my Saturday was completely gone and that the house was totally dirty again by Monday morning. Stresses me out just thinking about it.

Then one time I was visiting a friend's house who had three rambunctious toddler boys. I walked into her house for the first time and my jaw dropped. Her house was CLEAN. Like, I'm not talking about tidy - tidy is not always possible during the day with kids, but it was clean. She is one of those amazing mothers who is really active with her kids, so I knew she didn't spend all day neglecting her boys to clean the house. I was surprised and a little jealous of her sparkly floors so I begged her to share her secret. She laughed and said she kept a chore chart, which I thought was hilarious! What grown woman has a chore chart?! Suddenly I had to have one!

I copied her chart and have been using a slightly tweaked version ever since. I can't say that I'm always following through here, but when I do, my house is practically spotless and best of all, I don't feel like I am cleaning all the time - which honestly was the hardest part for me of being a stay at home mom in the early years.

It looks like a lot, but I think even on the most intense days I'm only spending 30 or 40 minutes in aggregate cleaning (though we live in a 1500 sq ft apartment, so your home might require a little more time). I've listed the chart here below, and here's a simple printable version.


So the basic idea is this: there are daily chores - easy things you should take care of almost habitually in the morning and in the night, and then there is a single special chore of the day. Most of these chores end up getting done once a week (for example, every Monday I do a deep vacuuming of all our rugs. I took only one interior design class in college and I only remember a handful of things from that class. One of them was a tangential comment my professor made about vacuuming. She said that you should go over the same area on a rug SEVEN times super slowly to get it clean. Isn't that just nuts? I don't do that, but I do try to do a slow vacuuming on Mondays.). Friday though is the swing day, where you rotate in chores that need to be done less frequently, like scrubbing the microwave.

I'll walk you through today's cleaning schedule. It's Tuesday. I wake up and make our bed. It won't get done unless I make it as soon as I get up. The girls are getting good about making their beds too. After I finish getting ready I wipe down the bathroom counters and the sink. While I'm making the kids breakfast I empty out the dishwasher.

Then life happens and the house sort of falls apart during the day.

Then at night the girls help me clear the table and load the dishwasher. Michael does the trashes. Once the kids are in bed I quickly sweep or vacuum the kitchen and dining room and I might pop into the living room too. I keep a wet rag with me and as I go I'll spot clean the floor. My goal is fast and furious cleaning!


And here's where my baskets come into play. I keep them everywhere. I really love this basket that I posted about yesterday because it is super sturdy and holds its shape. I zip through my house every night with this basket, throwing in every misplaced item, then going back to each room once and put the things back where they belong. It takes me just a few minutes to pick up a day's worth of clutter this way. No more running back and forth and back and forth from room to room putting things away. Try the basket method - you'll never go back!

Plus - another bonus of having your pretty baskets out in every room? If you have a friend coming over right away, you can just corral everything in the basket super fast and no one's the wiser.


Once the house has been de-cluttered, I do my chore of the day (today was cleaning the mirrors and windows), and then I'm done! It might sound like a lot, but I promise it isn't. When I'm consistent with this schedule, I never have to do one of those marathon cleaning days to get back to ground zero. The house never has a chance to get really dirty, so the cleaning never feels like a true chore. It feels easy and, dare I say it? Pleasant?


So that's my approach to cleaning in a nutshell. I know we all have our special tricks, and I'd LOVE to hear yours!

Today's super-sized give away is $350 to Target AND $150 to the Container Store and all you have to do to enter is leave a comment sharing your favorite cleaning or organization tip. I can't wait to see what you guys do to keep your spaces sparkling! Any other crazies out there with a chore chart? :)

Contest ends March 22. Winner will be announced on the 23rd. Contest rules can be read in full here. Good luck!!