Tampilkan postingan dengan label Loft Update. Tampilkan semua postingan

Loft Living: The Good, the Bad and the Ugly


Today's content is presented by smartwater, live a life well hydrated. Click here to learn more.

You know what's a really weird experience? Walking through your home for the last time. Saying goodbye to the empty loft late Sunday night was a surprisingly hard moment for me. In a lot of ways the space was a challenge to live in, so I wasn't expecting to feel that nostalgic as I stood there taking a million pictures of our old home.


The same day we were shown the loft two years ago, we also toured a really lovely two-bedroom in Battery Park City. It was in a nice luxury building with all sorts of amenities. The apartment was a good enough size, and the finishes were really nice, but the real selling point was a heart-stopping view of the Hudson River and the Statue of Liberty.

We went back and forth on which of the two apartments to rent. Each place represented two very different sets of trade offs. They were the opposites of each other in almost every way. What would life have been like there on the river?


When it came down to it, we decided open-concept living was a better fit for our family. It just felt more "us." I wanted to live, eat, work, play all in the same space. It felt like a great opportunity to get in a lot of family time. And I think we actually achieved some of that dream over the two years we lived in our big white box. I know I'll miss some of that. Some of the other things... not so much. Namely, the fashion photographer neighbor who would play loud house music for his shoots that would often last until 3 or 4 in the morning (!). Also, the less-than-awesome natural light situation that made it hard to photograph the windowless bedrooms and that probably gave us all SADD in the winter. Also...


Did I ever mention that we didn't have walls that went all the way up to the ceiling? A law was passed the month we signed the lease that made landlords super liable for accidents involving pressurized walls (commonly used to divide up apartment spaces here in New York). So when we signed the lease, we thought we were going to be able to divide up the space with semi-permanent, insulated walls, and that ended up not being the case. We were too close to moving in when we heard the news, so we just had to roll with it and make eight-foot tall 'bookshelf walls' instead. We stacked old trunks on top of the shelves to fill the two-foot gap and give us more privacy, but I think you can figure out on your own that the wall situation was not super ideal.


And now our house in Brooklyn has very separate spaces for separate functions, which I'm thinking might feel a little lonely at first! But, the exciting news is all of us have real rooms, with real walls. We have more than one bathroom (hallelujah!). And my office is two full floors away from my kids room (which will make business calls sound a lot more professional than they've been the last two years! ha!).


In my experiences working with clients in all sorts of home and apartments, and also with all the places I've lived (my move-count is up to 22!), I've had the chance to think a lot about how to make spaces work despite/while embracing challenges. The reality is, we can never have it all and there are always tradeoffs. I wonder how soon I'll miss the tradeoffs that were unique to the loft.


How many times have you moved in your life? (It's actually a fun exercise - try it! Can anyone beat my 22?) Also, am I the only one that slowly walks through the empty house after packing up, saying goodbye to each room? So many memories (sniff, sniff). But here's to many new ones!

Toy Box Redo


My approach to toy organization is pretty simple compared to the systems some of my super organized friends have. Books go on the shelf, small toys go in the fabric bins and large toys go in the big toy box. It's been our system for ages and it works for us.

The first toy box we had was a clearance aisle find from TJ Maxx or Marshalls and it lasted us several years then finally kicked the bucket during the move to NYC (like, it broke in the truck I think). Then oddly enough the day we moved in, our neighbor across the hall was hauling this gigantic chinese chest out to the curb and I did the awkward - 'Hi nice to meet you! What's that? what are you doing with it? So you don't want it any more?' conversation. What a lousy first impression right? #embarrassing

Also embarrassing is that the chest has seen no improvements in almost two years other than an occasional wipe down. I know it doesn't look it, but it is super clean, just very old and beat up.


I've been pumping out a couple projects for the girls room this week though, so the toy box finally got some attention yesterday. I wiped it down again, filled the (many) cracks with wood filler, and then painted it with Sherwin Williams' In the Pink.


I finished the first coat of paint, stood back and had a weird deja vu moment. Then I suddenly remembered this image from Sibella Court/Vogue Living:


What the WHAT with that box color! It's so weird how ideas seep into our subconscious!

Since the toy box lid is open 99% of the time, I wanted to do something fun with the lining of the trunk. I thought about just painting it a contrasting color, but I had a bunch of this chartruese linen on hand and I thought it looked so pretty with the pink. I got both the linen and the orange/magenta braid trim at SAS in Phoenix, AZ (one of the greatest bargain trim stores EVER - I practically clean them out each time we visit home).


Using my trusty staple gun, I just ran a line of straight staples along the top of the fabric inside the trunk, then along the left side, then I pulled tight and stapled down the right side. Then I pulled really tight and stapled along the bottom. (basically my approach to every upholstery project is the same)


It's okay if your lines aren't perfect - that's what the trim is for. The goal here is tight fabric.


Once I finished the inside of the box, I did the three panel insets in the top of the lid too.


Then I used a little Magnatac to glue the trim on top of the staples. Magnatac is super-strength, so I think it will hold up well, but I'm also thinking about putting in a few small nails to keep the trim extra secure.


I love the way the toy box looks opened and closed now. I'm so sad I let this project go undone for so long.


I'm giving the glue a night to fully dry, so the girls will be able to enjoy another morning of toys all over the dining room floor. I guess this was a good project for spring break :)

I changed my mind

So remember when I bought this mirror? And had plans to turn it into a chalkboard?


Well, I totally didn't get around to it and I'm so glad! I moved the coral/black bookshelf to the back of our apartment and scooted the skirted console over to that wall. Once the sconces were over in the gallery wall, the old mirror felt really small. On a whim I pulled out this mirror that was intended to be a chalkboard, and it was true love. The mirror fits the wall perfectly and looks great in the space!


So the moral of the story is sometimes procrastination pays off.

Jazzing Up Cheap Chairs

I am not a fan of cheap upholstery. My philosophy is buy the best upholstery your budget can afford and then DIY/rework/save up for the other items in a room. If you know how to upholster, vintage furniture is a great route. They just don't make things like they used to, so nowadays you really get what you pay for when it comes to new upholstery.


I don't know what I was thinking then a while back when I ordered some cheap chairs on a whim. I had been shopping for a new pair of chairs for a long time, but everything I liked was at least $1500 per chair with my discount (like the Odette chairs below from MGBW). We're thinking of moving in September so it just didn't make sense to shell out thousands for chairs right now. Plus, I didn't want to wait two months to get them.


Then last month we hosted five dinner parties and I was desperate for chairs. I looked on Overstock and Wayfair when I was up against a wall and saw these chairs. They were on sale for $275 each and I had a 25% coupon code and there was free shipping, so I went ahead and just bought them. I liked the shape of the arms (they sort of reminded me a little bit of the Odette chairs) and I liked the nail head trim. And they came in just two days.

When they arrived I was a bit disappointed. They weren't as nice and crisp looking as the photos and they just felt blah. Rather than deal with returning them (and since we *really* needed extra seating), I decided to jazz the chairs up.


I went to my local fabric store (JEM) and bought six yards of black twill tape that was about the same width of the upholstery nail.


I used these handy staple removers to take out all the old upholstery nails


I actually thought the brushed nickel was pretty and would have looked great with the black twill tape, but I have some polished nickel lighting nearby and it was all looking a little matchy-matchy. So I bought some brass nails and brass caster cups for the front feet.


To get started with the new trim job, I just rolled the end of the twill tape under:


And used the old nail hole to make things really easy.


The only real trick to keep in mind is to pull the ribbon tight so there is no gaping between the nails. I also went back and tapped everything in with an upholstery hammer.


To keep the corners smooth, I just folded the ribbon in under itself and put the nail into the folds.


I added brass caster cups from Lee Valley but the legs ended up being a little wider than I expected so I had to cut away some of the wood so the casters would fit right. It was a pain! Totally recommend double checking your dimensions before adding casters!


Here's the front view of the finished chairs. It's not a drastic change, but I think the trim and casters help the chairs look a little less cheap.


I like them from the side best.


Here's a wider shot of the space. In case you need a refresher here's a link to our floor plan.


They've grown on me. I like the shape of the arms a lot and I think the new contrasting trim highlights the shape. So even though I broke my own rule about not wasting money on cheap upholstery, I think I'm pretty happy with these chairs for now and they fit in well with the mix of furniture styles I have in the space.

Buttery Soft Camel Leather

Today got away from me somehow, but I wanted to pop in to say the Chesterfield arrived! It's lovely and so comfortable and makes me super excited for those 'we're-staying-in-our-apartment-longer-than-expected' changes. Can't wait to share.


DIY Skirted Console


This post is sponsored by Glad. We’re taking small steps to do our part and want to help you waste less too. Visit GLAD.com for more information.

I'm so excited to finally share this tutorial with you! This skirted table is my fourth or fifth of these DIYs, between my house and my client projects (remember the original one here?), but somehow I haven't managed to put together a tutorial until now. The steps are simple and completely NO-SEW! Ready to jump in?


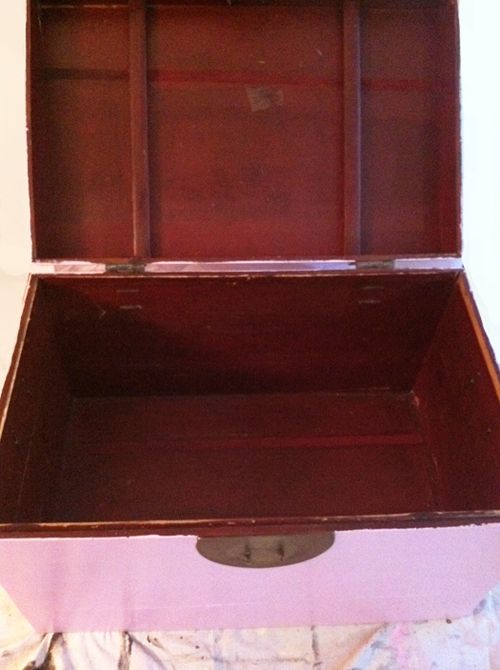
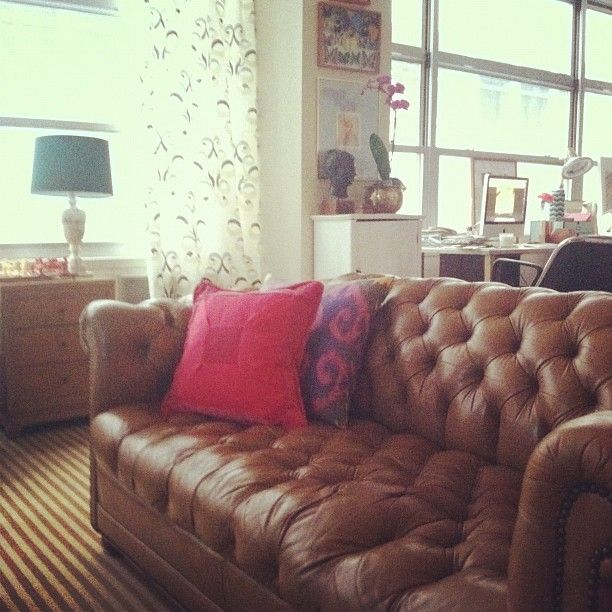
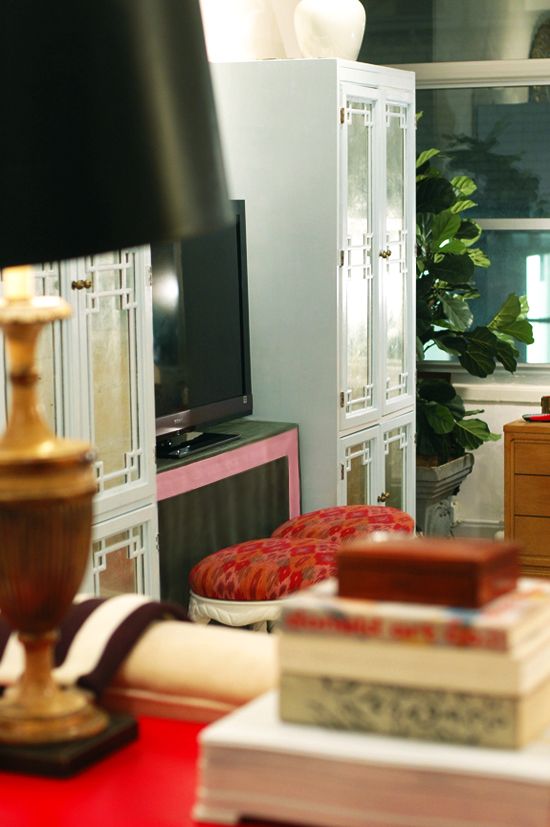
After we moved to New York, I was looking everywhere for a bookshelf or console table to use as the base for a skirted console for our TV to go between the two fretwork cabinets. I checked Craigslist for a couple weeks with no luck, and just as I was about to cave and buy something new, Michael came to the rescue. One of our neighbors left this vintage bookshelf in our building's recycling room. Not only were the dimensions *perfect* but I was glad to save this sturdy little piece of furniture and give it a new life.


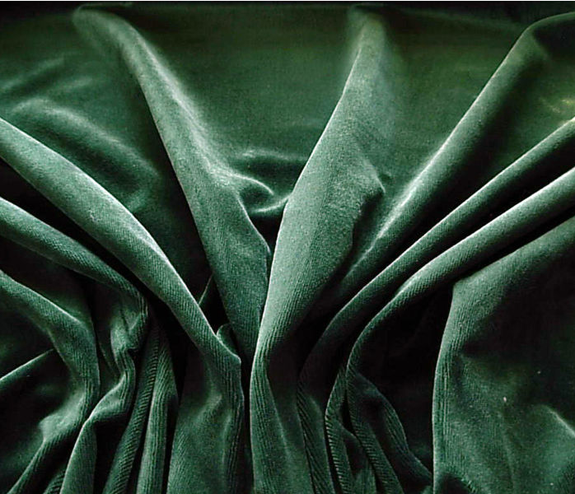
I've been trying to add some still-bright-but-less-primary colors to my living room. I told my friend that I was buying a forest green velvet for my console and some burgundy linen for my settee and she gave me the most hilarious look and goes "WHAT.THE.90s!!!!!! Gross!!!!" :)

Look how pretty the green is though! Mossy and muddy with a tiny bit of blue undertone. I lucked out and got it on eBay for $4/yd.


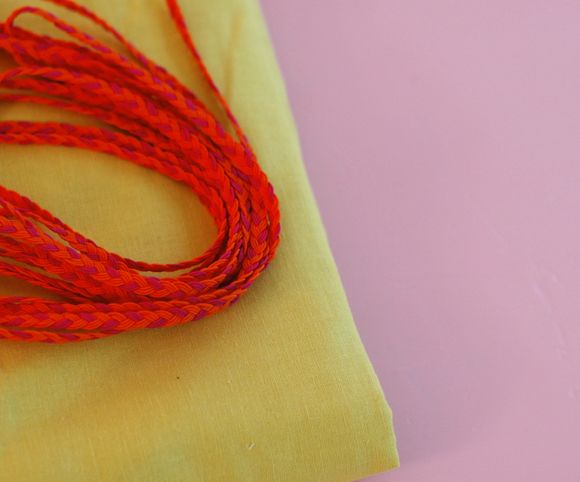
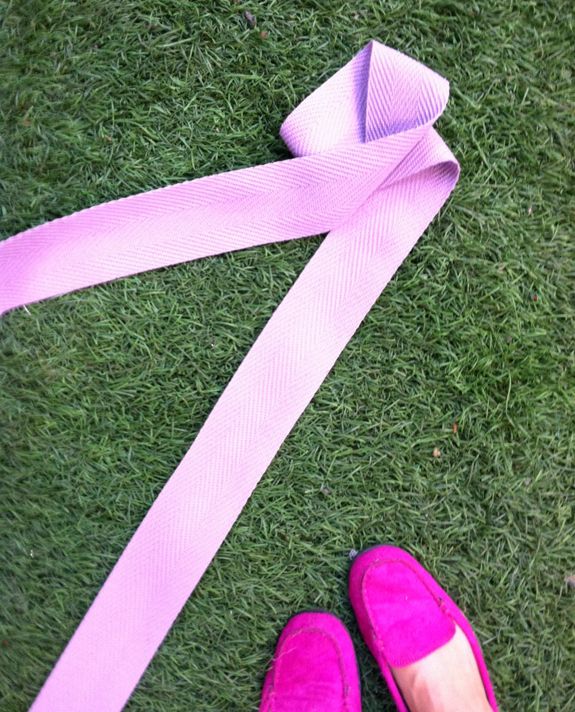
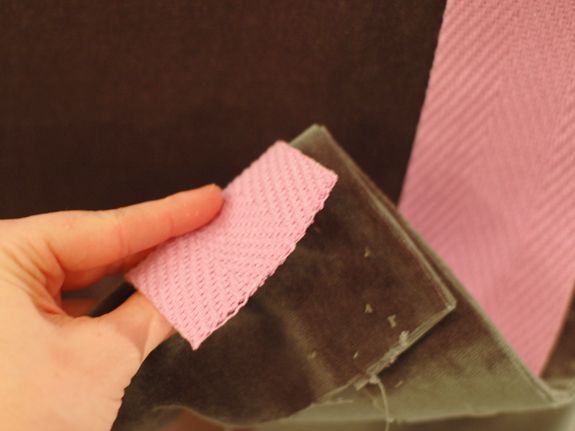
Before the fabric arrived, I went trim shopping at JEM in Tribeca (they have a killer selection of vintage trimmings) and found this really pretty lilac herringbone trim. I wasn't looking for something purple at all, but I had just finished reading Katie Ridder's new book Rooms (sooooo good, btw), so lavender was on the brain and the color drew me in.


And then for the first time in my life, I was thrilled to see an astroturf rug. JEM has a green grass rug that seemed close to my velvet that was being shipped. I loved the colors together! Sold.


I was still happy with the color combo when the velvet arrived and couldn't wait to get started. I wiped the recycled bookshelf down with a bleach-water solution and got my fabric, trim and supplies ready...

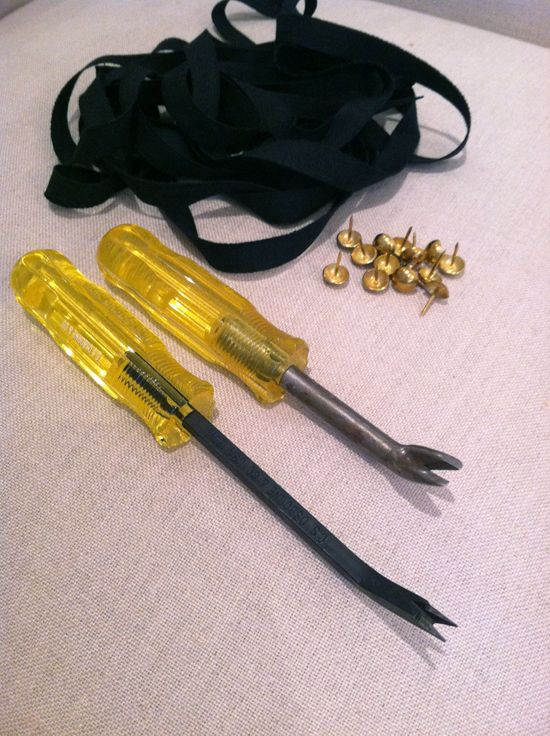
Here's what you'll need for a no-sew skirted console:
Iron
Tape measure
Tailor's chalk
Scissors
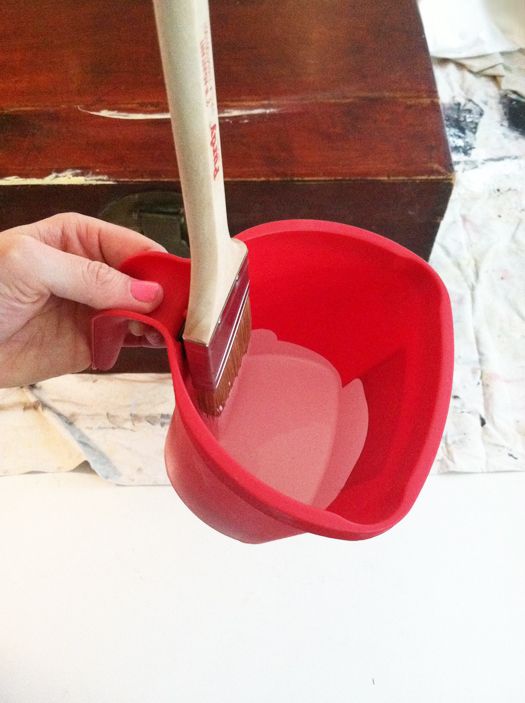
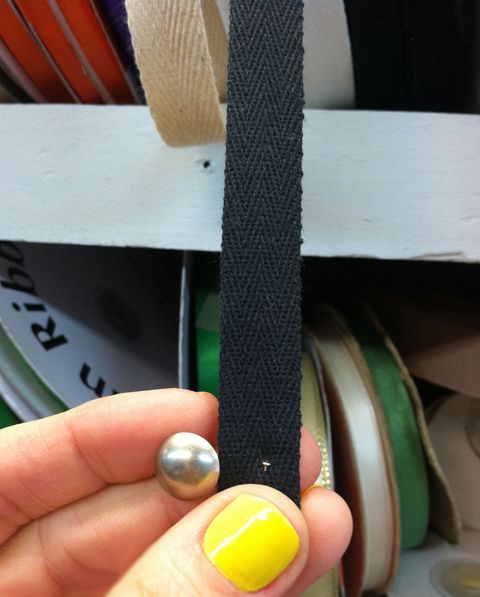
Magnatac or other strong fabric glue
Staple gun and staples

STEP 1 - MEASURING and CUTTING
Measure your bookshelf/console and come up with a game plan with your measurements. I added 2" of hem to every side and 3" of hem to every BOTTOM (no hems on the top!!).


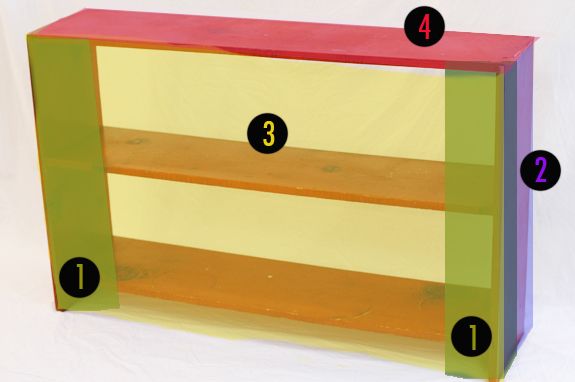
Components are as follows, in order of appearance:

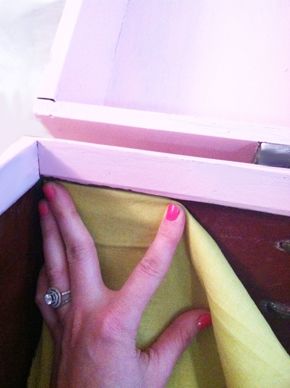
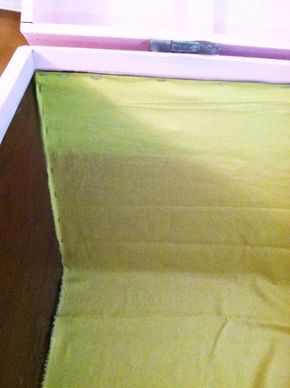
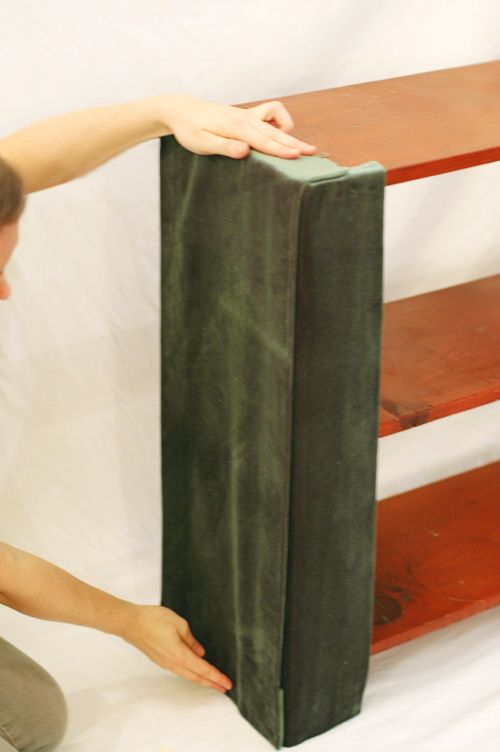
1) Inside flaps (green)
These two flaps will hardly be seen. They are like camisoles for you console. No one wants to see bare corners! Cover them up with some simple flaps. Mine were about 4" wide on the front and another 4" wrapped around to the side. I added 4" more for my two 2" side hems, and 3" to the bottom just to keep things neat and to minimize fraying.

2) Side panels (purple)
There are also two of these panels, made to be the exact depth of your bookshelf sides. You'll want a good 3 or 4" of extra fabric for the top in addition to a 3" bottom hem. Again, don't forget to add 2" for each side hem.

3) Front panel (yellow)
One big flap that covers the top and fronts of your bookshelves. Again, at least 4" of extra fabric after your hem, for the top part where you're stapling.
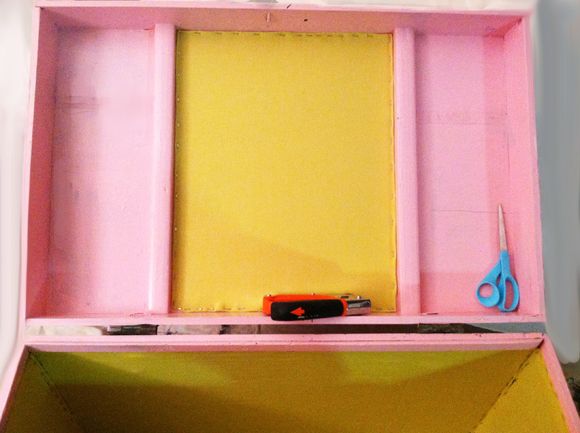
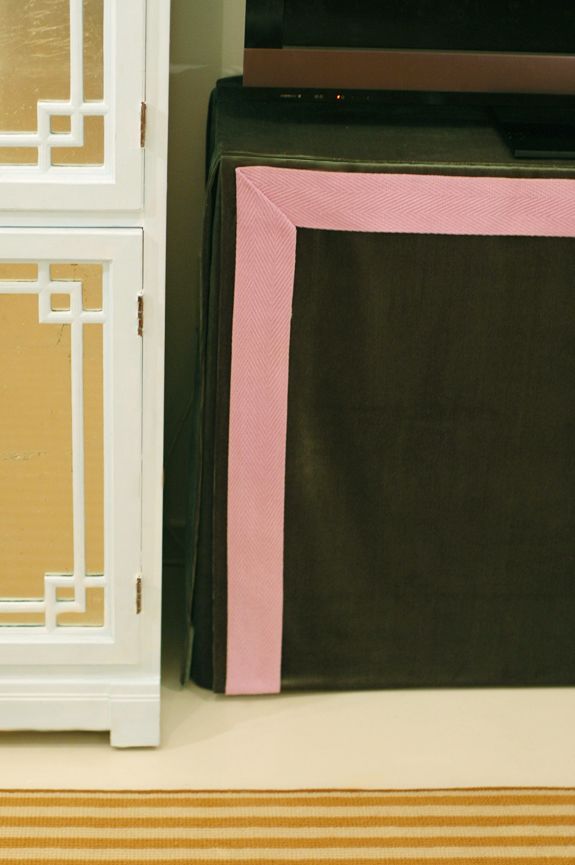
4) Top panel (pink)
Made to fit the top of your bookshelf perfectly. Just add a 2" hem on all sides.


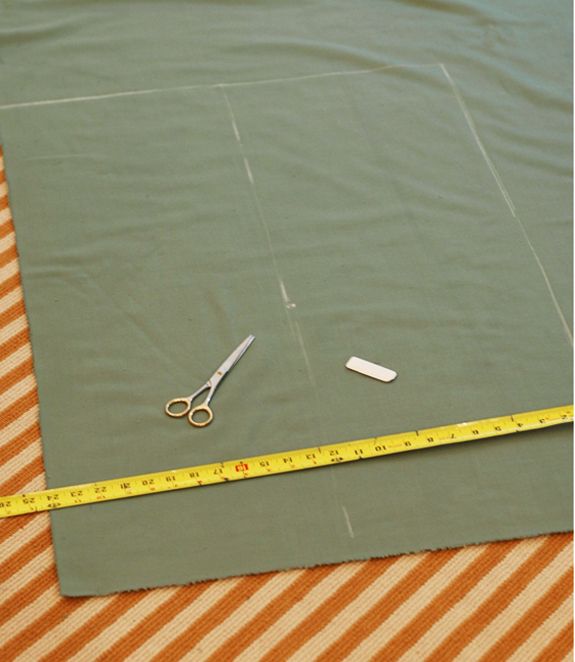
Now that you're all organized and prepped with your measurements, mark out all your pieces with a tape measure and tailor's chalk on the back side of the fabric and cut them out. If you are using velvet like I did, make sure not to mess with the orientation of the pieces. You want the piles of each piece to lay in the same direction or else the sheen and color appearance will be totally off. (This applies to other velvet upholstery projects as well! Be careful with the pile directions!)


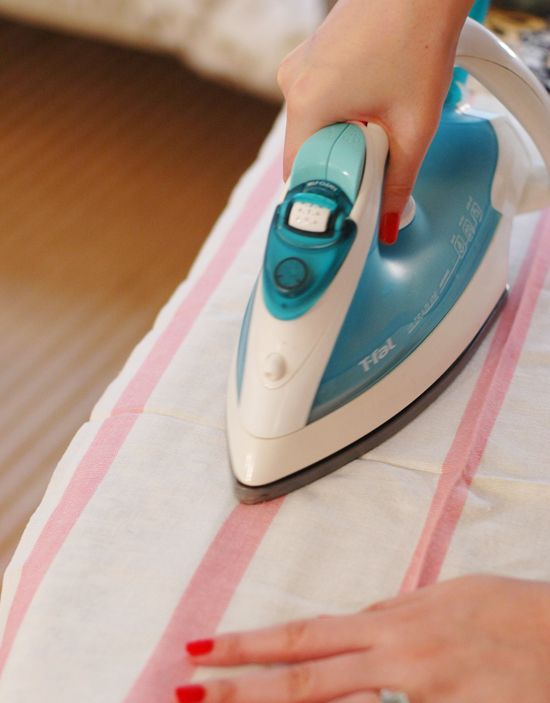
STEP 2 - PRESSING and GLUEING
My mom always says the most important part of any sewing or soft goods project is the pressing. It's so true!! For velvet, you don't want to iron directly on the pile. I used a tea towel as a protective barrier and that worked fine to give me a strong crease for all my hems. Again, I did about 2" on all sides and 3" along the bottom. I used my tailor's chalk markings and a ruler to keep my hems even.


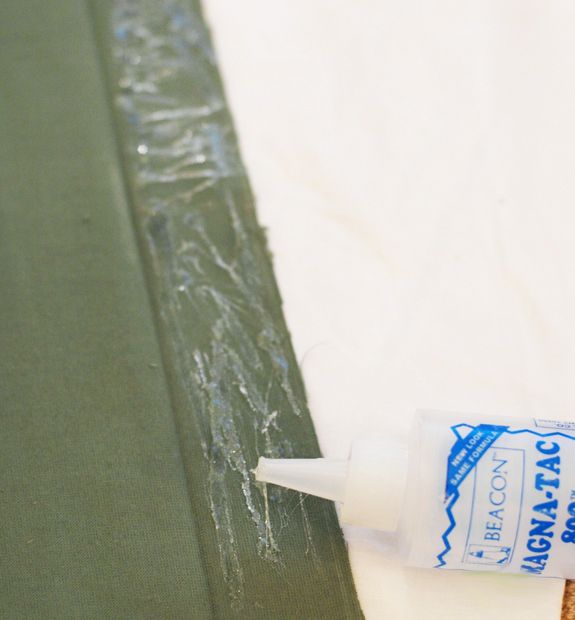
Then simply put down an even coat of fabric glue on the hem flap. By keeping the glue application to just the flap you're reducing the chances of leaking. I glued the sides first and the bottom hem last.


This is getting a little nit-picky, but try not to let the side flaps poke out of bottom hem sides. You might have to overcompensate and pull in those side flaps a little more before glueing the bottom hem.


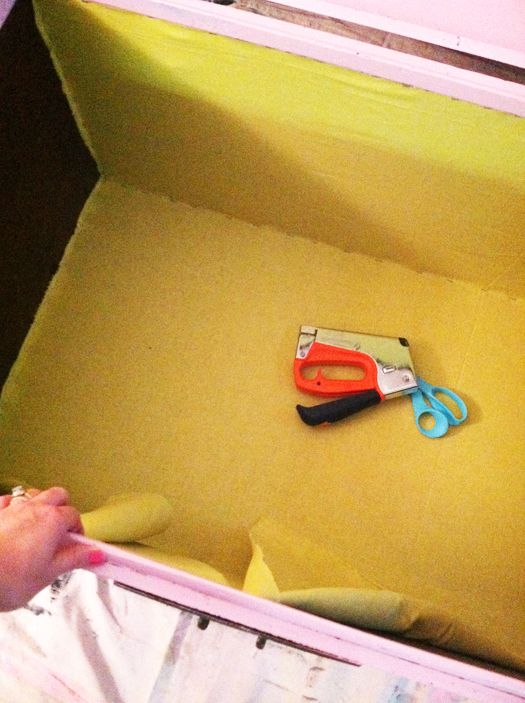
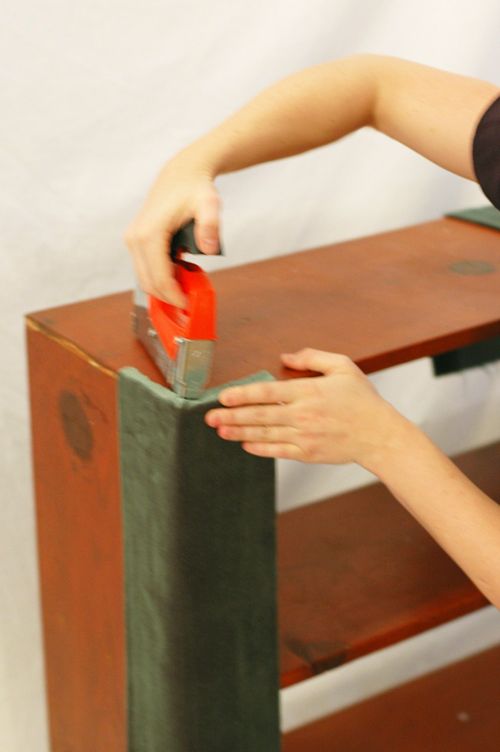
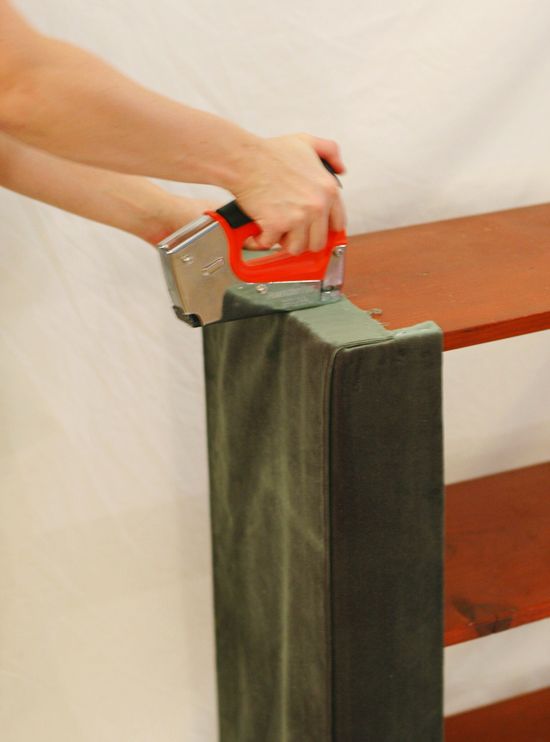
STEP 3 - HANGING and STAPLING
Once all your pieces have been ironed and glued, it's time to assemble! Go in order of the chart above. First are the inside flaps. So, the real trick of a no-sew skirted table is to focus on the break of the hem, not so much on the top part yet. It doesn't matter how much fabric is on top or if it's crooked or whatever, just move the panel vertically until it perfectly and evenly hits the ground. I probably like it best with a 1/4" break. Nothing is worse than too-short curtains or console skirts!


After finding the right length, just put in a staple every two inches or so to keep the fabric in place without sagging. I couldn't be happier with my Powershot Pro staple gun (used with Powershot Staples - it makes a serious difference!).


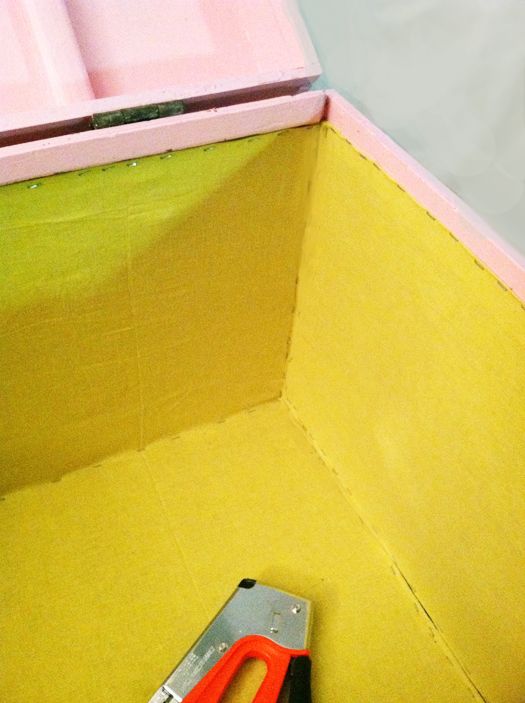
After hanging the inside flaps, do the side flaps next, and then the front piece.


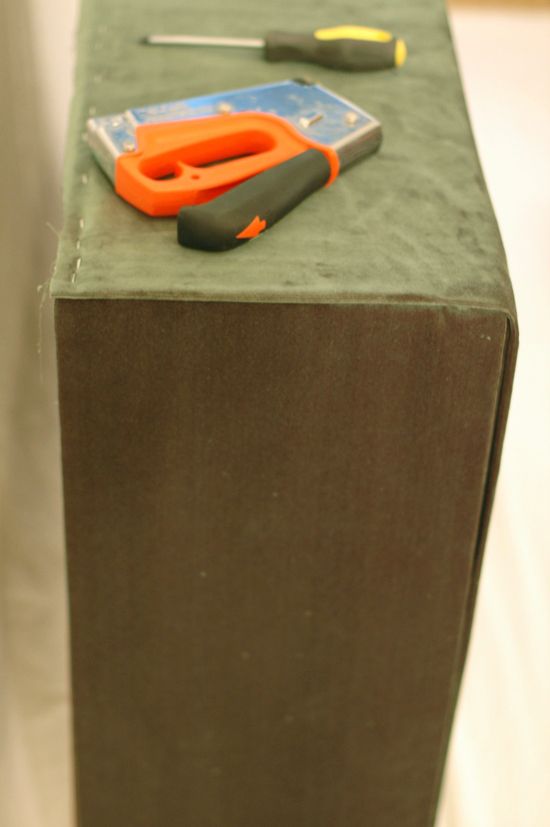
Because velvet was so thick, I didn't want too many edges on the top. So I took the top piece all the way to the back. This really helped to keep the top surface flat and even out all those edges from the other pieces.


I could have stopped with this step and have the front piece be the top piece too, but I really wanted this to look like a sewn skirt, with seams.


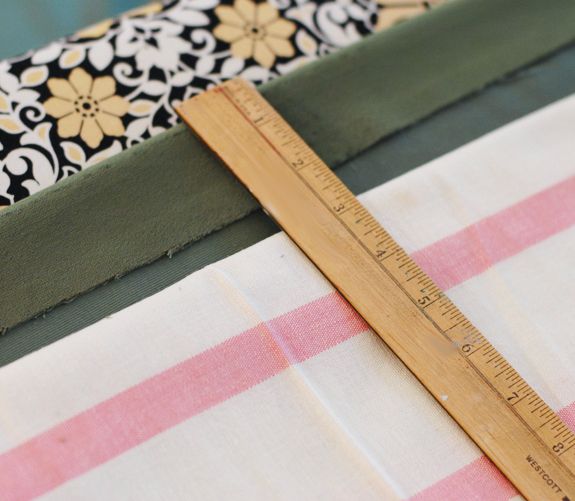
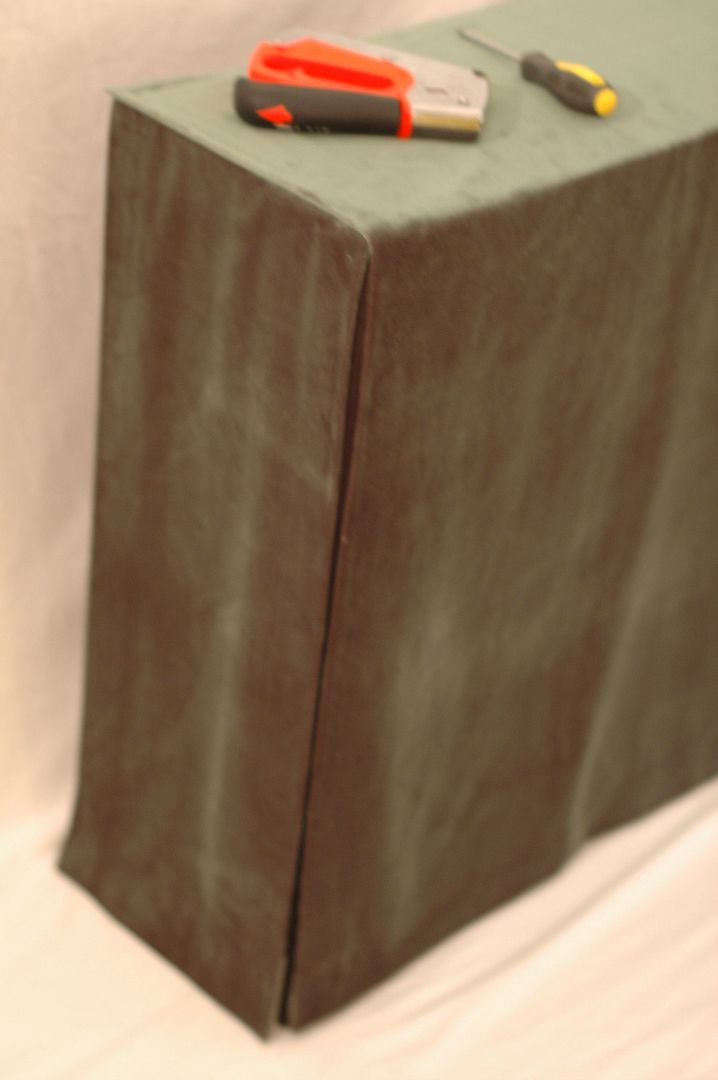
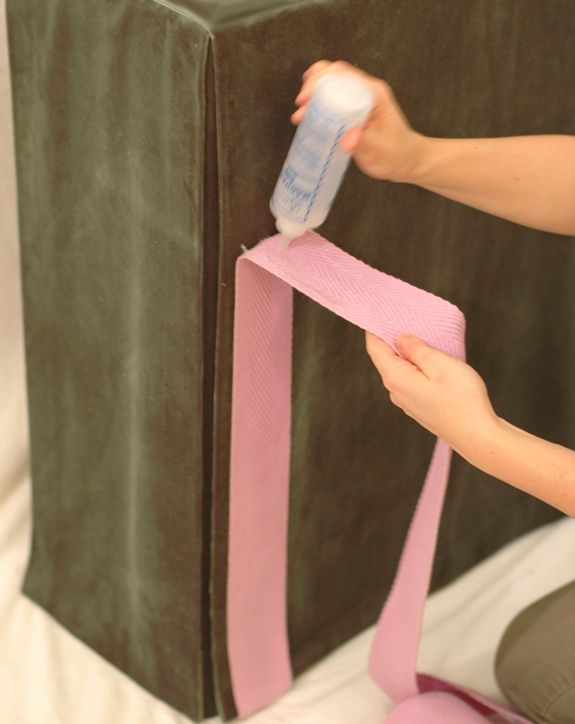
Before putting on the top though, I glued on the trim. My assistant Colleen and I went back and forth on whether to do a full boxed border, but the trim is so thick we decided to go with the upside-down U, and I really like it.

Remember to always inset your glue line about 1/4" from the edge, otherwise the glue will leak out from underneath when you press the trim into place.


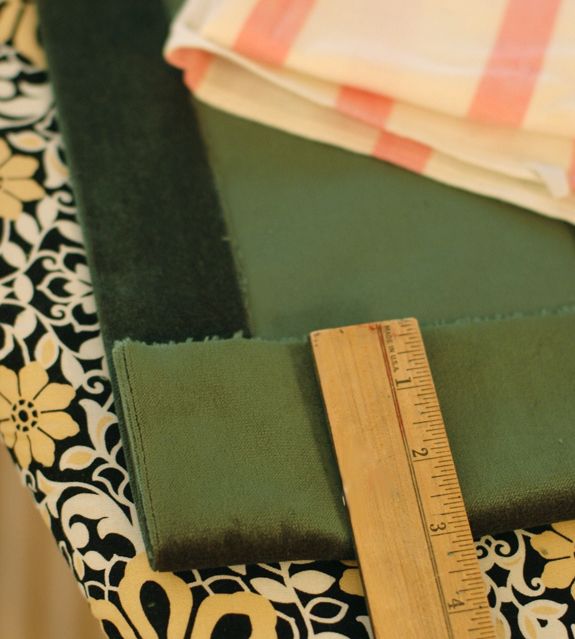
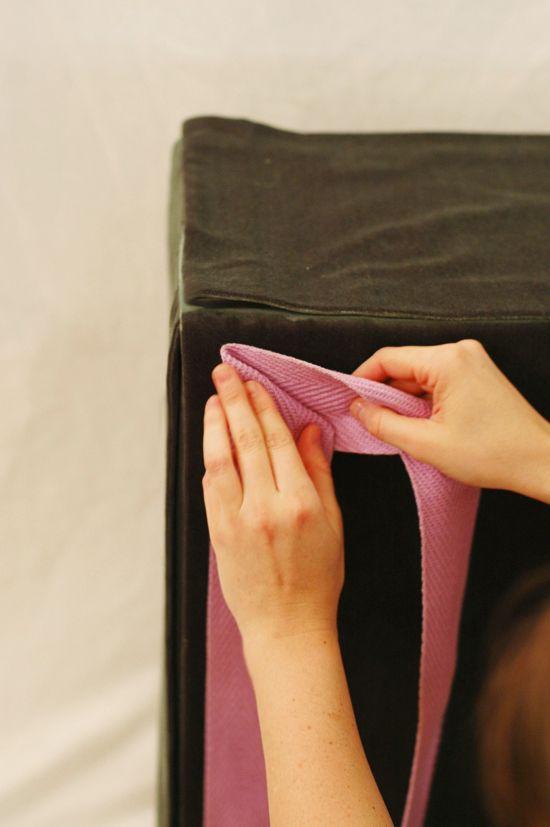
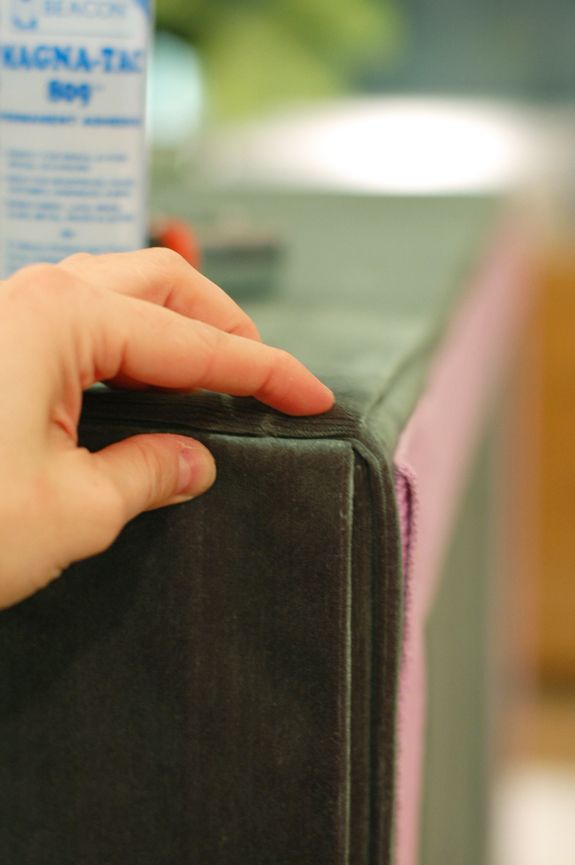
I don't like to cut trim for mitered corners. It never looks right to me. The trick to folding a mitered corner is to keep all your fold angles at 90 degrees and 45 degrees.


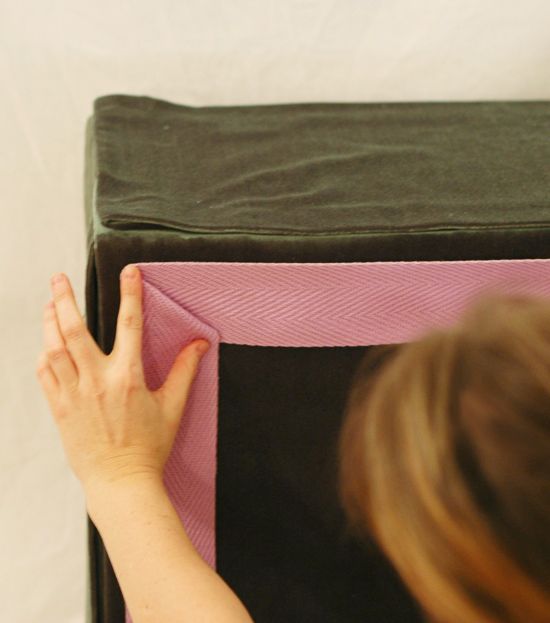
You have to play with it for a minute to get the trim to lay right, then glue in all the folds and really crease and press the folds into place.


Then finish off your trim with a little turned under hem.


The last step is securing the top piece, so don't put away the glue just yet. Glue evenly and press down hard to make everything lay flat.


You can see in the photos above and below how the inside flaps cover the corners.


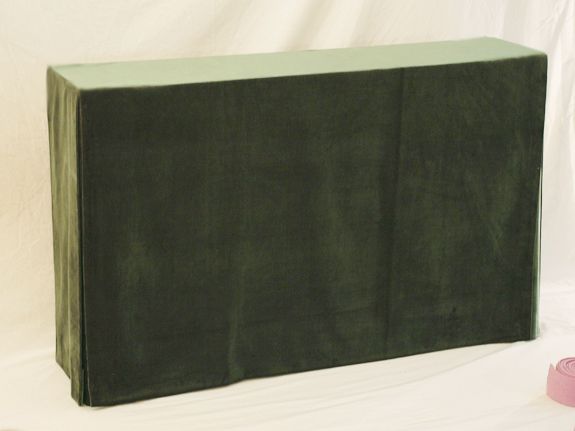
All done and nary a needle or Singer in sight!


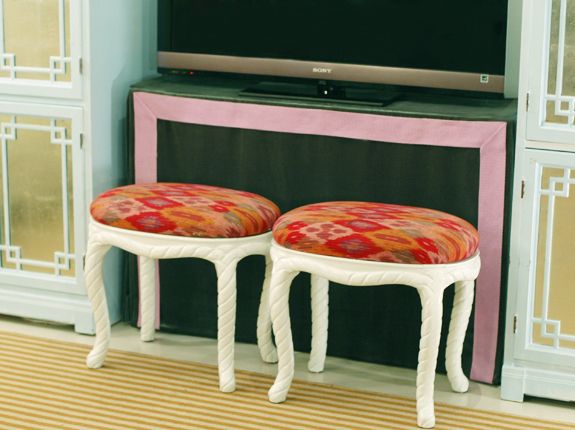
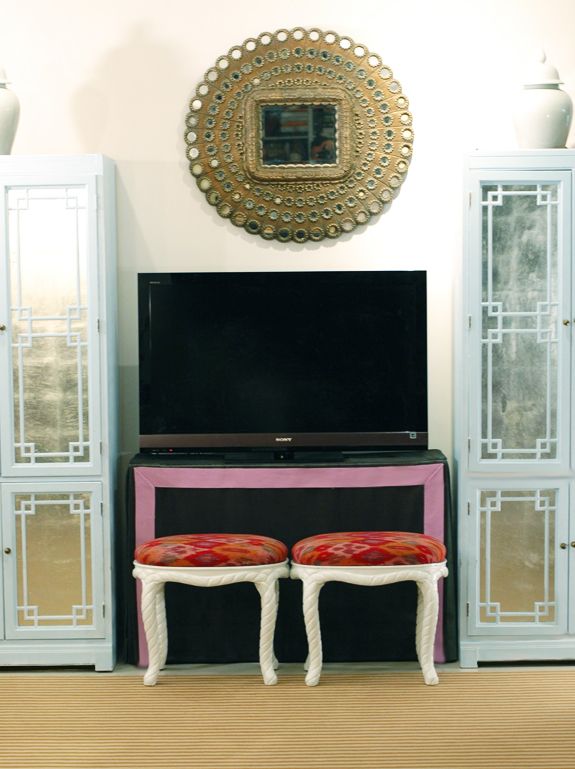
We have all our cable and video components under the skirt. The remote works with a little sensor thing we got off Amazon.


Everything's still easily accessible, but completely hidden. I love, love, love skirted consoles for any house, but especially for small homes or apartments where every piece of furniture really has to count. You can pack a lot of stuff under there!

As a side note, I know some decorators really hate a glass top on skirted consoles, but I'm thinking it's a necessity here. Between the dust and the sticky little fingers, I'm pretty sure I'm going to want a protective surface on top of that velvet!